AcuRite 5-in-1 Sensor Wind Cups Replacement Guide
Step-by-step instructions for replacing the wind cups on your AcuRite 5-in-1 sensor. Learn how to safely remove old cups, lubricate the spindle, and install the new assembly.
Table of contents
Manual images
Click an image to enlargeQuick guide from the manual
This guide outlines the procedure for replacing the wind cups on your AcuRite 5-in-1 sensor. Proper installation ensures accurate wind speed measurement and smooth operation of the anemometer.
Replacing the wind cups
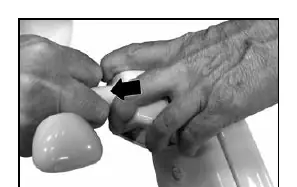
- Remove old cups: Secure your fingers between the wind cups. Pull the base of the wind cup assembly away from the sensor while holding the sensor steady with your other hand.
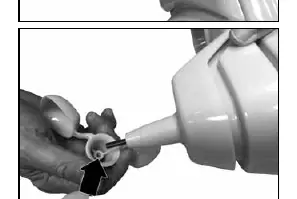
- Align new cups: Line up the mounting hole on the replacement wind cups with the spindle on the sensor.
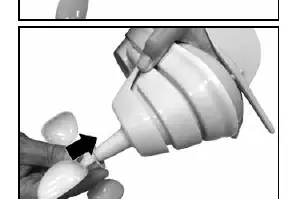
- Attach: Insert the spindle into the wind cups and apply pressure to ensure they are properly secured on the sensor.
Tips and maintenance
- Lubrication: Place one drop of light machine oil or spray lubricant on the spindle to ensure the anemometer spins freely.
- Safety: Be careful when handling old wind cups, as broken edges may be sharp.
- Technique: Hold the sensor close to your body while pulling to maximize your pulling strength.
Customer support
For assistance, contact AcuRite customer support at (877) 221-1252 or visit www.AcuRite.com.
Official resources from the manual
Manufacturer information
AcuRite
Practical help
Common problems
Wind cups not spinning freely
Apply a drop of light machine oil or spray lubricant to the spindle.
Before use
- Ensure you have the correct replacement wind cup assembly
- Have light machine oil or spray lubricant ready
- Ensure the sensor is held securely during removal

Manual page author
Michael Turner
Technical manual editor
Reviews PDF manuals for structure, safety notes, and practical product details so readers can find the right information quickly.