Electronics / Camera Modules
User Manual for Arducam 12MP IMX477 Camera Module
Quick guide for the Arducam 12MP IMX477 Camera Module. Learn how to connect the hardware, configure Raspberry Pi OS settings, and capture images using libcamera.
Table of contents
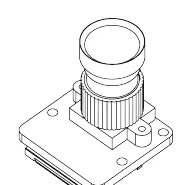
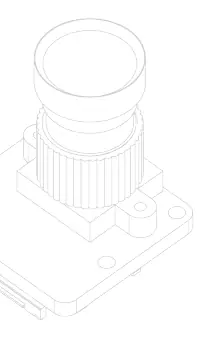
Manual images
Click an image to enlargeQuick guide from the manual
This camera module is designed for Raspberry Pi and requires the latest Raspberry Pi OS (Bullseye, released Jan 28th, 2022 or later). It is compatible with Raspberry Pi 1, 2, 3, 4, Zero, and Zero 2W. The module uses the libcamera framework for operation.
Hardware Installation
- Insert the connector into the Raspberry Pi MIPI port. Ensure it is facing the correct direction.
- Do not bend the flex cable and ensure it is firmly inserted.
- Push the plastic connector down while holding the flex cable until the connector is back in place.
Software Configuration
For Raspbian Bullseye users:
- Open a terminal and edit the configuration file: sudo nano /boot/config.txt
- Find the line: camera_auto_detect=1 and update it to: camera_auto_detect=0
- Add the line: dtoverlay=imx477
- Save the file and reboot your Raspberry Pi.
For Bullseye users on Pi 0-3, perform the following additional steps:
- Open a terminal.
- Run: sudo raspi-config
- Navigate to Advanced Options.
- Enable Glamor graphic acceleration.
- Reboot your Pi.
Operating the Camera
The module uses the libcamera-still command line tool.
- To capture an image with a 5-second preview: libcamera-still -t 5000 -o test.jpg
- To view a live preview only: libcamera-still -t 0
The captured image will be stored in your home folder as test.jpg.
Technical Specifications
- Sensor: Sony IMX477
- Resolution: 12.3 Megapixels (4056 x 3040 pixels)
- Video Modes: 1080p30, 720p60, 640x480p60/90
- Interface: 2-lane MIPI CSI-2
- Mount: M12 Mount
- Dimensions: 25x24x23mm
Contact
For further support, email [email protected] or visit the Arducam forum at https://www.arducam.com/forums/
Official resources from the manual
Manufacturer information
ARDUCAM TECHNOLOGY CO., LIMITED
Practical help
Common problems
Camera not detected or not working
Ensure you are using Raspberry Pi OS Bullseye (Jan 2022 or later). Legacy OS is not supported.
Configuration changes not taking effect
Ensure you have rebooted the Raspberry Pi after editing /boot/config.txt.
Poor performance on Pi 0-3
Ensure Glamor graphic acceleration is enabled via sudo raspi-config.
Before use
- Verify Raspberry Pi OS is updated to Bullseye (Jan 28th 2022 or later).
- Ensure the flex cable is firmly inserted into the MIPI port.
- Check that the connector is facing the correct direction.
- Confirm the camera is compatible with your specific Raspberry Pi model.
Specs in practice
- Still resolution
- 12.3 Megapixels
Images and diagrams
- The connector must be pushed down while holding the flex cable to ensure a secure connection.
Model compatibility
- Compatible with Raspberry Pi 1, 2, 3, 4, Zero, and Zero 2W.
- Requires libcamera apps; not compatible with previous Raspberry Pi OS (Legacy) users.

Manual page author
Emily Carter
User documentation editor
Prepares concise manual descriptions and highlights the most useful setup, operation, and maintenance information for readers.