ASRock Graphics Card Support Bracket Installation Guide
Quick installation guide for the ASRock Graphics Card Support Bracket. Learn how to assemble, adjust, and install the support stand to prevent GPU sag.
Quick answers from the manual
Quick answer
- The ASRock Graphics Card Support Bracket is installed by extending the bracket to the correct height, placing it under the graphics card, and locking it in place to prevent sagging. p. 1
Key actions
- Adjusting bracket height p. 1
- Positioning under GPU p. 1
Where to find it in the PDF
- Installation Guide p. 1
Manual images
Click an image to enlargeQuick installation guide
This guide provides instructions for installing the ASRock Graphics Card Support Bracket, designed to support heavy graphics cards and prevent sagging.
Installation steps
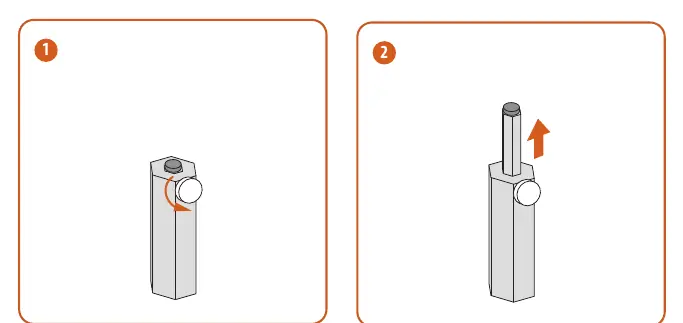
- Unlock: Rotate the top section of the support bracket to unlock it.
- Extend: Extend the bracket to the required height.
- Install GPU: Install your graphics card into the PC case as per the card's instructions.
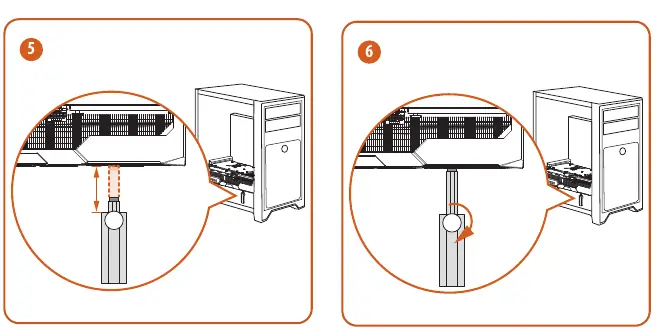
- Position: Place the base of the support bracket inside the PC case, directly beneath the graphics card.
- Adjust: Adjust the height of the bracket so it makes contact with the bottom of the graphics card.
- Lock: Rotate the top section of the bracket to lock it in place, ensuring the card is supported.
Practical help
Common problems
Graphics card sagging
Install the support bracket to provide structural support.
Bracket height incorrect
Rotate the top section to unlock, adjust the height, and lock it again.
Before use
- Ensure the PC case has enough space for the bracket.
- Install the graphics card first.
- Verify the bracket is positioned directly under the GPU.

Manual page author
Michael Turner
Technical manual editor
Reviews PDF manuals for structure, safety notes, and practical product details so readers can find the right information quickly.