Installation Guide for Astro Minima Round Downlight
Quick installation guide for the Astro Minima Round recessed downlight. Includes step-by-step wiring instructions, hole size requirements, and essential safety warnings regarding thermal insulation and flammable materials.
Quick answers from the manual
Quick answer
- The Astro Minima Round is a recessed downlight requiring a 76mm hole. It must not be covered by thermal insulation or installed in flammable materials like wood. p. 1, 2
Key actions
- Turn off power before starting installation. p. 2
- Cut a 76mm (3 inch) hole in the ceiling. p. 2
- Connect wires: Live (Brown/Red), Neutral (Blue/Black), Earth (Green/Yellow). p. 1, 2
Technical specifications
| Parameter | Value | Meaning | Pages |
|---|---|---|---|
| Hole Cutout | 76mm / 3in | Required diameter for ceiling installation. | p. 2 |
| Minimum Clearance | 150mm | Required distance from insulation and surrounding materials. | p. 2 |
Show 1 more answers Show less
Where to find it in the PDF
- Safety and Wiring Overview p. 1
- Installation Steps p. 2
Table of contents
Manual images
Click an image to enlargeQuick Guide from the Manual
This document provides installation instructions for the Astro Minima Round recessed downlight. Before beginning, ensure the power is turned off. The installation requires a 76mm (3 inch) hole in the ceiling. Please note critical safety restrictions regarding thermal insulation and flammable materials.
Installation Steps
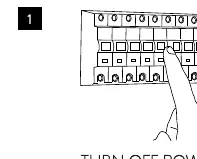
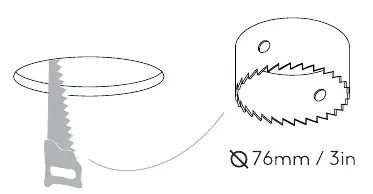
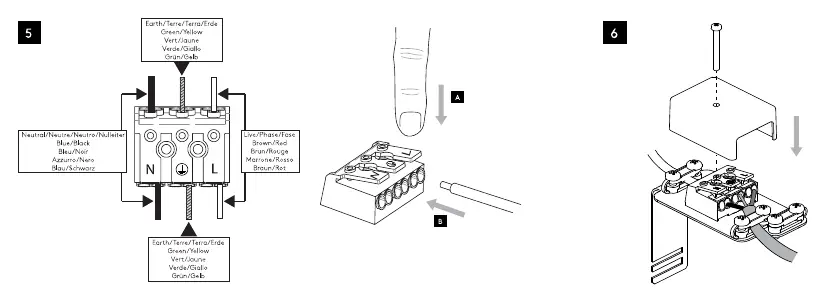
- Turn off power: Always isolate the electrical supply before starting any installation work.
- Prepare the ceiling: Cut a hole with a diameter of 76mm (3 inches) in the ceiling.
- Prepare wiring: Open the terminal block housing.
- Connect wires: Connect the supply wires to the terminal block as follows:
- Live: Brown or Red
- Neutral: Blue or Black
- Earth: Green or Yellow
- Finalize installation: Secure the unit into the ceiling. Ensure the terminal block housing is properly closed and secured.
Safety Precautions
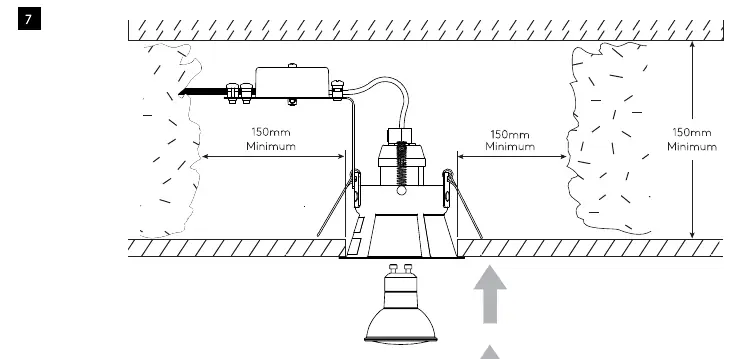
- Thermal Insulation: This product is not suitable for covering with thermal insulation.
- Flammable Materials: Do not mount this product in flammable materials, such as wood.
- Clearance: Maintain a minimum clearance of 150mm from insulation and surrounding materials to ensure proper operation and safety.
Manufacturer information
Astro Pneumatic
Practical help
Common problems
Ensure the unit is not covered by thermal insulation and is not installed in flammable materials like wood.
Verify connections: Live (Brown/Red), Neutral (Blue/Black), Earth (Green/Yellow).
Before use
- Turn off the main power supply.
- Verify the ceiling hole diameter is exactly 76mm (3 inches).
- Ensure the installation surface is not flammable (e.g., wood).
- Confirm there is at least 150mm of clearance around the unit.

Manual page author
Michael Turner
Technical manual editor