User Manual for Cameo SUPERFLY FX 2-in-1 LED Derby & Laser Effect
Quick guide for the Cameo SUPERFLY FX 2-in-1 LED Derby & Laser Effect. Learn about setup, DMX control, operating modes, safety precautions, and maintenance.
Quick answers from the manual
Quick answer
- The Cameo SUPERFLY FX is a 2-in-1 LED Derby and Laser effect light. It can be controlled via DMX (2 or 8 channels), IR remote, sound, or standalone programs. p. 13, 14
Key actions
- Activate DMX control p. 21
- Clean fan filter p. 16
First start
- Connect to power p. 21
Problems and fixes
Check key switch position (ON), check interlock/remote connector, ensure DMX mode is not overriding.
p. 19Maintenance and reset
- Reset to factory settings p. 21
Technical specifications
| Parameter | Value | Meaning | Pages |
|---|---|---|---|
| Power Consumption | 25 W | Power usage | p. 42 |
Where to find it in the PDF
- Safety Measures p. 2, 3, 4, 5
- Introduction & Features p. 13, 14
- Connections & Controls p. 15, 16, 17, 18
- Operation p. 21, 22, 23, 24
- IR Remote Control p. 30, 31, 32, 33
- DMX Control p. 34, 35, 36, 37
- Specifications p. 42, 43, 44, 45
Table of contents
Manual images
Click an image to enlargeQuick guide from the manual
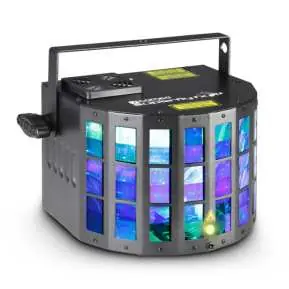
The Cameo SUPERFLY FX is a professional 2-in-1 effects spotlight combining a Derby effect and a laser effect. It supports DMX-512 control, Master/Slave operation, IR remote control, standalone programs, and music control via a built-in microphone.
Safety Information
- Laser Safety: This device contains a Class 3R laser. Never look directly into the laser beam. Use the key switch to enable/disable the laser effect and remove the key to prevent unauthorized use.
- Electrical Safety: Ensure the mains voltage matches the device specifications (100-240V AC). Always connect to a grounded outlet.
- Installation: Ensure the device is installed securely and cannot fall. Keep a distance of at least 0.5m from combustible materials.
Device Description
The device features a 4-digit LED display for menu navigation, a microphone for sound control, and a sensitivity knob. The rear panel includes DMX IN/OUT (3-pin XLR), Power IN/OUT, a key switch for the laser, and a remote connector for an optional emergency stop switch.
Installation and Mounting
The spotlight can be placed on the floor using its integrated rubber feet or mounted on a truss using the supplied mounting bracket. For overhead installation, always secure the device with an appropriate safety cable attached to the safety eyelet.

Operating Modes
- DMX Control: Supports 2-channel and 8-channel modes. Use the MODE button to select 'dMX' and ENTER to configure the start address and mode.
- Slave Mode: Connect the Master and Slave units using a DMX cable (Master DMX OUT to Slave DMX IN). Select 'SLA' on the Slave unit.
- Automatic Mode: Select 'Aut' to run one of the 3 built-in auto programs. Speed can be adjusted from S 01 to S 99.
- Music Control: Select 'Sou' to activate sound-controlled programs. Adjust sensitivity using the knob on the device.
- Color Mixing Mode: Select 'CoL' to adjust brightness for individual Red, Green, Blue, and White LEDs and activate the strobe effect.
Maintenance
The housing fan is located on the top of the projector. To prevent overheating, ensure the fan is not covered. The foam filter must be cleaned regularly: disconnect from power, pry open the fan cover, remove the filter, clean with mild soapy water, dry, and replace.
Technical Specifications
- Operating Voltage: 100 - 240 V AC, 50 - 60 Hz
- Power Consumption: 25 W
- Dimensions: 220 x 140 x 169 mm
- Weight: 1.74 kg
Practical help
Common problems
Ensure the key switch is in the ON position and the remote connector (or short-circuit plug) is properly installed.
Ensure the fan is not covered and clean the foam filter regularly.
Check that the DMX mode is correctly set and the DMX signal is present (DMX LED should be active).
Before use
- Check mains voltage (100-240V AC)
- Ensure stable mounting
- Verify laser key switch is in ON position
- Check DMX cables if using DMX control
- Ensure fan is unobstructed
Specs in practice
- DMX Channels
- 2-channel or 8-channel modes for control
- Power Consumption
- 25 W
Images and diagrams
- Front panel: Lens, IR sensor, Mic, Sensitivity knob
- Rear panel: DMX IN/OUT, Power IN/OUT, Key switch, Remote connector
Model compatibility
- Requires DMX-512 compatible controller
- Compatible with Adam Hall 3 STAR, 4 STAR, and 5 STAR cables

Manual page author
Emily Carter
User documentation editor
Prepares concise manual descriptions and highlights the most useful setup, operation, and maintenance information for readers.