General / Other Manuals
Casaria 190L Garden Outdoor Storage Box Assembly Instructions
Quick assembly guide for the Casaria 190L Garden Outdoor Storage Box. Includes step-by-step installation instructions, parts list, and safety guidelines for proper setup.
Table of contents
Quick guide from the manual
This document provides assembly instructions for the Casaria 190L Garden Outdoor Storage Box. Ensure all parts are present before beginning assembly. The product is designed for outdoor use, but please follow the safety guidelines to ensure longevity and user safety.
Parts list
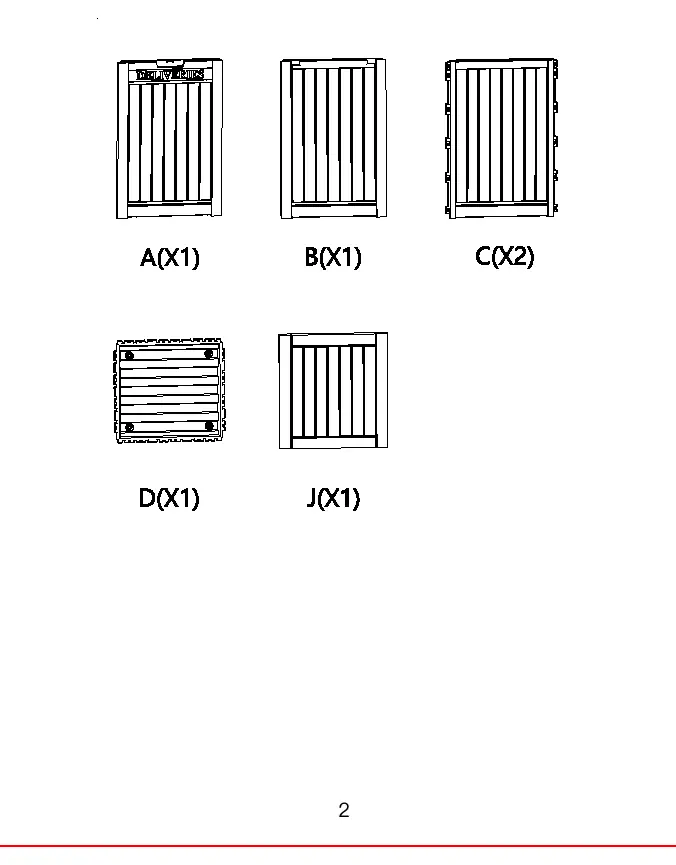
- A (x1): Side panel
- B (x1): Side panel
- C (x2): Side panels
- D (x1): Base panel
- J (x1): Lid
Assembly instructions
- Base and Side Panels: Align the base panel (D) with the two side panels (C). Press firmly until you hear a click to secure the connection.
- Remaining Sides: Attach the side panels (A) and (B) to the existing structure. Ensure all locking mechanisms click into place.
- Lid Installation: Attach the lid (J) to the assembled box structure by aligning the hinges with the corresponding slots on the back panel (B).
Care and safety
- Assemble the product on a flat, clean, and soft surface to prevent damage.
- Some parts may have sharp edges; wear protective gloves during assembly if necessary.
- Do not stand on the lid of the storage box.
- In case of fire, do not attempt to extinguish burning polypropylene with water.
- Wear safety goggles if using power tools during installation.
Practical help
Common problems
Parts not clicking into place
Ensure the panels are aligned correctly on a flat surface and apply firm, even pressure until the locking mechanism engages.
Missing parts
Verify all parts against the parts list before starting. If parts are missing, contact customer service.
Before use
- Check that all parts (A, B, C, D, J) are present.
- Clear a flat, clean, and soft area for assembly.
- Wear protective gloves to handle potential sharp edges.
- Have safety goggles ready if using power tools.
Specs in practice
- 190L Capacity
- The internal volume of the storage box designed for garden items.
Images and diagrams
- The diagrams illustrate a 'click-to-lock' assembly system where panels are joined by aligning tabs and slots.
- Step 3 specifically highlights the hinge alignment for the lid (J) onto the back panel (B).

Manual page author
Emily Carter
User documentation editor
Prepares concise manual descriptions and highlights the most useful setup, operation, and maintenance information for readers.