Assembly Instructions for Costway 3x6M Carport
Quick assembly guide for the Costway 3x6M heavy-duty carport. Includes parts list, structural diagram, and setup steps for your outdoor canopy.
Table of contents
Quick guide from the manual
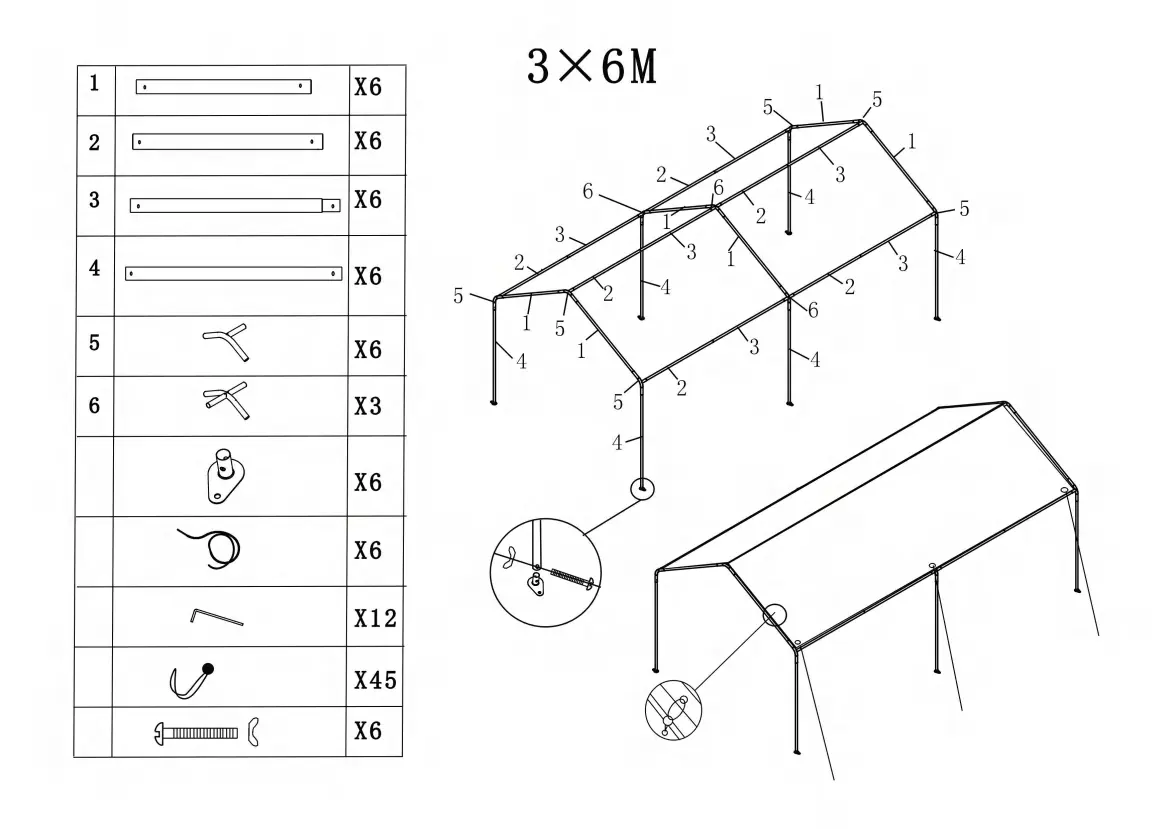
This document provides the structural assembly diagram and parts list for the Costway 3x6M carport. Use this guide to identify components and understand the frame connection points before beginning assembly.
Parts List
Before starting, verify that all components are present. The kit includes:
- Poles 1-4: Structural frame components.
- Connectors 5-6: Joint pieces for the frame.
- Hardware: Bolts, stakes, and clips for securing the structure.
Assembly Instructions
The assembly follows a modular frame design:
- Lay out all parts according to the diagram to ensure correct orientation.
- Connect the roof frame using the numbered poles and connectors (1, 2, 3, 5, 6).
- Attach the vertical support legs (4) to the roof frame.
- Secure all joints using the provided bolts and clips.
- Anchor the structure to the ground using the included stakes.
Manufacturer information
Costway
Practical help
Common problems
Ensure all bolts are tightened and ground stakes are fully inserted into the ground.
Verify all 6 sets of poles and connectors against the parts list before starting assembly.
Before use
- Clear a flat, level area for assembly.
- Check all parts against the included list (poles 1-6, connectors, bolts, stakes).
- Ensure you have a ladder or assistance for the roof assembly.
- Verify all hardware is accounted for before beginning.

Manual page author
Michael Turner
Technical manual editor
Reviews PDF manuals for structure, safety notes, and practical product details so readers can find the right information quickly.