Installation Guide for Costway 10459WH-CYCB Computer Desk
Quick installation guide for the Costway 10459WH-CYCB computer desk. Includes assembly steps, hardware list, and safety instructions for proper setup.
Table of contents
Manual images
Click an image to enlargeQuick guide from the manual
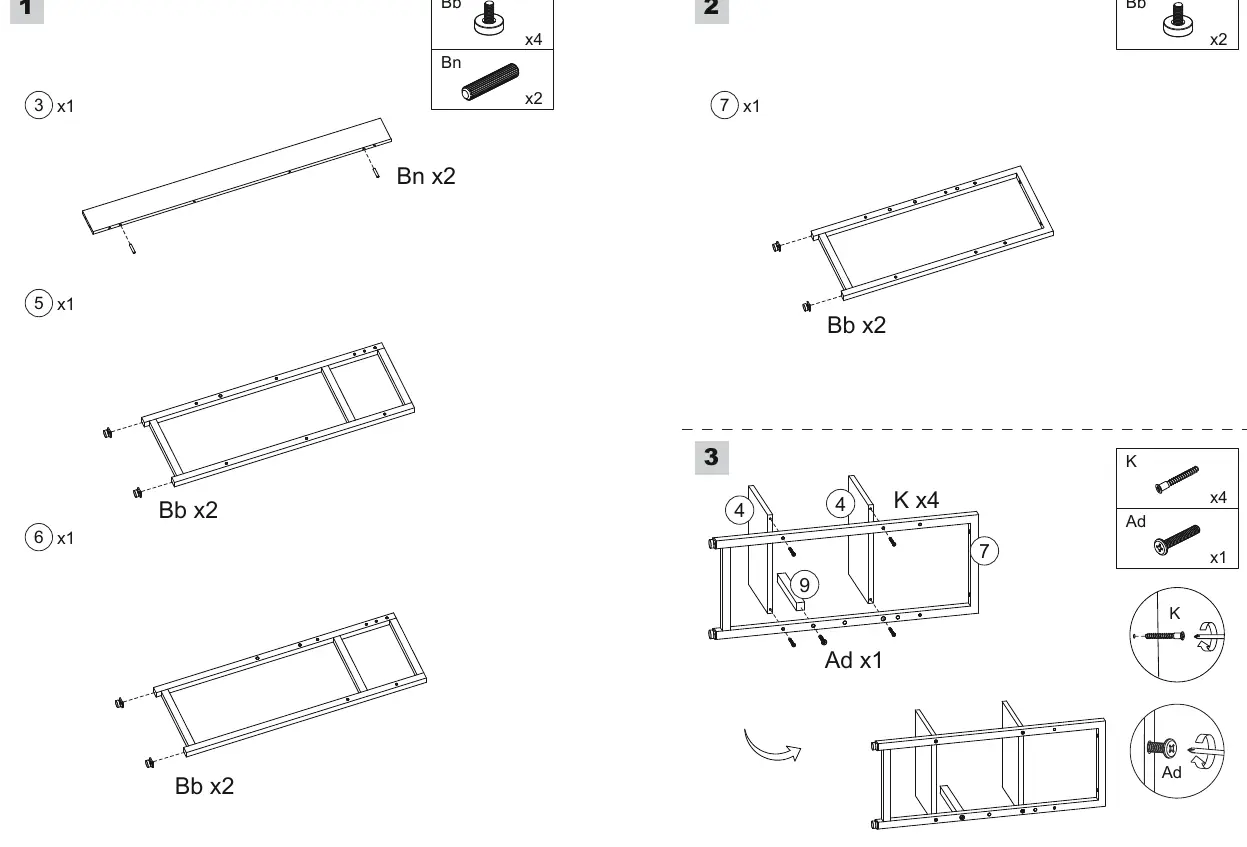
This guide provides instructions for the assembly of the Costway computer desk. Important: Do not tighten the screws during the initial installation. Only tighten them fully after all parts have been installed to ensure proper alignment.
Safety instructions
- Keep all small parts and packaging materials away from babies and children to prevent choking hazards.
- Assemble the product on a flat, steady, and stable surface.
- We recommend assembling the desk near the area where it will be used to avoid moving it unnecessarily once finished.
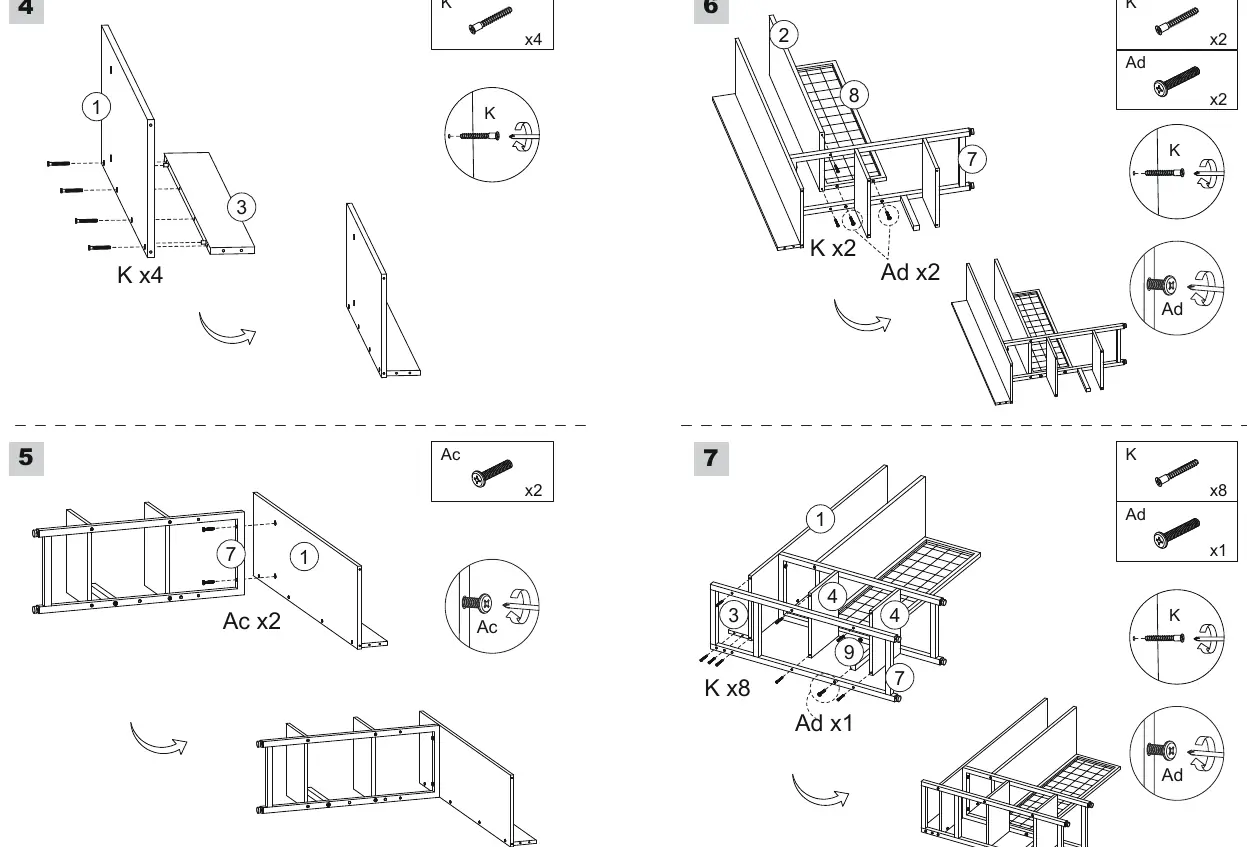
Assembly instructions
Follow the steps in the manual to assemble the frame and shelves. Ensure all parts (1-9) are accounted for before beginning. Use the provided hardware (K, Ac, Ad, Bb, Bn, Bw, Cj) as indicated in the diagrams. Remember to keep screws loose until the final step.
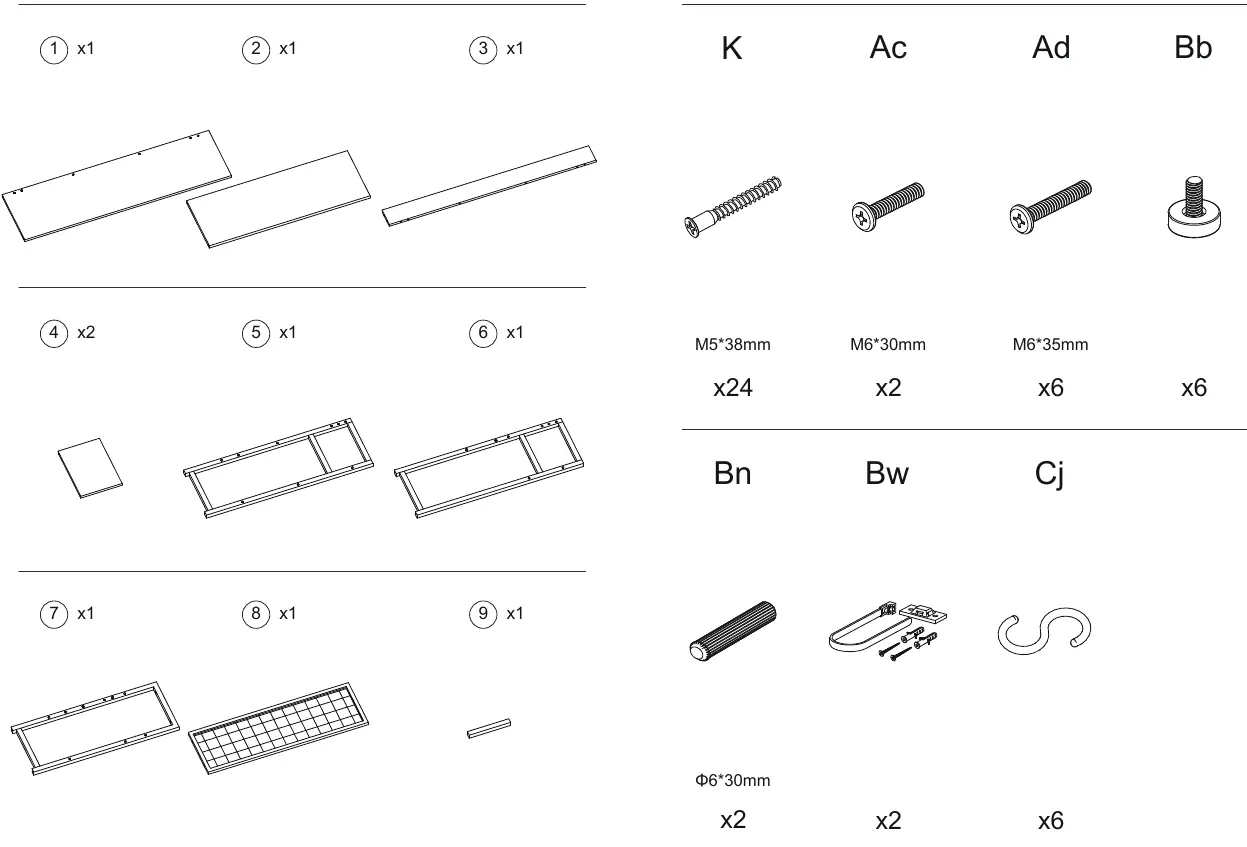
Parts and hardware list
The desk consists of 9 main parts and various hardware components including screws (M5*38mm, M6*30mm, M6*35mm), leveling feet, and wall anchors. Verify all components against the parts list before starting assembly.
Manufacturer information
Costway
Practical help
Common problems
Ensure all screws are fully tightened only after the entire frame has been assembled. If it remains unstable, check that the leveling feet (Bb) are adjusted correctly.
Do not tighten screws during the installation process. Keep them loose to allow for adjustments, then tighten them all once the structure is complete.
Before use
- Clear a workspace on a flat, stable surface.
- Separate and count all parts (1-9) and hardware (K, Ac, Ad, Bb, Bn, Bw, Cj).
- Ensure you have a screwdriver for assembly.
- Do not tighten screws until the entire frame is assembled.

Manual page author
Emily Carter
User documentation editor
Prepares concise manual descriptions and highlights the most useful setup, operation, and maintenance information for readers.