Assembly Manual for Dancover BBQ Gazebo 2.4x1.5x2.3m
Complete assembly guide for the Dancover BBQ Gazebo (2.4x1.5x2.3m). This manual includes a detailed parts list, hardware identification, and a 16-step installation process to help you construct your gazebo.
Quick answers from the manual
Quick answer
- This document is the assembly manual for the Dancover BBQ Gazebo (Model PA20010). It provides a comprehensive parts list and a 16-step installation guide. p. 1, 2
Key actions
- Assemble the base and vertical posts p. 4
- Assemble the roof panels p. 9, 10
Technical specifications
| Parameter | Value | Meaning | Pages |
|---|---|---|---|
| Dimensions | 2.4x1.5x2.3m | Overall size of the gazebo | p. 1 |
Show 1 more answers Show less
Where to find it in the PDF
- Parts List p. 2
- Assembly Steps p. 4, 5, 6, 7
Table of contents
Manual images
Click an image to enlargeQuick guide from the manual
This manual provides assembly instructions for the Dancover BBQ Gazebo (2.4x1.5x2.3m). Before beginning, ensure all parts listed on page 2 are present. The assembly process involves 16 steps, requiring the provided tools and hardware. It is recommended to clear a flat, spacious area for assembly.
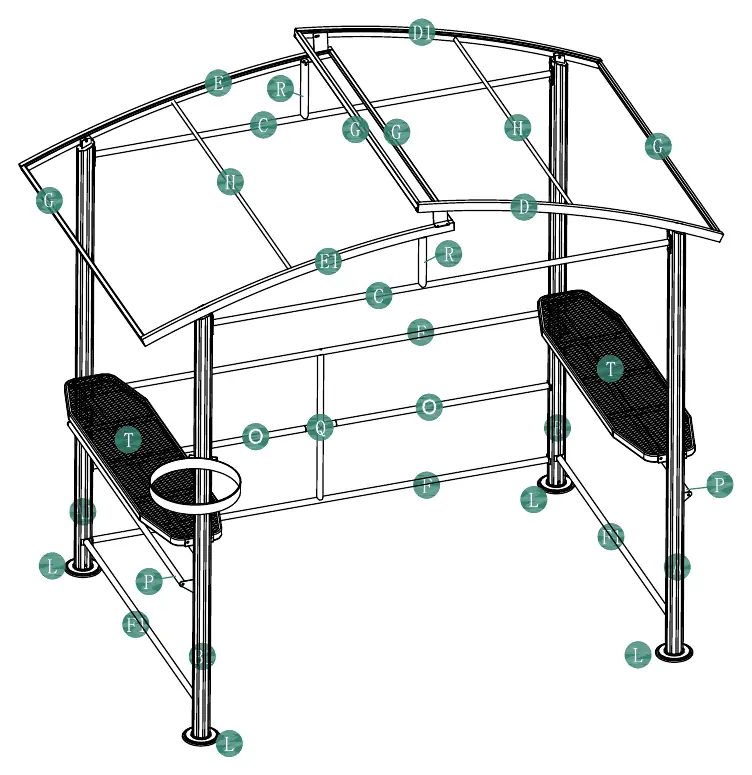
Parts List
The gazebo consists of various frame components (A-U) and hardware (X-Z2). Verify all items against the list on page 2 before starting assembly. Ensure you have the provided tools (Z2) ready.
Assembly Instructions
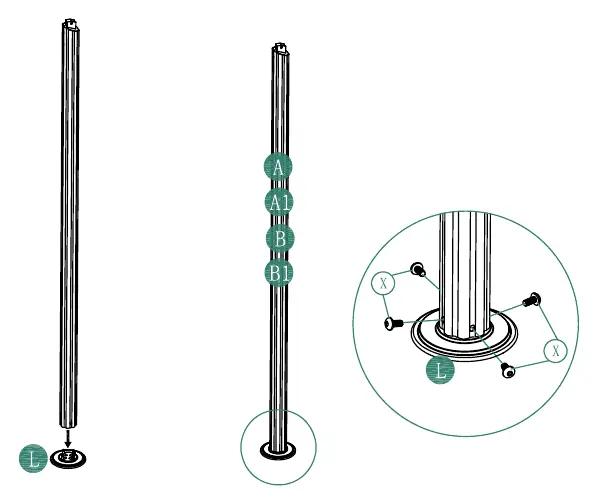
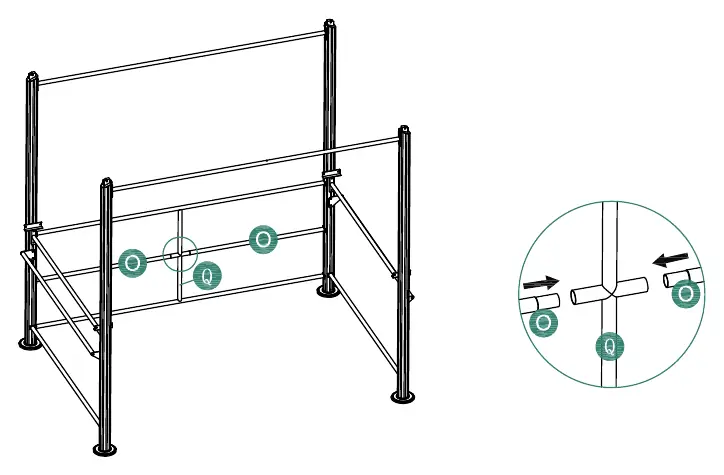
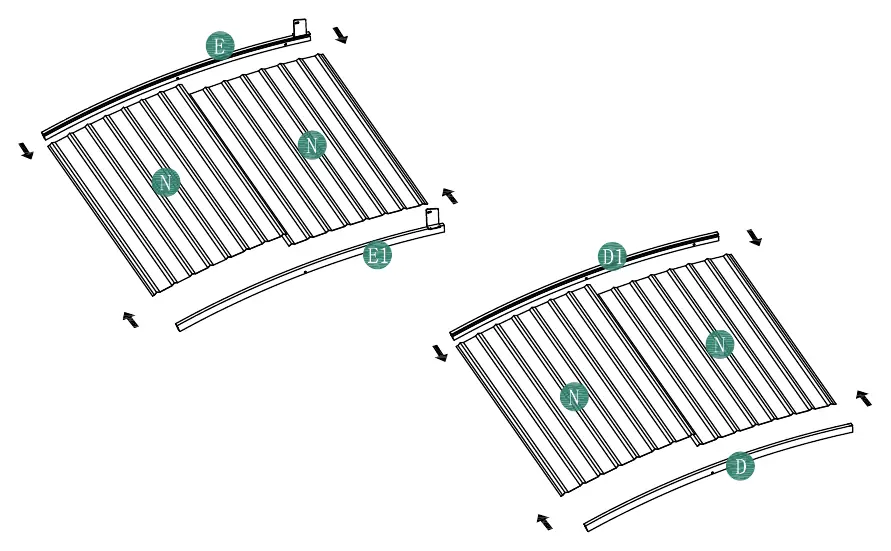
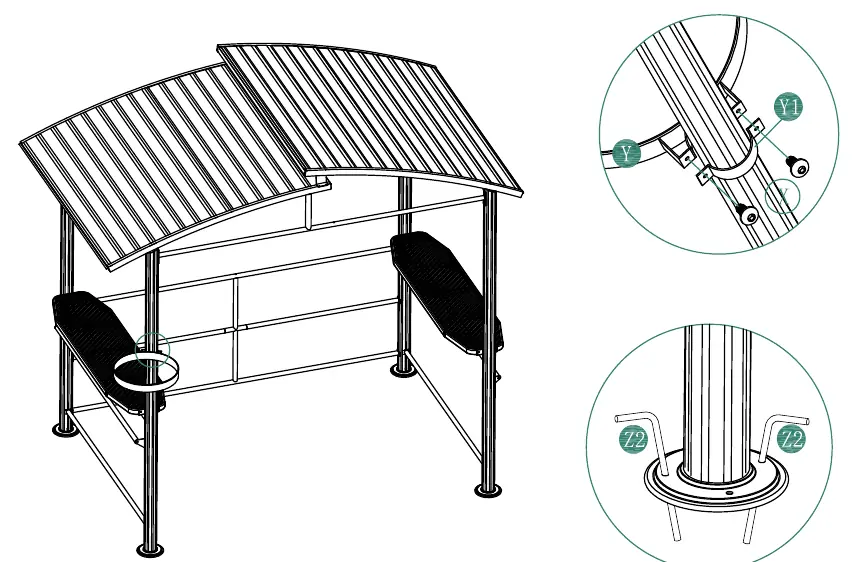
Frame Assembly (Steps 1-8)
- Steps 1-2: Assemble the base and vertical posts.
- Steps 3-7: Connect the side supports and crossbars.
- Step 8: Secure the frame structure using the specified hardware.
Roof and Finishing (Steps 9-16)
- Steps 9-11: Attach the roof support structure.
- Steps 12-13: Assemble the roof panels.
- Steps 14-15: Install the roof onto the frame.
- Step 16: Finalize the assembly and secure the structure to the ground.
Practical help
Common problems
Verify all items against the parts list on page 2 before starting. If items are missing, contact Dancover support.
Ensure the assembly area is perfectly flat and do not fully tighten screws until the entire section is aligned.
Before use
- Verify all parts against the parts list on page 2
- Ensure you have the provided tools (Z2)
- Clear a flat, spacious area for assembly
- Identify all hardware (X, X1, X2, X3, X4, X5) before starting

Manual page author
Michael Turner
Technical manual editor