Installation Guide for Danfoss RA-DV Dynamic Valve Service Kit
A step-by-step installation guide for the Danfoss RA-DV Dynamic Valve service kit, including component replacement, torque specifications, and required tools.
Table of contents
Quick guide from the manual
This document provides instructions for replacing internal components of the Danfoss RA-DV Dynamic Valve using the official service kit. The process involves removing the existing thermostatic element, regulator, and valve top, cleaning the valve body, and installing new components with specific torque requirements.
Service kit contents
- Gland seal
- Valve top
- Orifice
- Regulator
Installation procedure
- Removal: Remove the thermostatic element by lifting the locking ring with a screwdriver.
- Disassembly: Use an M18 ring spanner to unscrew the insert. Use a Torx 45 key to unscrew the regulator.
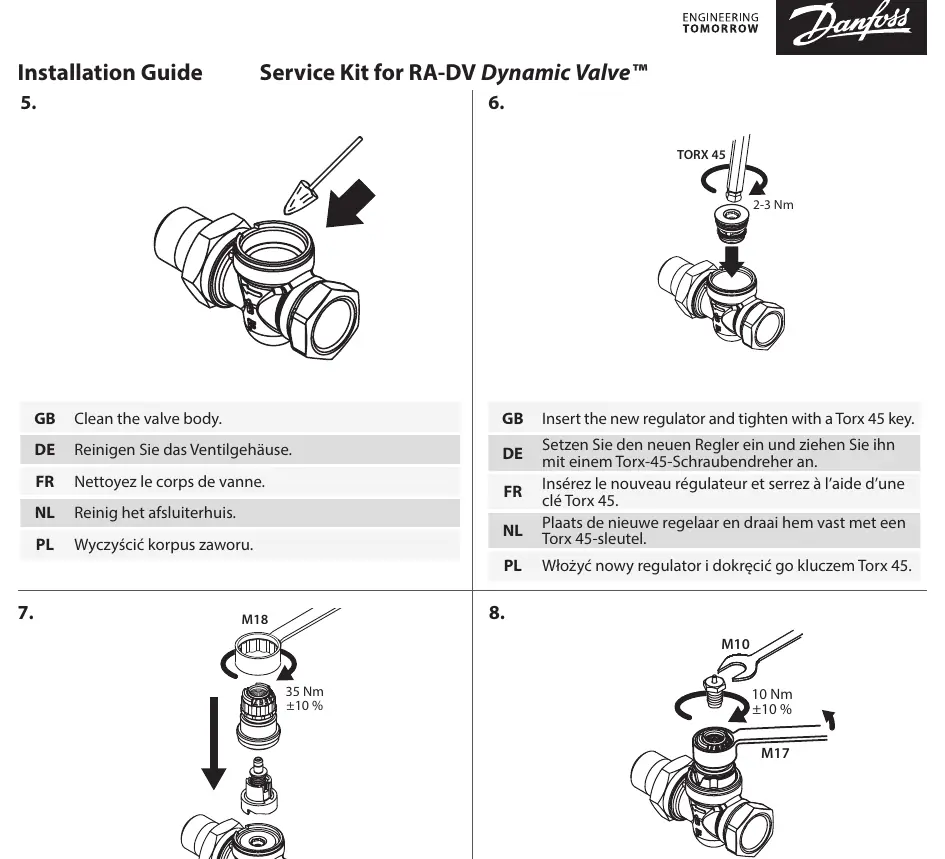
- Cleaning: Thoroughly clean the valve body before installing new parts.
- Assembly: Insert the new regulator and tighten with a Torx 45 key (2-3 Nm).
- Mounting: Mount the valve top and tighten with an M18 ring spanner (35 Nm ±10%).
- Finalizing: Fix the valve top using an M17 ring spanner. Mount the gland seal and tighten with an M10 spanner (10 Nm ±10%).
Manufacturer information
Danfoss A/S
Practical help
Common problems
Difficulty removing the thermostatic element
Use a screwdriver to carefully lift the locking ring free from the valve body.
Before use
- Ensure you have the correct service kit for your valve model (013G7831, 013G7980, or 015G0899).
- Prepare an M18 ring spanner.
- Prepare a Torx 45 key.
- Prepare an M17 ring spanner.
- Prepare an M10 spanner.
- Ensure the valve body is clean before installing new components.

Manual page author
David Miller
Documentation analyst
Organizes user manual content into clear summaries, with attention to model details, product context, and everyday usability.