Operator's Manual for Drucker Diagnostics BOOST 2+ Flex Centrifuge
Quick guide for the Drucker Diagnostics BOOST 2+ Flex centrifuge, covering setup, cycle programming, operation, loading, maintenance, and troubleshooting.
Table of contents
Manual images
Jump to the sectionQuick guide from the manual
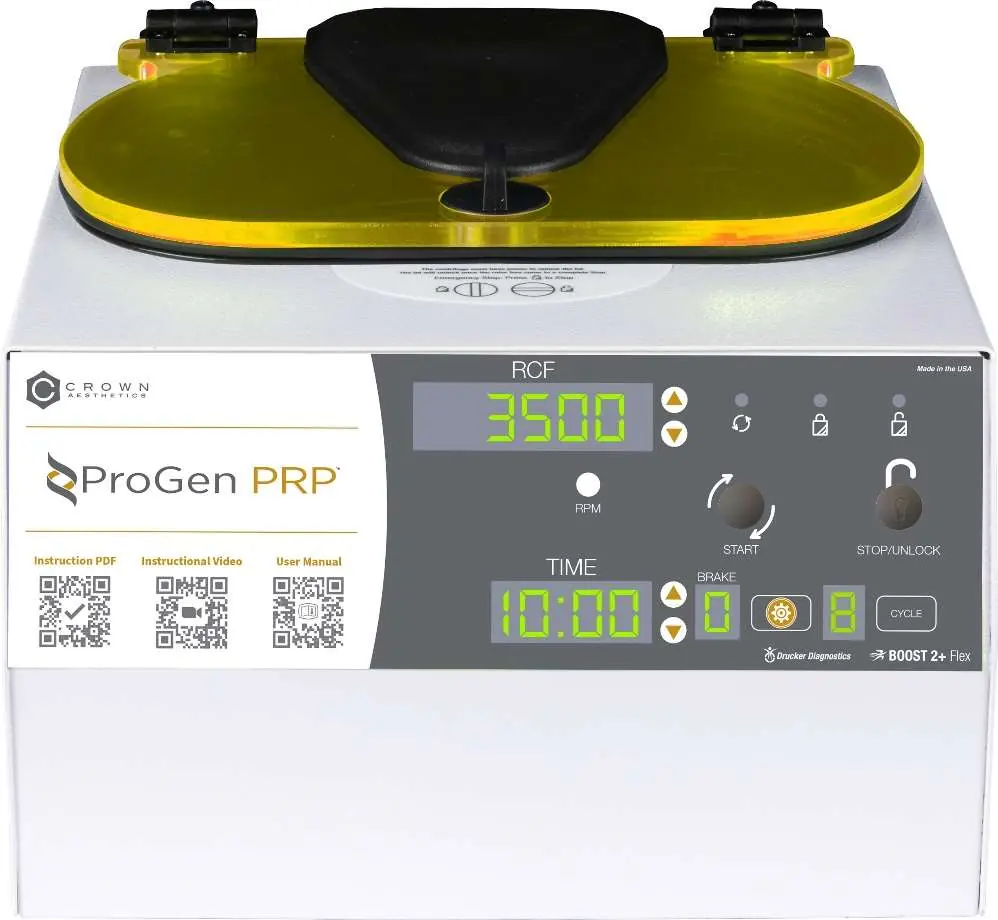
This document provides essential operating instructions for the Drucker Diagnostics BOOST 2+ Flex laboratory centrifuge. It is intended for trained personnel to perform density-based fluid separation. Key operations include programming up to 10 custom cycles, adjusting speed (RPM) or g-force (RCF), and managing safety locks.
Initial setup
- Ensure the centrifuge is placed on a flat, level surface with 6 inches (15 cm) of clearance around it for ventilation.
- Maintain an ambient temperature between 16°C and 32°C.
- Verify that the centrifuge, power cord, and carriers are included.
- Plug the power cord into an approved electrical outlet that remains accessible for emergency disconnection.
Operation
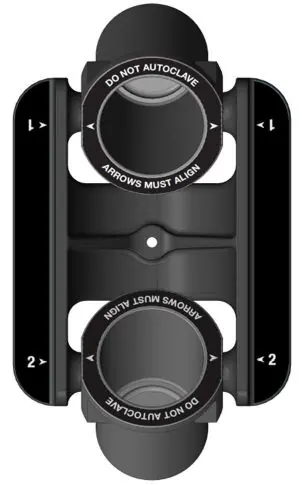
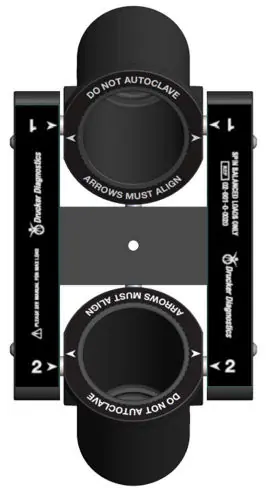
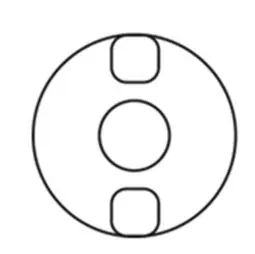
Loading: Always use a balanced load. If spinning an odd number of samples, use a water-filled tube of equal weight to balance the rotor. Ensure carriers are properly aligned and hanging freely from the rotor pins.
Running a cycle:
- Place tubes into carriers.
- Close the lid and turn the knob clockwise to the stop position.
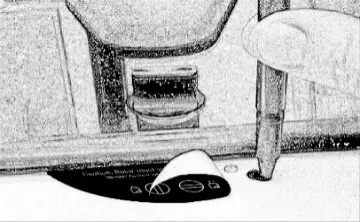
- Select the desired cycle using the UP/DOWN buttons.
- Press the START button.
- Once the cycle completes, the rotor will stop and the lid light will flash.
- The lid will unlock for 60 seconds; press UNLOCK if more time is needed.
Settings and programming
You can adjust parameters for single-use cycles or save up to 10 custom presets. Use the GEAR button to enter the advanced menu to adjust braking (0-9), toggle the audible beeper, or name cycles. Use the CYCLE button to save new settings.
Maintenance and cleaning
- Unplug the unit before cleaning.
- Use only isopropyl alcohol or a 10% bleach solution for disinfection.
- Do not submerge the unit in liquid.
- Inspect carriers regularly for cracks and replace them every 24 months.
Troubleshooting
If the centrifuge does not run, verify power and ensure the lid latch is turned fully clockwise. If the unit makes excessive noise, check that it is on a flat surface and the load is balanced. For locked settings, press and hold the UNLOCK button for 5 seconds to deactivate locks.
Manufacturer information
Drucker Diagnostics
Practical help
Common problems
Verify power and ensure the lid latch is turned completely clockwise to the stop position.
Ensure the unit is on a flat surface and the load is perfectly balanced.
The unit is likely in Preset Lock mode. Press and hold the UNLOCK button for 5 seconds until you hear two beeps, then repeat until the next two beeps to unlock.
Ensure the lid knob is turned fully counterclockwise. If it remains stuck, turn it fully clockwise, press UNLOCK, then turn counterclockwise.
Before use
- Verify the centrifuge is on a flat, level surface.
- Ensure 6 inches (15 cm) of clear space around the unit.
- Check that the lid latch is fully closed.
- Ensure all samples are balanced in the rotor.
- Verify that the carriers are hanging freely from the rotor pins.
Specs in practice
- Max Carrier Load
- 140.0 grams; do not exceed this weight per carrier.
Images and diagrams
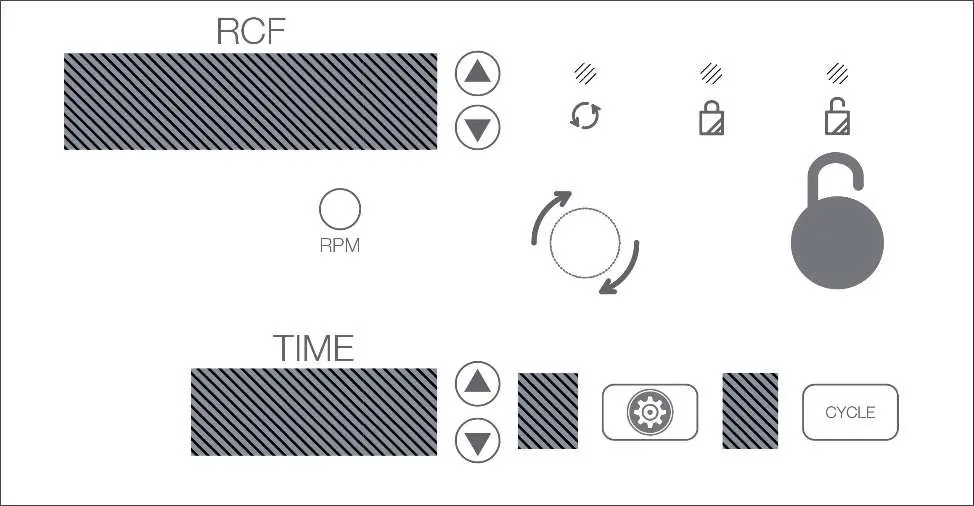
- The control panel features RCF and TIME displays with dedicated UP/DOWN buttons for adjustments.
- The GEAR button accesses advanced settings like brake force and beeper toggles.
- The CYCLE button is used for selecting, saving, and modifying presets.
- Carrier alignment arrows must be matched to ensure proper rotor operation.
Model compatibility
- Only use Drucker Diagnostics components.
- Do not use flammable, explosive, or highly reactive chemicals.
- Use only isopropyl alcohol or 10% bleach for cleaning; avoid TBQ germicidal products.

Manual page author
David Miller
Documentation analyst
Organizes user manual content into clear summaries, with attention to model details, product context, and everyday usability.