User Manual for electriQ 25" Full HD 165Hz LED Monitor eiQ-25FHD165TFSGH
Quick guide for the electriQ 25" Full HD 165Hz LED Monitor (eiQ-25FHD165TFSGH). Includes setup instructions, OSD menu navigation, connection details, VESA wall mounting, and troubleshooting tips.
Table of contents
Manual images
Click an image to enlargeQuick guide from the manual
This document provides essential information for setting up and operating the electriQ 25" Full HD 165Hz LED Monitor. Key features include multiple input options (HDMI 1.4, HDMI 2.0, DisplayPort 1.2), FreeSync support, and an OSD menu for fine-tuning display settings. Ensure the monitor is placed in a well-ventilated area with at least 5cm of clearance.
Safety information
- Read all instructions before operating the product.
- Do not use the equipment near water or in humid environments.
- Clean only with a dry cloth; do not use solvents.
- Do not block ventilation openings.
- Keep away from heat sources like radiators or stoves.
- Do not tamper with the supplied BS1363 standard plug.
- Disconnect power immediately if the plug or cable is damaged, or if liquid spills on the unit.
- Do not remove safety covers; there are no user-serviceable parts inside.
What's included
- Monitor
- Power supply
- Power cable
- HDMI cable
Connections
The monitor features the following ports on the back:
- DC 12V: Power input.
- USB: For firmware updates.
- HDMI 2: HDMI 1.4, 75Hz, Free Sync.
- HDMI 1: HDMI 2.0, 144Hz, Free Sync.
- DP: Display Port 1.2, 165Hz, Free Sync.
- AUDIO OUT: Audio output.
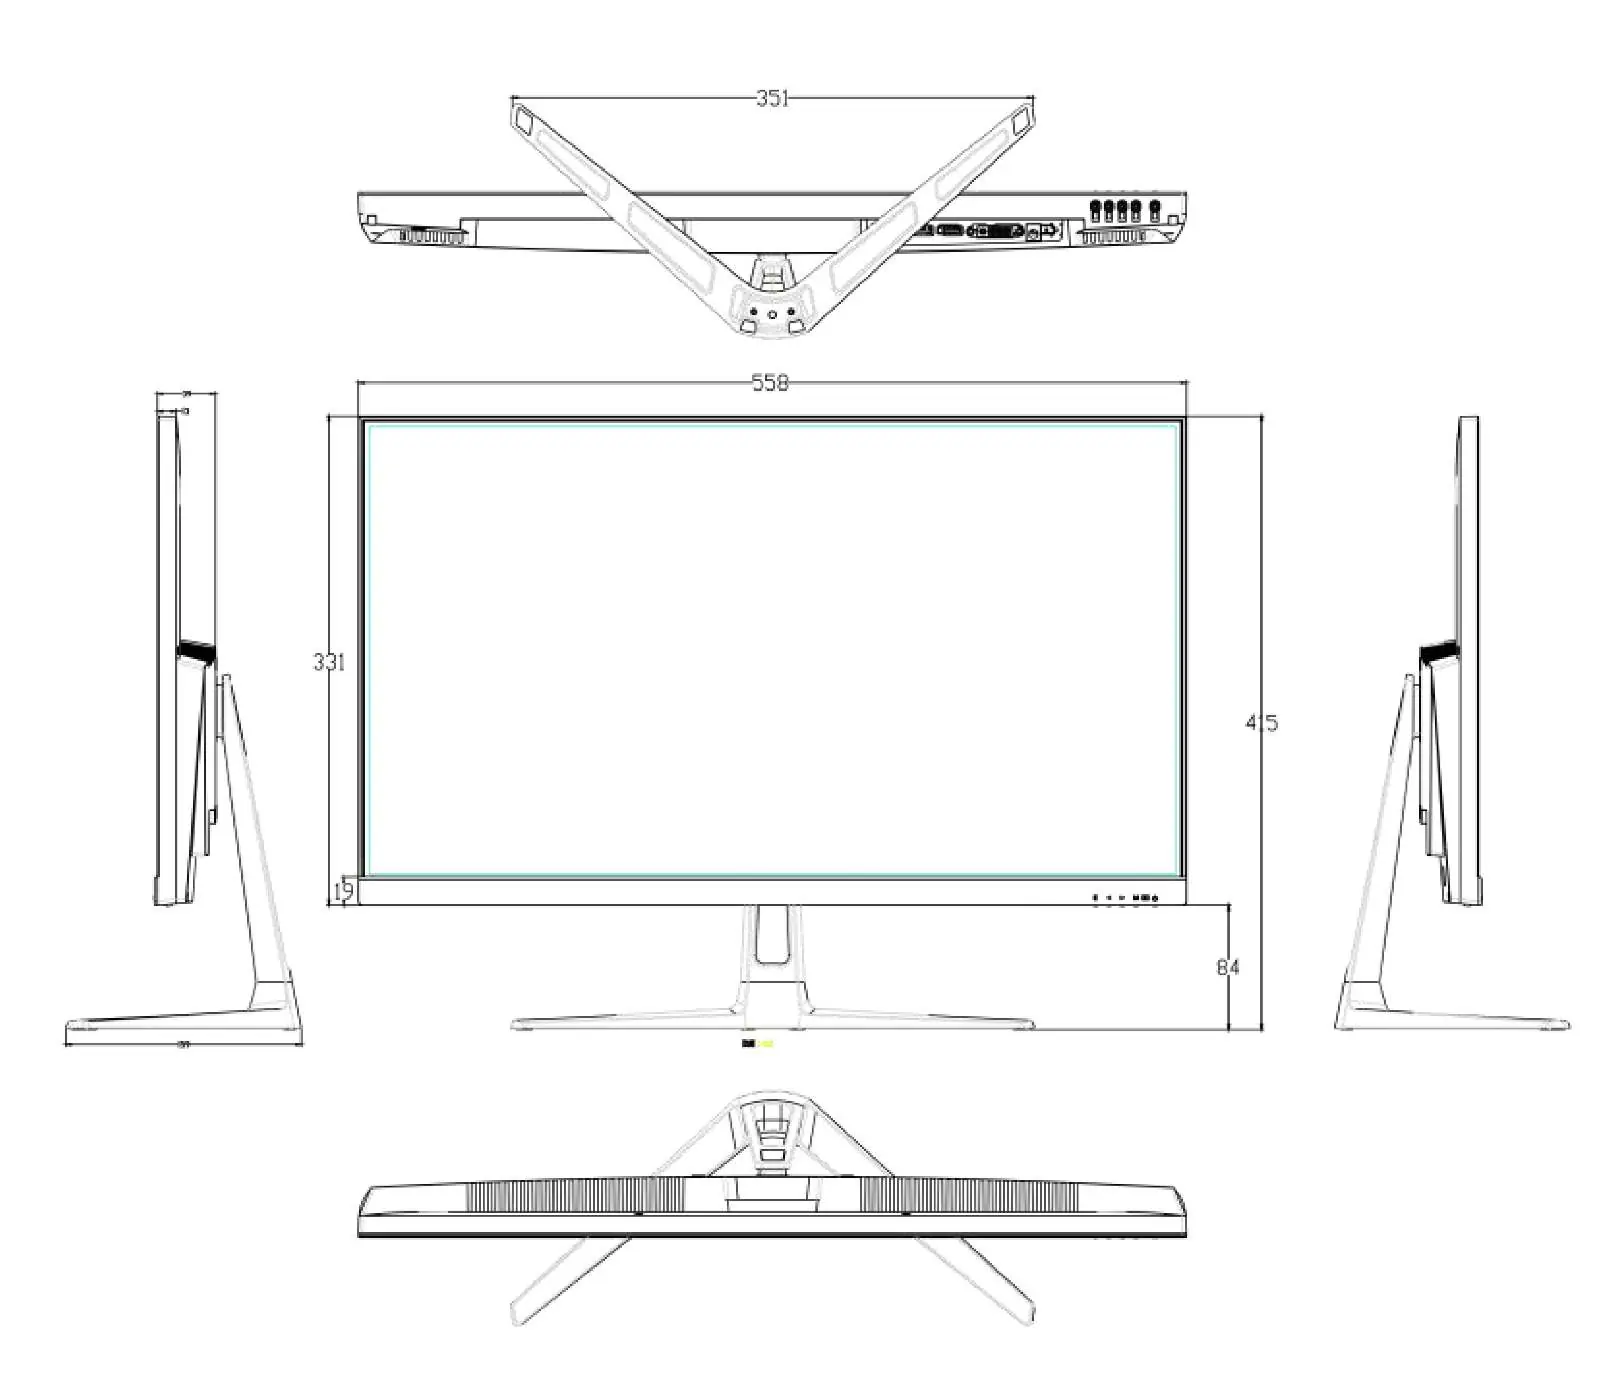
Wall mounting
The monitor supports VESA wall mounting.

- Mounting pattern: 100x100mm.
- Screw size: 4 x M6 x 10 (not supplied).
- Do not use screws longer than specified to avoid internal damage.
- Consult a professional installer as the monitor is considered heavy.
Monitor controls
The control panel is located on the monitor and includes the following buttons:

- E: Select signal source or Exit the menu.
- <: Go Up within the Main Menu or increase the value of the selected item.
- >: Go Down within the Main Menu or decrease the value of the selected item.
- M: Enter the Main OSD Menu and Select submenu.
- Power button: Turn the monitor on or off.
Initial setup
- Connect the monitor to a power socket.
- Press the POWER button to turn it on (indicator will be blue).
- Connect the relevant cable to the corresponding input. The source will be automatically detected.
- To change inputs, press the E button to enter the source menu and use the < and > buttons to select between DP, HDMI1, and HDMI2.
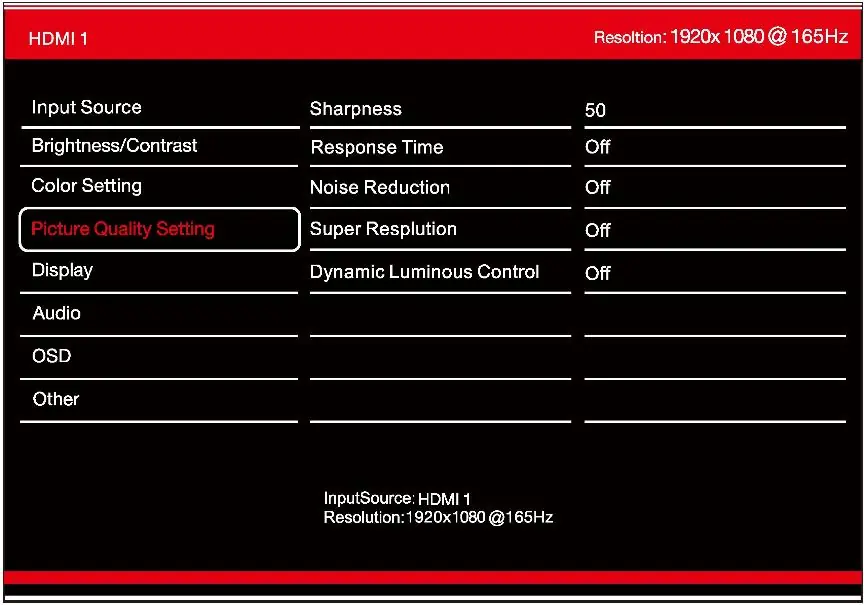
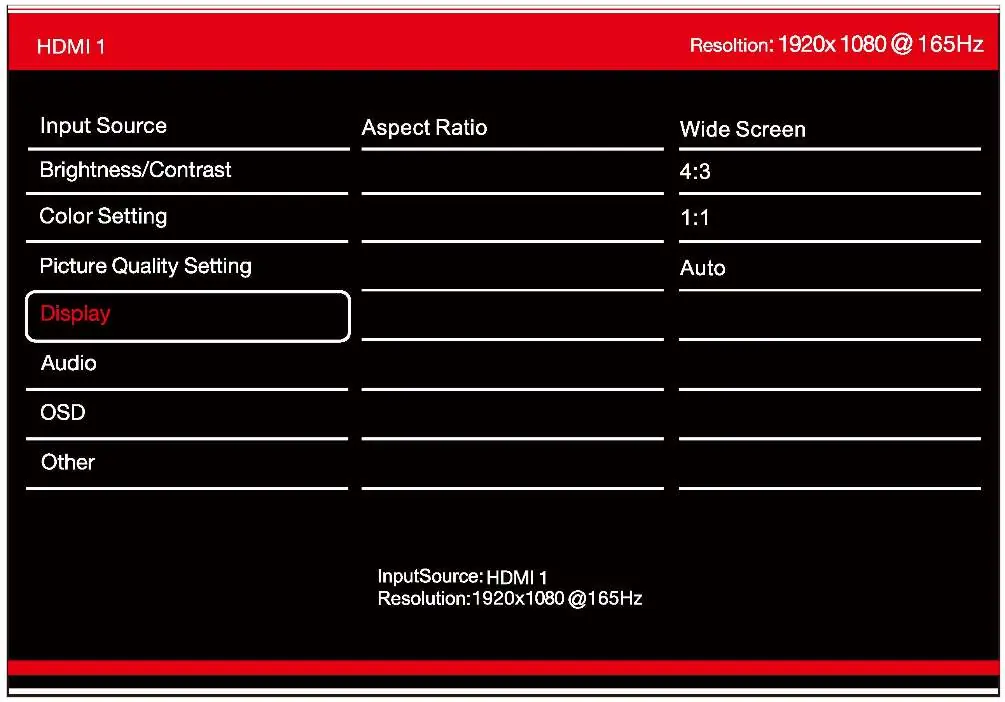
OSD menu options
The OSD menu allows adjustment of various settings:
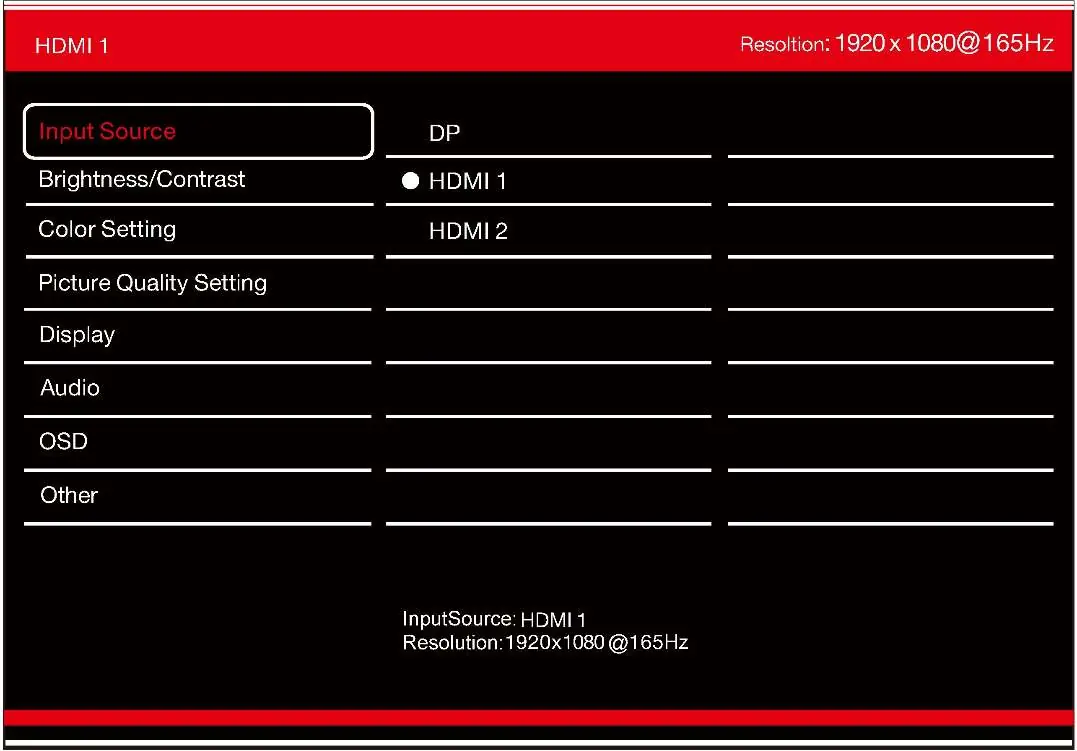
- Input Source: Select between DP, HDMI 1, and HDMI 2.
- Brightness/Contrast: Adjust brightness, contrast, and DCR.
- Colour Settings: Adjust Gamma, Picture Mode, Colour Temperature, Hue, Saturation, and Low Blue Light.
- Picture Quality Settings: Adjust Sharpness, Response Time, Noise Reduction, Super Resolution, and Dynamic Luminance Control.
- Display: Adjust Aspect Ratio (Wide screen, 4:3, 1:1, Auto).
- Audio: Mute and Volume control.
- OSD: Language, position, transparency, and menu rotation.
- Other: Free Sync, HDR (requires HDMI 2.0), MPRT, Firmware Update, and Reset.
Specifications
- Panel Type: 25" (16:9) LED Backlit Monitor.
- Best Resolution: 1920x1080 @ 165Hz.
- Contrast Ratio: 1000:1.
- Brightness: 400 cd/m2.
- Response Time: 5ms (GTG).
- Power Input: DC 12V 4A.
- Power Consumption: <=21W.
Troubleshooting
- No power: Insert the plug securely into the power outlet.
- No picture: Ensure equipment is connected properly and the correct input is selected.
- Buttons unresponsive: Disconnect the power plug and reconnect it.
- Noise or interference: Relocate the unit away from other electronic equipment.
Practical help
Common problems
Insert the plug securely into the power outlet.
Ensure that the equipment is connected properly and the correct input is selected.
Disconnect the power plug and then reconnect it.
Electronic equipment near the unit may be causing interference. Relocate the unit or move the equipment.
Before use
- Ensure ventilation clearance of at least 5cm around the monitor.
- Connect to a mains power supply as rated on the back of the equipment.
- Use only attachments/accessories specified by the manufacturer.
- Do not place heavy items on the cable.
- Hold by the plug when removing from a socket.
Specs in practice
- Contrast Ratio
- 1000:1 typical ratio.
- Response Time
- 5ms (GTG).
Images and diagrams
- Connections: DC 12V, USB (firmware), HDMI 2 (1.4, 75Hz), HDMI 1 (2.0, 144Hz), DP (1.2, 165Hz), Audio Out.
- Controls: E (Source/Exit), (Down/Decrease), M (Menu/Select), Power.
Model compatibility
- VESA mounting: 100x100mm, M6x10 screws.
- HDR requires HDMI 2.0 input.
- FreeSync is supported on HDMI and DP inputs.

Manual page author
Michael Turner
Technical manual editor
Reviews PDF manuals for structure, safety notes, and practical product details so readers can find the right information quickly.