User Guide for Elite Screens Yard Master Electric Tension Series Projector Screen
Quick guide for the Elite Screens Yard Master Electric Tension Series. Includes installation instructions for wall, ceiling, and suspended mounting, RF remote and 12V trigger setup, and essential maintenance tips.
Table of contents
Manual images
Jump to the sectionQuick guide from the manual
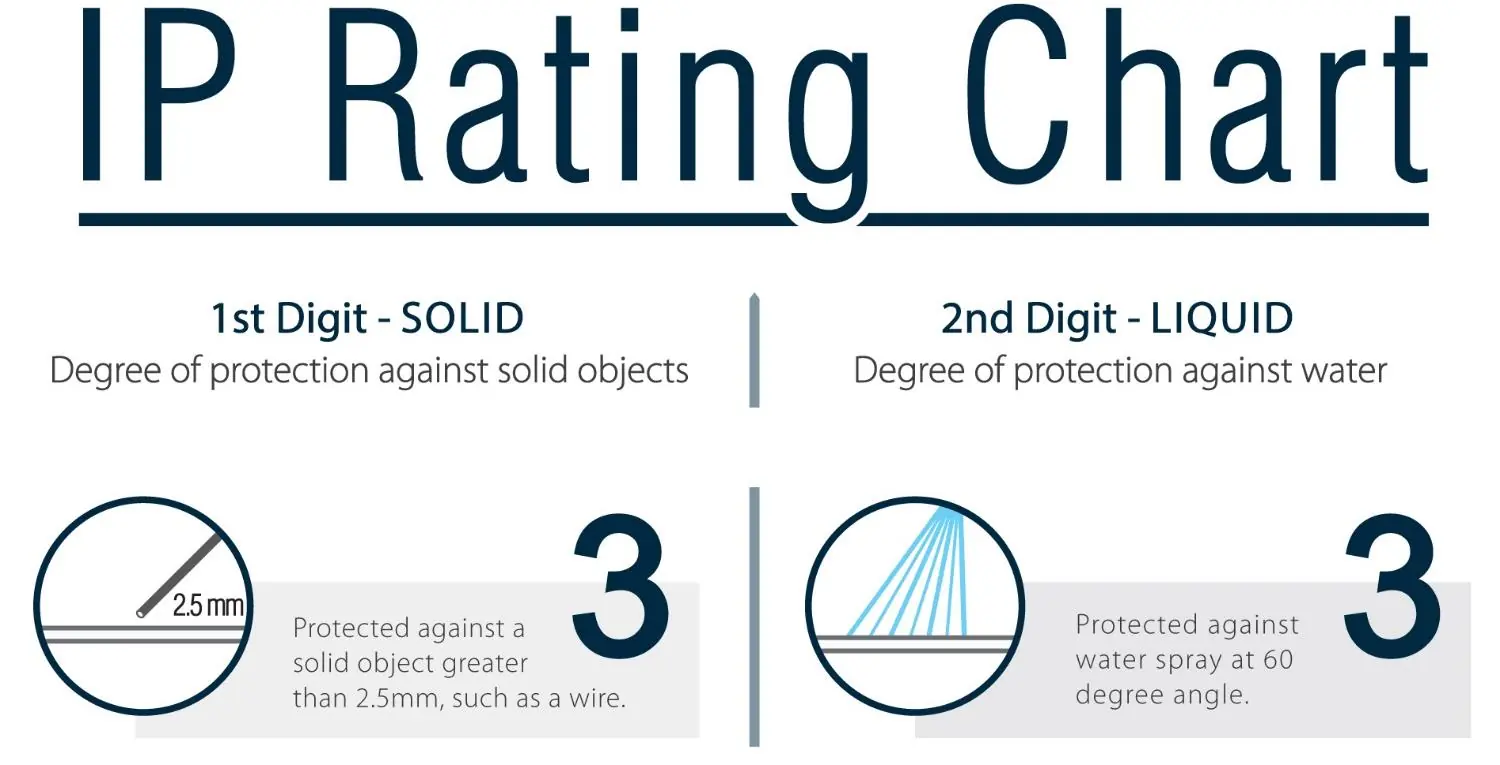
The Yard Master Electric Tension Series is an outdoor projector screen designed for wall or patio installations. To ensure longevity, the screen must be retracted into its protective casing when not in use to prevent photodegradation from UV radiation. The unit is IP33 rated, providing protection against solid objects larger than 2.5mm and water spray at a 60-degree angle.
Safety and Care
- Do not touch, write on, or point at the projection surface with sharp objects.
- Clean only with a soft-damp cloth and clean water; do not use chemicals or alcohol.
- Operate only under adult supervision.
- Disconnect power during heavy rain, wind, or lightning.
- Do not disassemble the unit; there are no user-serviceable parts.
Installation
Installation requires at least two people. Ensure the screen is mounted on a level surface. Wall screws provided are complementary and may not suit all surfaces; consult a professional if needed.
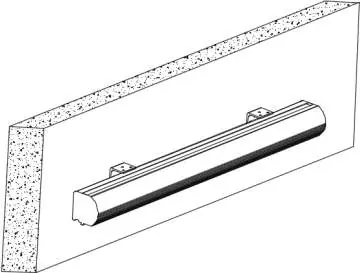
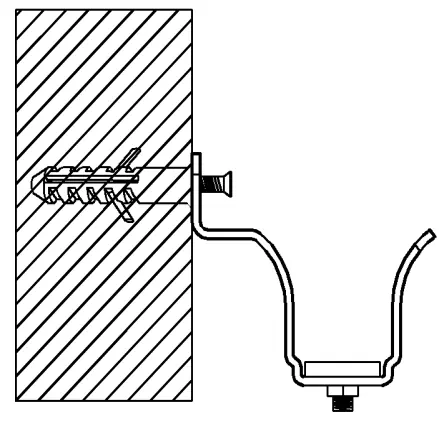
Wall and Ceiling Mount
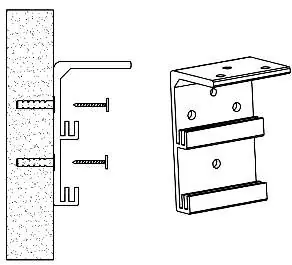
- Measure and mark the distance between the bracket screw holes.
- Drill holes and secure the Wall/Ceiling mount brackets (A) using the provided anchors and screws (B).
- Hang the screen by placing the downward catch on the back over the bracket's upper catch.
- Slide the screen horizontally to center it, then secure it with the M5x25mm screw (H).
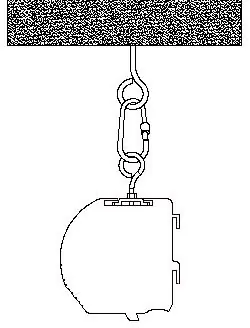
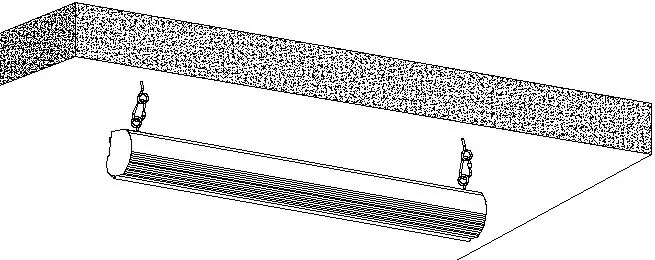
Suspended Mount
- Screw the eyebolt (I) into the bracket connector (D).
- Attach the snap link (J) to the eyebolt and connect to a ceiling-rated eyebolt screw (not included).
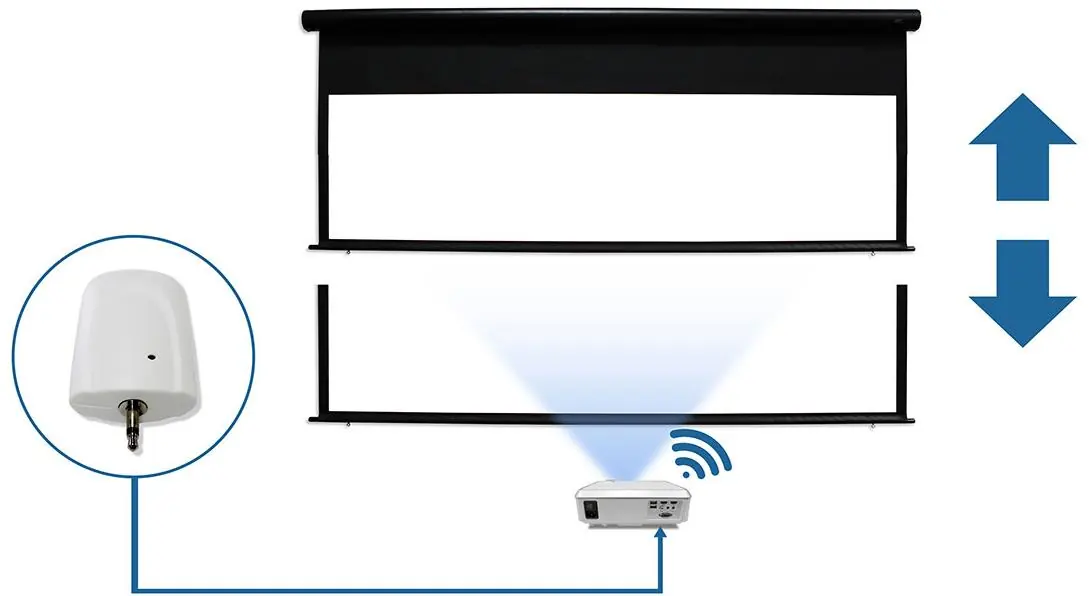
Control System
The screen can be operated via RF Remote or a Wireless 12-volt projector trigger.
RF Remote Synchronization
- Unplug the screen from the power source.
- Press and hold the STOP button on the remote.
- Plug the screen back in while holding the button.
- Release the button after hearing a set of multiple beeps.
Wireless 12V Trigger Setup
- Unplug the screen.
- Press and hold the small hole on the trigger with a pointy object until the red light turns on.
- Plug the screen in and continue pressing the trigger hole until you hear four faint beeps.
- Connect the trigger to the projector's output port.
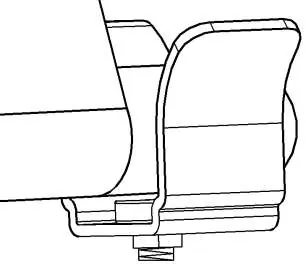
Magnetic Bottom Bracket
After mounting, install the magnetic bottom bracket (G) to secure the weight bar. Use the RF remote to lower the screen and align it with the bracket until the weight bar sleeve is cradled inside.
Manufacturer information
Elite Screens Inc.
Practical help
Common problems
Ensure the projector is completely powered off (fan off). If it still fails, repeat the synchronization process from step 1.
Perform the synchronization process: unplug the screen, hold the STOP button, plug it back in, and release after hearing multiple beeps.
Reorient the receiving antenna, increase separation between the screen and the receiver, or connect the screen to a different power outlet.
Before use
- Ensure the power outlet voltage (100v, 110v, or 220v) is compatible with the screen.
- Verify the mounting surface is level and capable of supporting the screen weight.
- Ensure the power source provides a continuous power flow.
- Check that the screen is not exposed to direct sunlight or moisture when not in use.
- Confirm all brackets are securely fastened.
Specs in practice
- Top Black Drop
- Already set to maximum distance; do not modify as it voids the warranty.
Images and diagrams
- The IP Rating chart explains the 1st digit (solid protection) and 2nd digit (liquid protection).
- Installation diagrams show the 'catch' mechanism for wall/ceiling brackets.
- The 12V trigger diagram illustrates the connection between the trigger, projector, and screen.
Model compatibility
- Wall screws included are complementary and may not be adequate for all mounting surfaces.
- Extension cords must have an equal rating to the appliance to avoid overheating.
- The screen is compatible with 100v, 110v, or 220v depending on the region.

Manual page author
David Miller
Documentation analyst
Organizes user manual content into clear summaries, with attention to model details, product context, and everyday usability.