Eureka 1660SP Dust Cup Replacement
A step-by-step repair guide for replacing the dust cup on the Eureka 1660SP vacuum cleaner. Includes tool requirements and disassembly instructions to restore vacuum efficiency.
Table of contents
Manual images
Click an image to enlargeQuick guide from the manual
This guide provides instructions for replacing the dust cup on the Eureka 1660SP vacuum cleaner. Regular replacement of the dust cup is recommended to maintain maximum vacuuming efficiency.
Tools and Parts
To perform this replacement, you will need the following:
- Phillips #00 Screwdriver
- Replacement dust cup
Replacement Procedure
Follow these steps to replace the dust cup:
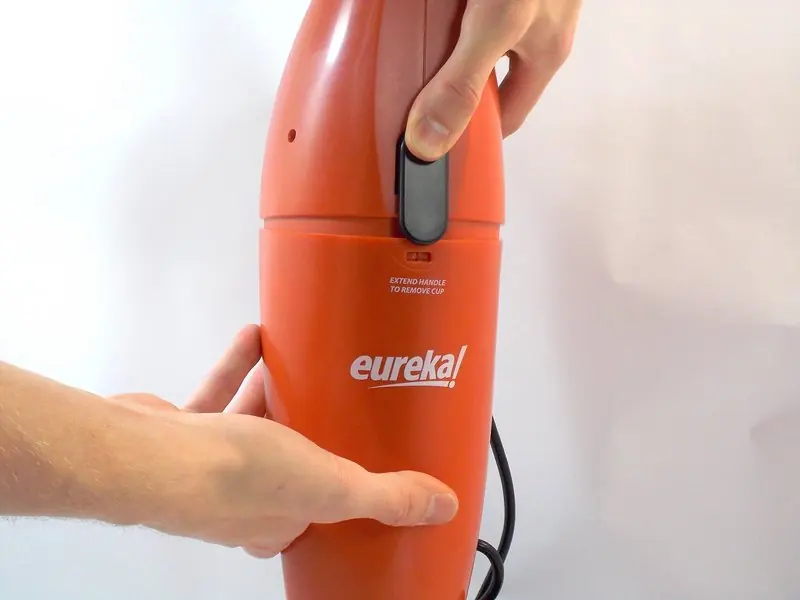
- Separate the vacuum body: Press the black separator switch and lightly pull the bottom half of the vacuum away from the top.
- Unscrew: Locate and unscrew the screws shown in the diagram.
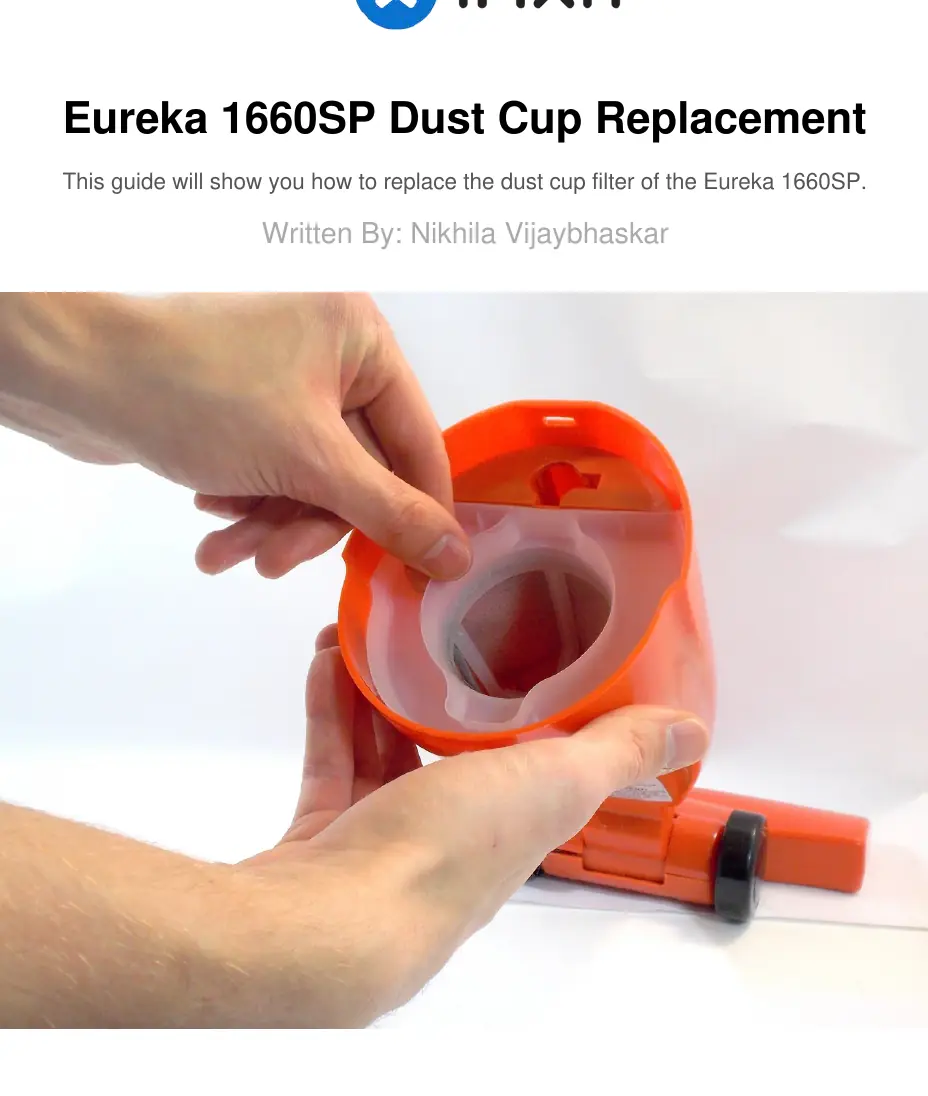
- Locate the dust cup: Once the body is separated, you can see the dust cup in the bottom half of the vacuum.
- Remove the dust cup: Lift the dust cup up and out of the cavity.
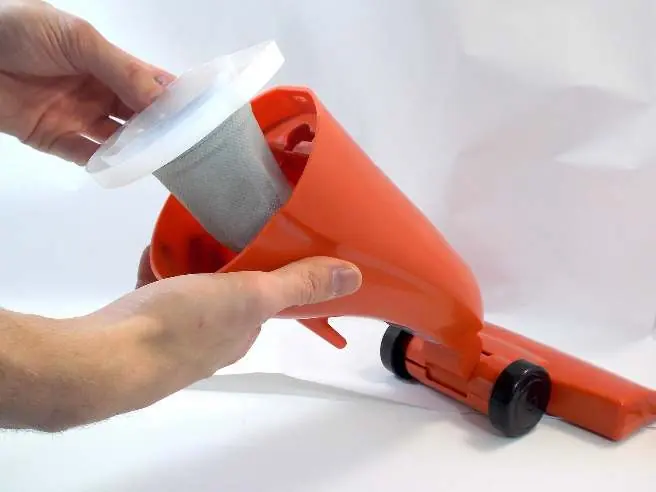
- Install the new dust cup: Slot the new dust cup back into the cavity.
Reassembly
To reassemble your device, follow the instructions above in reverse order.
Practical help
Common problems
The dust cup may be full or damaged; replace the dust cup using this guide.
Before use
- Ensure you have a Phillips #00 screwdriver.
- Ensure the vacuum is powered off and disconnected from power.
- Have the replacement dust cup ready.

Manual page author
Michael Turner
Technical manual editor
Reviews PDF manuals for structure, safety notes, and practical product details so readers can find the right information quickly.