Installation Guide for Fagerhult Notor 36 Pendant/Wall Light
Quick installation guide for the Fagerhult Notor 36 Pendant/Wall light. Includes wiring diagrams, mounting instructions, and safety warnings for the 16302R model.
Table of contents
Manual images
Click an image to enlargeQuick guide from the manual
This guide covers the installation and wiring of the Fagerhult Notor 36 Pendant/Wall light. Ensure all electrical installations are performed by qualified personnel. The light source and control gear are not user-replaceable.
Wiring
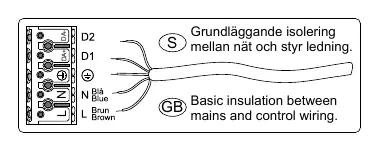
Connect the mains and control wiring according to the provided diagram. Ensure basic insulation is maintained between the mains and control wiring. Terminals include D1, D2, N, and L.
Installation
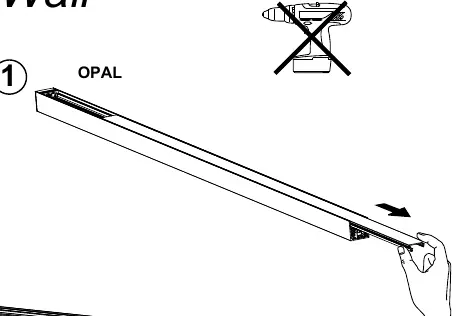
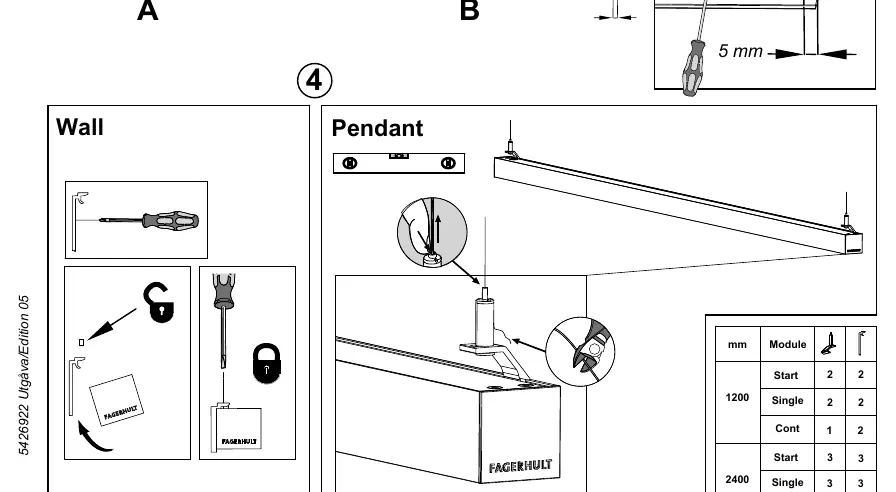
The Notor 36 supports both wall and pendant mounting configurations. Follow the numbered steps 1 through 7 for assembly. Refer to the module table to determine the number of mounting points required based on the fixture length (1200mm or 2400mm).
Safety and Maintenance
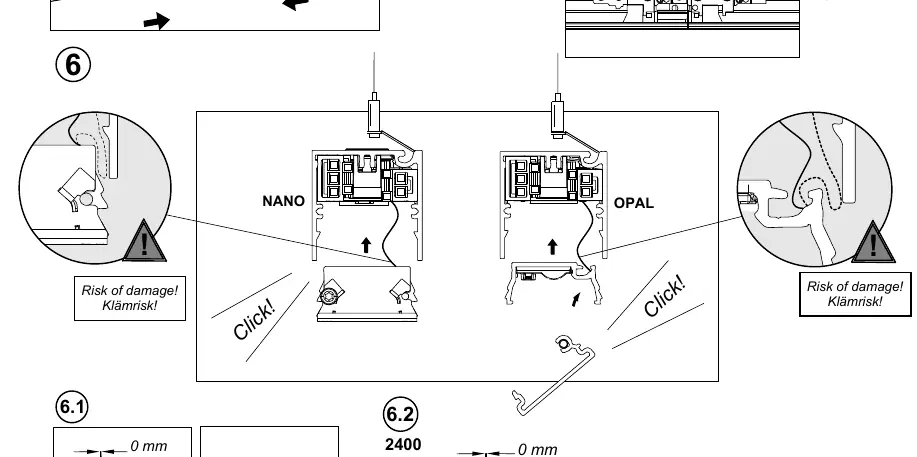
Be cautious of clamping risks during assembly. The light source and control gear must only be replaced by the manufacturer or its designated person. For models with Organic Respons, the operating frequency is 2.4 GHz with a maximum output power of 4dBm.
Manufacturer information
Fagerhult
Practical help
Common problems
Be careful with clamping points when clicking components into place to avoid damaging the fixture.
Before use
- Ensure power is disconnected before installation.
- Verify wall or pendant mounting configuration.
- Check wiring connections (D1, D2, N, L).
- Confirm the number of mounting points based on the module length (1200mm or 2400mm).

Manual page author
David Miller
Documentation analyst
Organizes user manual content into clear summaries, with attention to model details, product context, and everyday usability.