Falcon Ridge Timberline Mirror Installation Manual
Quick installation and adjustment guide for the Falcon Ridge Timberline Mirror (56-19052). Includes parts list, mounting steps for Can Am X3, and tension adjustment instructions.
Table of contents
Manual images
Jump to the sectionQuick guide from the manual
This document provides the necessary steps to install the Falcon Ridge Timberline Mirror (56-19052) and adjust its positioning. Ensure you have all parts before beginning the installation.
Parts list
- Mirror assembly
- Can Am X3 clamp
- 3 x M6x16mm button head bolts
Installation steps
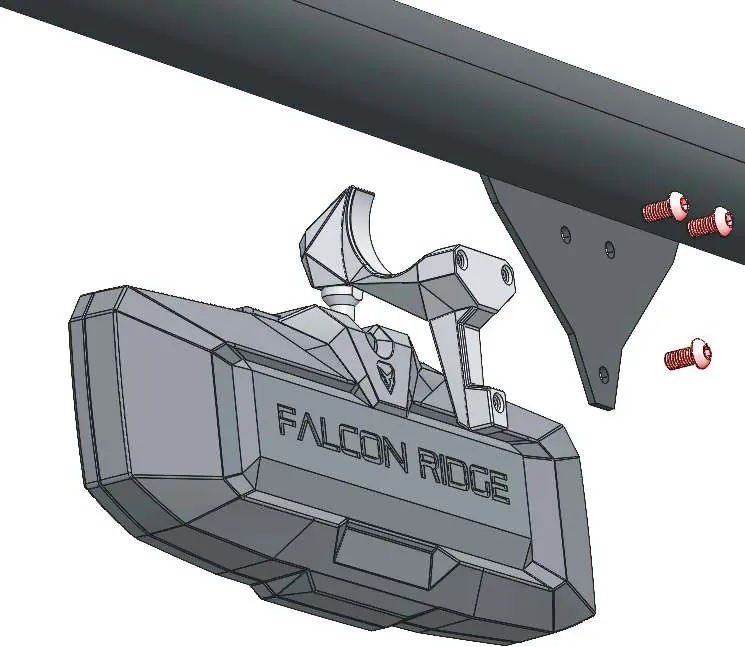
- Attach the mirror housing to the Can Am X3 clamp.
- Unscrew the M6x16mm button head bolts from the assembly.
- Screw and tighten the M6x16mm button head bolts through the holes to secure the clamp and mirror to the mirror mounting plate.
Adjustment and maintenance
To adjust the mirror position, simply move the mirror housing to the desired angle. If the mirror feels too loose or too tight, you can adjust the tension on the ball joint using the bolts on the back of the housing:
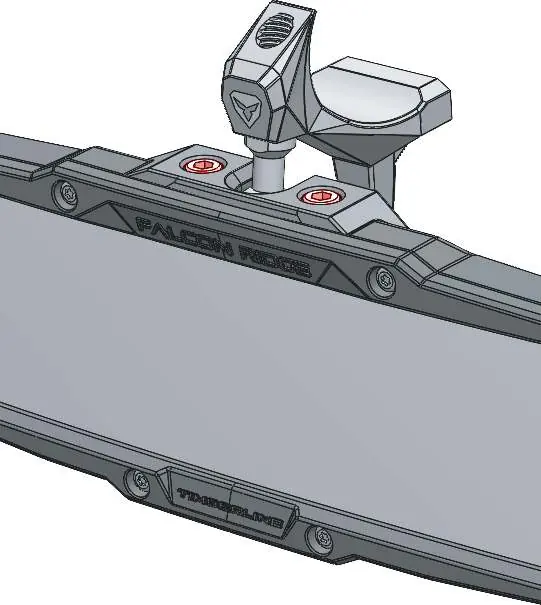
- Increase tension: Turn the bolts clockwise.
- Decrease tension: Turn the bolts counter-clockwise.
Practical help
Common problems
Increase tension on the ball joint by turning the adjustment bolts clockwise.
Decrease tension on the ball joint by turning the adjustment bolts counter-clockwise.
Before use
- Verify all parts are present: Mirror assembly, Can Am X3 clamp, and 3 M6x16mm bolts.
- Ensure the mounting surface on the vehicle is clean and ready for installation.
- Check that you have the appropriate tools to tighten the M6 button head bolts.

Manual page author
Emily Carter
User documentation editor
Prepares concise manual descriptions and highlights the most useful setup, operation, and maintenance information for readers.