Installation Guide for Fufu And Gaga 160CM Glass Display Cabinet
Step-by-step installation guide for the Fufu And Gaga 160CM Glass Display Cabinet. Includes assembly instructions, safety warnings, maintenance tips, and hardware list.
Table of contents
Manual images
Click an image to enlargeImportant Information
Before beginning the assembly of your Fufu And Gaga 160CM Glass Display Cabinet, please read the following guidelines to ensure a safe and efficient installation:
- Two-person assembly: It is highly recommended to have a partner assist with the installation to increase efficiency and reduce assembly time.
- Protect your furniture: Assemble the unit on a soft surface, such as a carpet, to prevent scratches on the panels.
- Manual tools only: Do not use an electric screwdriver. Excessive force can cause the boards to break. Use a manual screwdriver.
- Wall mounting: To prevent tipping, which can cause serious or fatal injury, you must use the included wall mounting hardware. If the hardware is not suitable for your wall type, please purchase the appropriate mounting solution.
- Maintenance: Tighten all screws two weeks after assembly and again every three months to ensure long-term stability.
Tools Required
Please prepare the following tools before starting:

- Tape measure
- Pencil
- Spirit level
- Hammer
- Manual screwdriver (flathead and Phillips)
Assembly Instructions
The assembly process involves 30 steps using the provided hardware (A-Q) and numbered panels (1-21). Follow the sequence carefully:
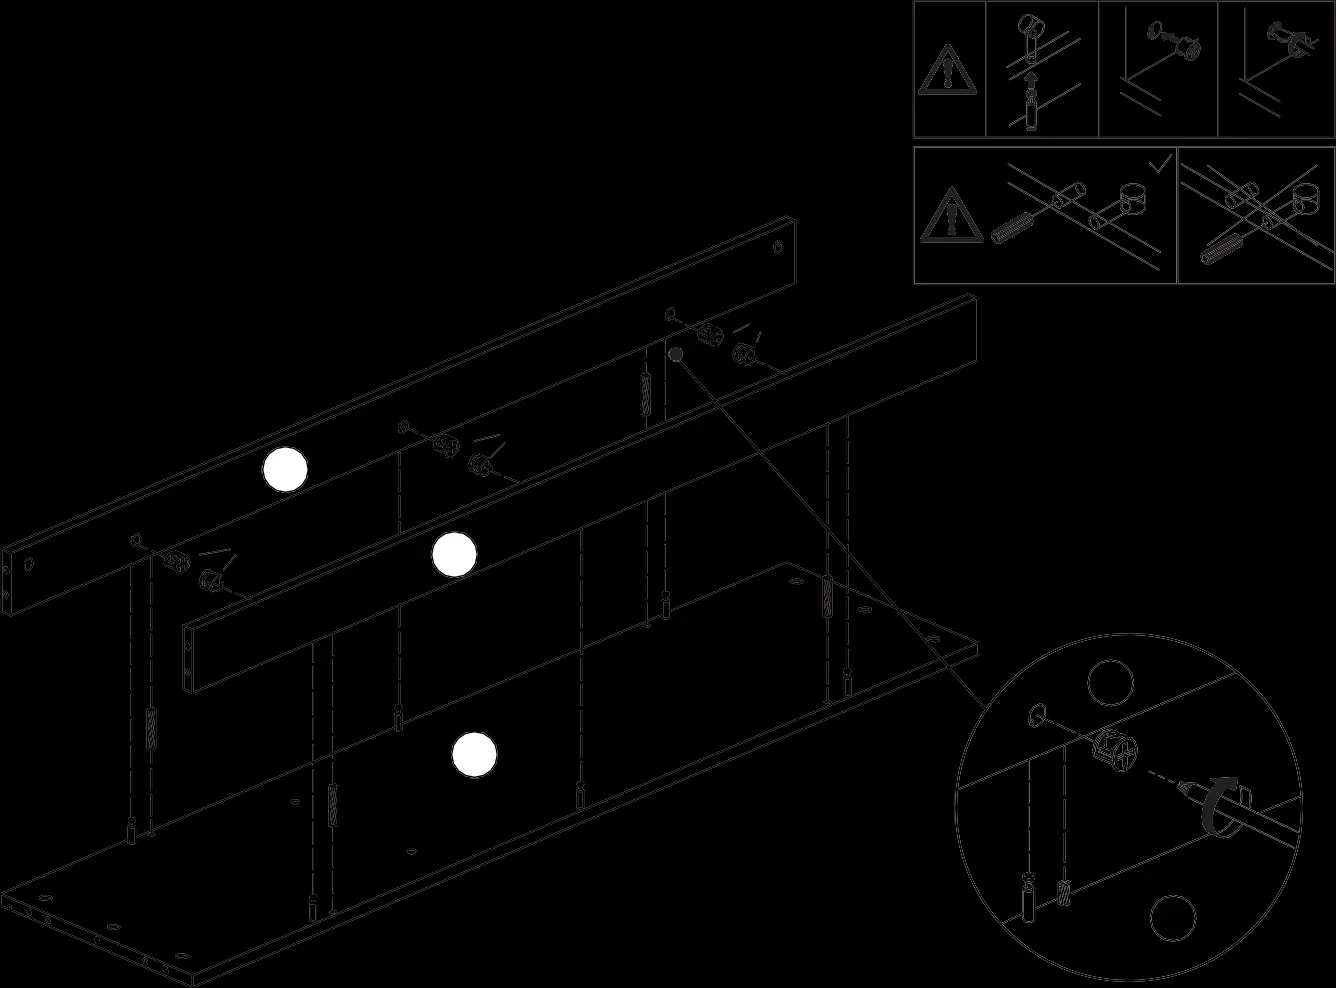
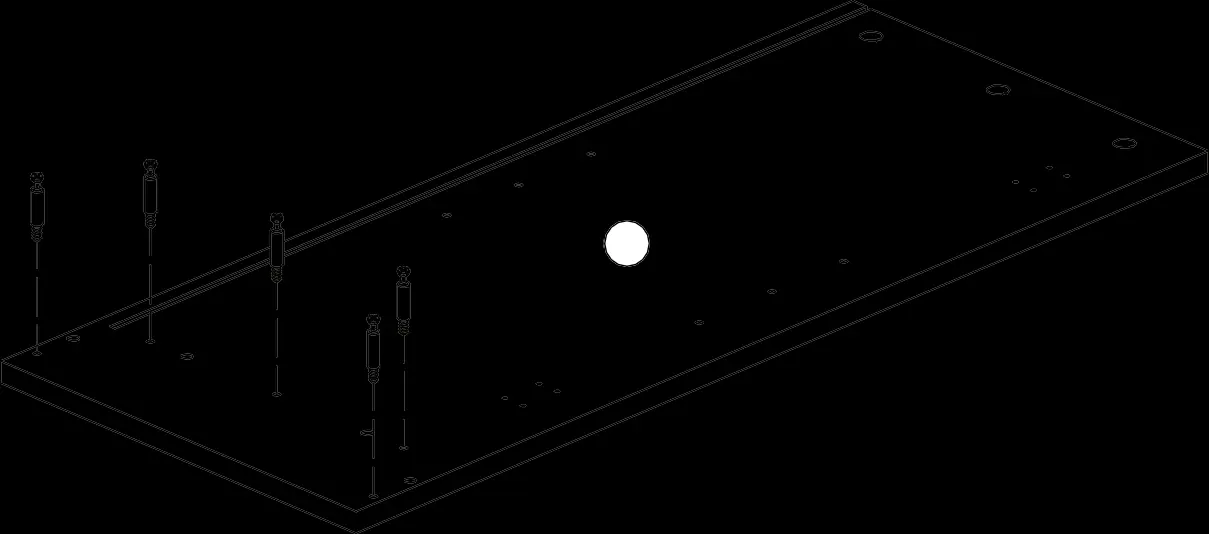
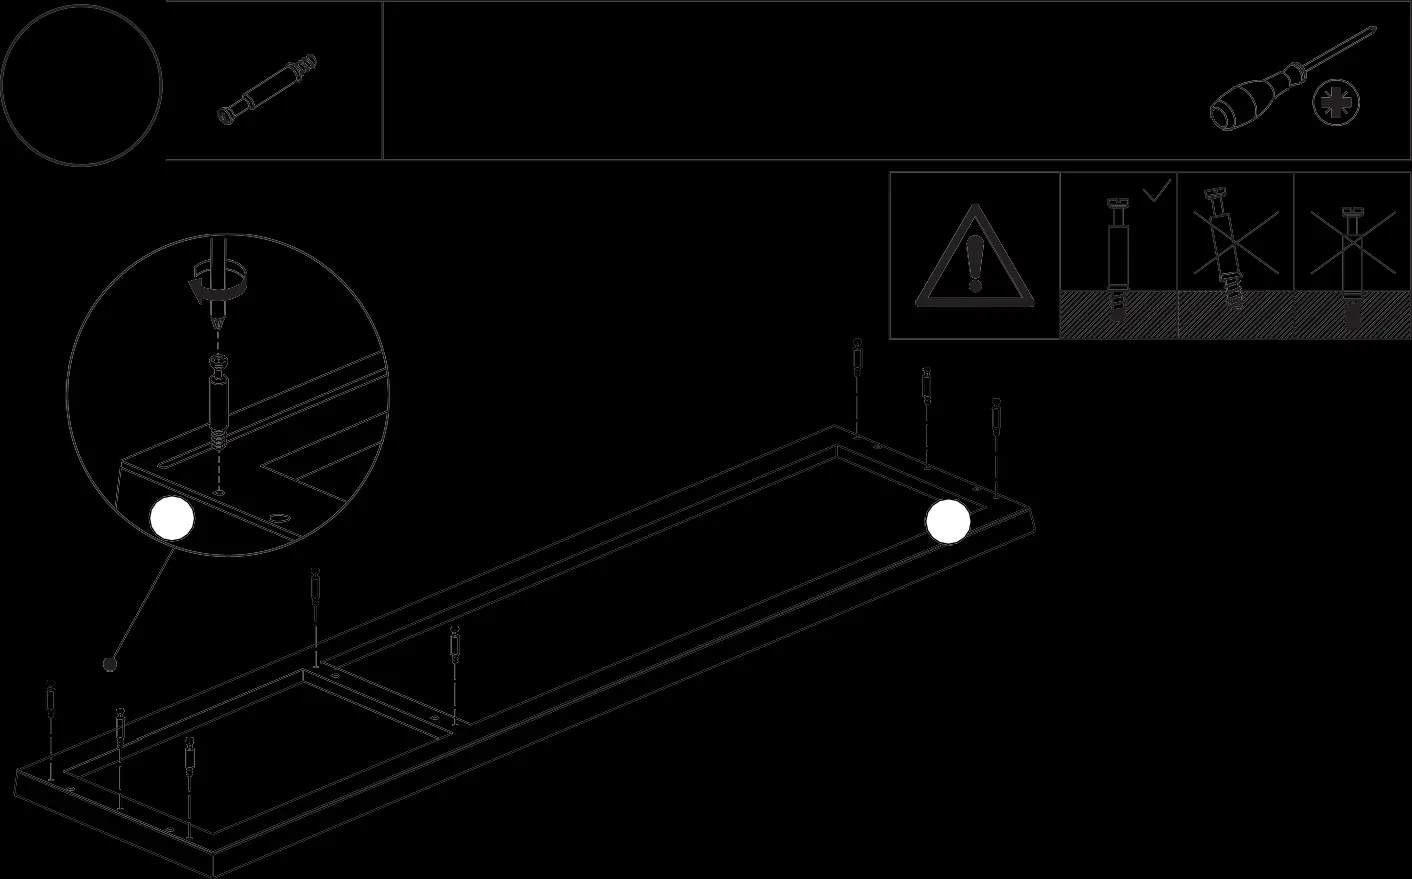


- Frame Preparation: Insert quick-fit screws (A) into the designated holes on panels 8, 4, 5, 6, 7, 2, and 3.
- Base and Lower Structure: Connect panels 12 and 8 using wooden dowels (C) and cam locks (B). Continue building the lower cabinet structure by attaching panels 16, 5, 11, and 4.
- Back Panel Installation: Slide the back panels (20) into the grooves of the lower structure and secure them.
- Upper Structure: Assemble the upper cabinet sections by connecting panels 6, 13, 14, 2, and 3.
- Top Panel: Attach the top panel (1) to the upper structure using wooden dowels (C) and cam locks (B).
- Shelving: Insert shelf supports (Q) into the pre-drilled holes in panels 4, 16, and 5, then place shelves 9 and 10.
- Doors and Hinges: Attach hinges (D) to the door panels (17 and 18) using screws (E). Install handles (F) using screws (G). Mount the doors to the cabinet frame.
- Final Adjustments: If the doors are not aligned correctly, use the hinge adjustment screws to fine-tune their position.
- Wall Anchoring: Drill holes in the wall and install the anti-tip safety brackets (K) using screws (H) and wall plugs (L).
Maintenance and Care
For regular cleaning of the frame, use a cloth dampened with a neutral detergent, then wipe dry with a clean cloth. For glass surfaces, use a cloth dampened with water or glass cleaner, followed by a dry cloth.
Practical help
Common problems
Ensure the wall mounting kit is installed correctly into the wall to prevent the cabinet from tipping.
Do not use electric screwdrivers. Use manual tools and avoid applying excessive force when tightening screws.
Assemble the unit on a soft surface, such as a carpet or rug, to protect the finish.
Use the adjustment screws on the hinges to align the doors properly after installation.
Before use
- Check all parts against the parts list (1-21)
- Prepare a soft assembly area
- Have a second person available for assembly
- Ensure you have a manual screwdriver
- Verify wall mounting hardware is suitable for your wall type
Images and diagrams
- The manual uses numbered parts (1-21) and lettered hardware (A-Q) to guide assembly.
- Steps 1-30 detail the sequential construction of the cabinet frame, doors, and shelves.
Model compatibility
- Wall mounting is mandatory for safety.

Manual page author
David Miller
Documentation analyst
Organizes user manual content into clear summaries, with attention to model details, product context, and everyday usability.