Geberit Kappa21 Dual Flush Plate Installation Instructions
Installation guide for the Geberit Kappa21 dual flush plate. Includes step-by-step instructions for mounting the frame, connecting the actuator, adjusting the rods, and attaching the flush plate.
Table of contents
Manual images
Click an image to enlargeQuick guide from the manual
This document provides the installation procedure for the Geberit Kappa21 dual flush plate. It covers the removal of existing components, installation of the mounting frame, connection of the actuator, and final assembly of the flush plate.
Installation steps
The installation process is primarily visual. Follow these general steps:
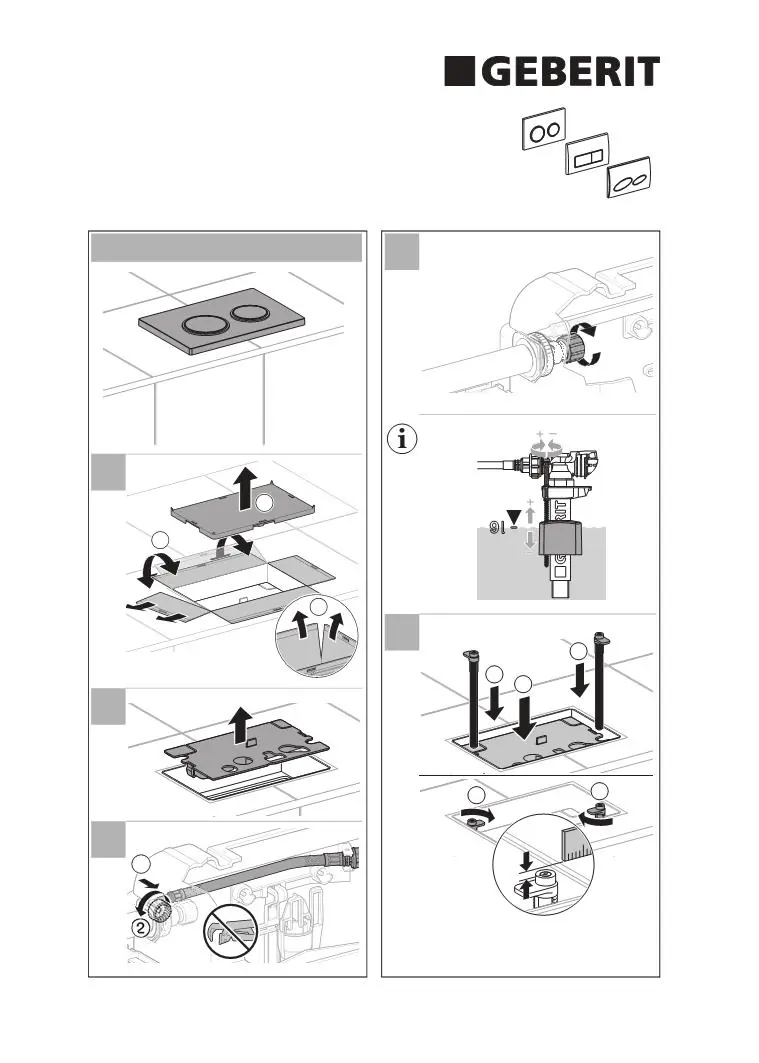

- Removal: Remove the existing flush plate and mounting frame if present.
- Preparation: Ensure the cistern is prepared and the water supply is accessible.
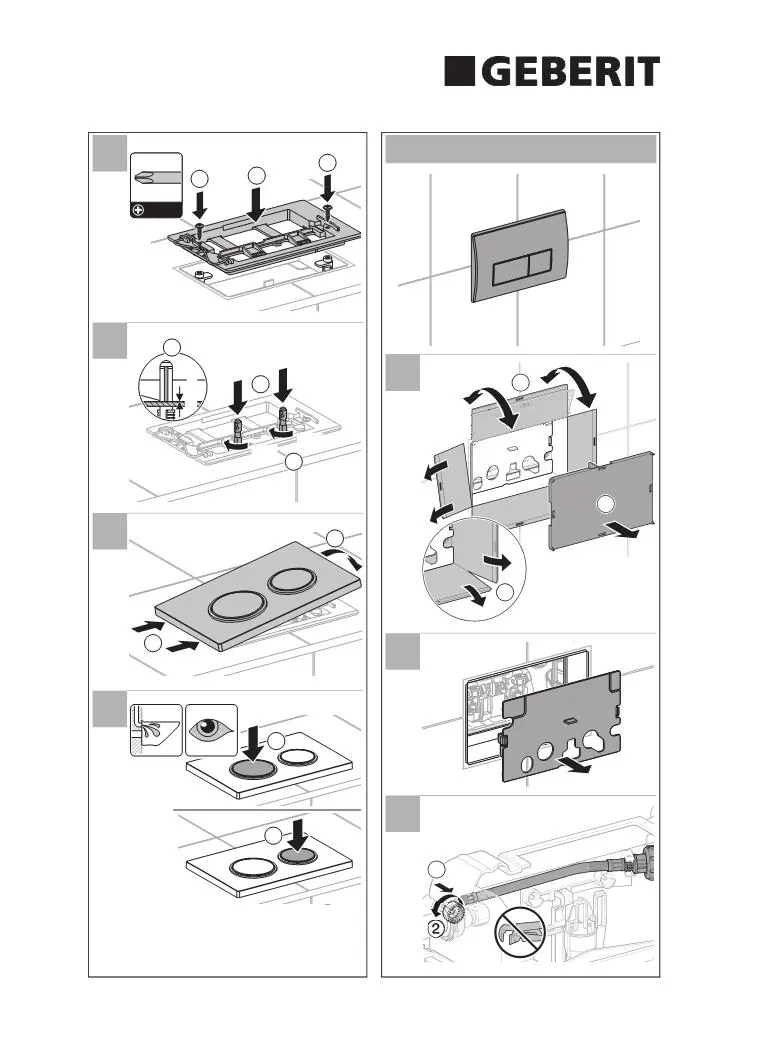
- Frame Installation: Secure the mounting frame to the cistern using the provided screws.
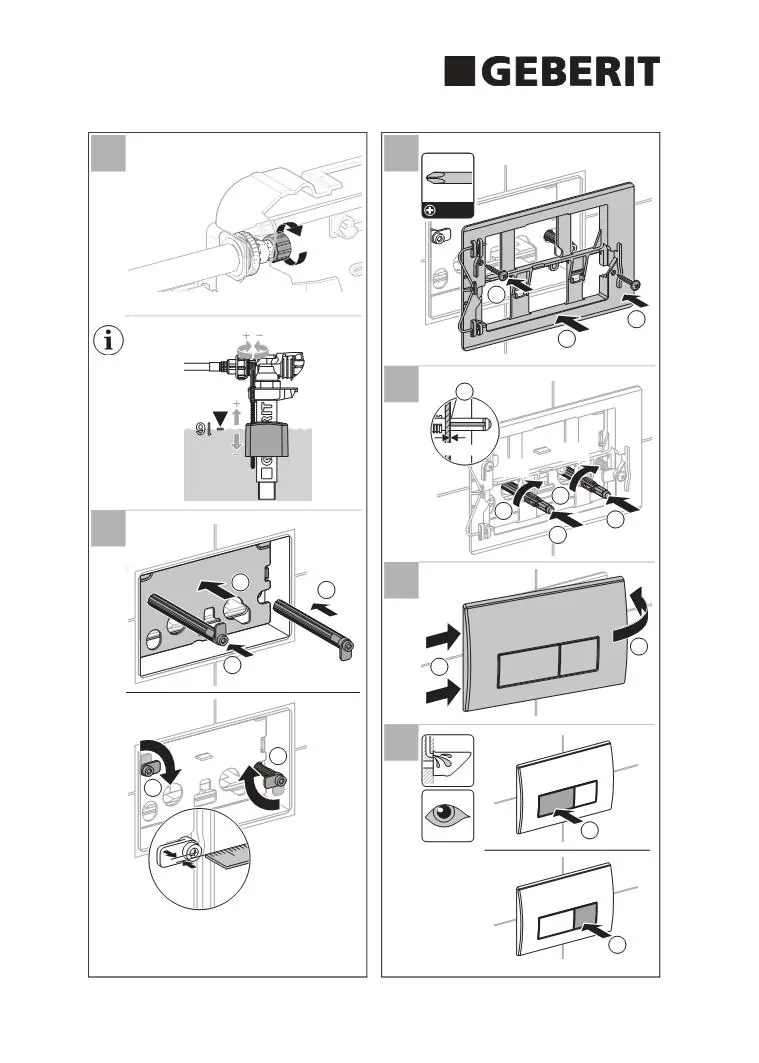
- Actuator Connection: Connect the actuator mechanism to the flush valve.
- Adjustment: Adjust the actuator rods to ensure proper operation. A gap of 2-3mm is typically required for correct actuation.
- Final Assembly: Snap the flush plate onto the mounting frame.
Maintenance and cleaning
Clean the flush plate using mild, non-abrasive cleaning agents. Do not use aggressive chemicals that may damage the surface finish.
Contact information
Geberit International AGSchachenstrasse 77CH-8645 [email protected]
Manufacturer information
Geberit Group
Practical help
Common problems
Adjust the actuator rods to the correct length (2-3mm gap).
Check that the actuator mechanism is properly connected to the flush valve and not obstructed.
Before use
- Verify compatibility with the existing Geberit cistern
- Ensure you have a PH3 screwdriver
- Clean the installation area
- Check that the water supply is turned on

Manual page author
Michael Turner
Technical manual editor
Reviews PDF manuals for structure, safety notes, and practical product details so readers can find the right information quickly.