Generic 12V Solar Panel Kit User Guide
Quick guide for the Generic 12V Solar Panel Kit, covering connection methods, LED status indicators, and compatibility requirements for 12V batteries.
Table of contents
Quick guide from the manual
This solar charger is designed exclusively for 12V batteries. Its performance is directly influenced by sunlight intensity, temperature, and atmospheric conditions. It is not compatible with 6V, 24V, or 36V battery systems.
Connection methods
There are two primary ways to connect the solar panel to your vehicle battery:
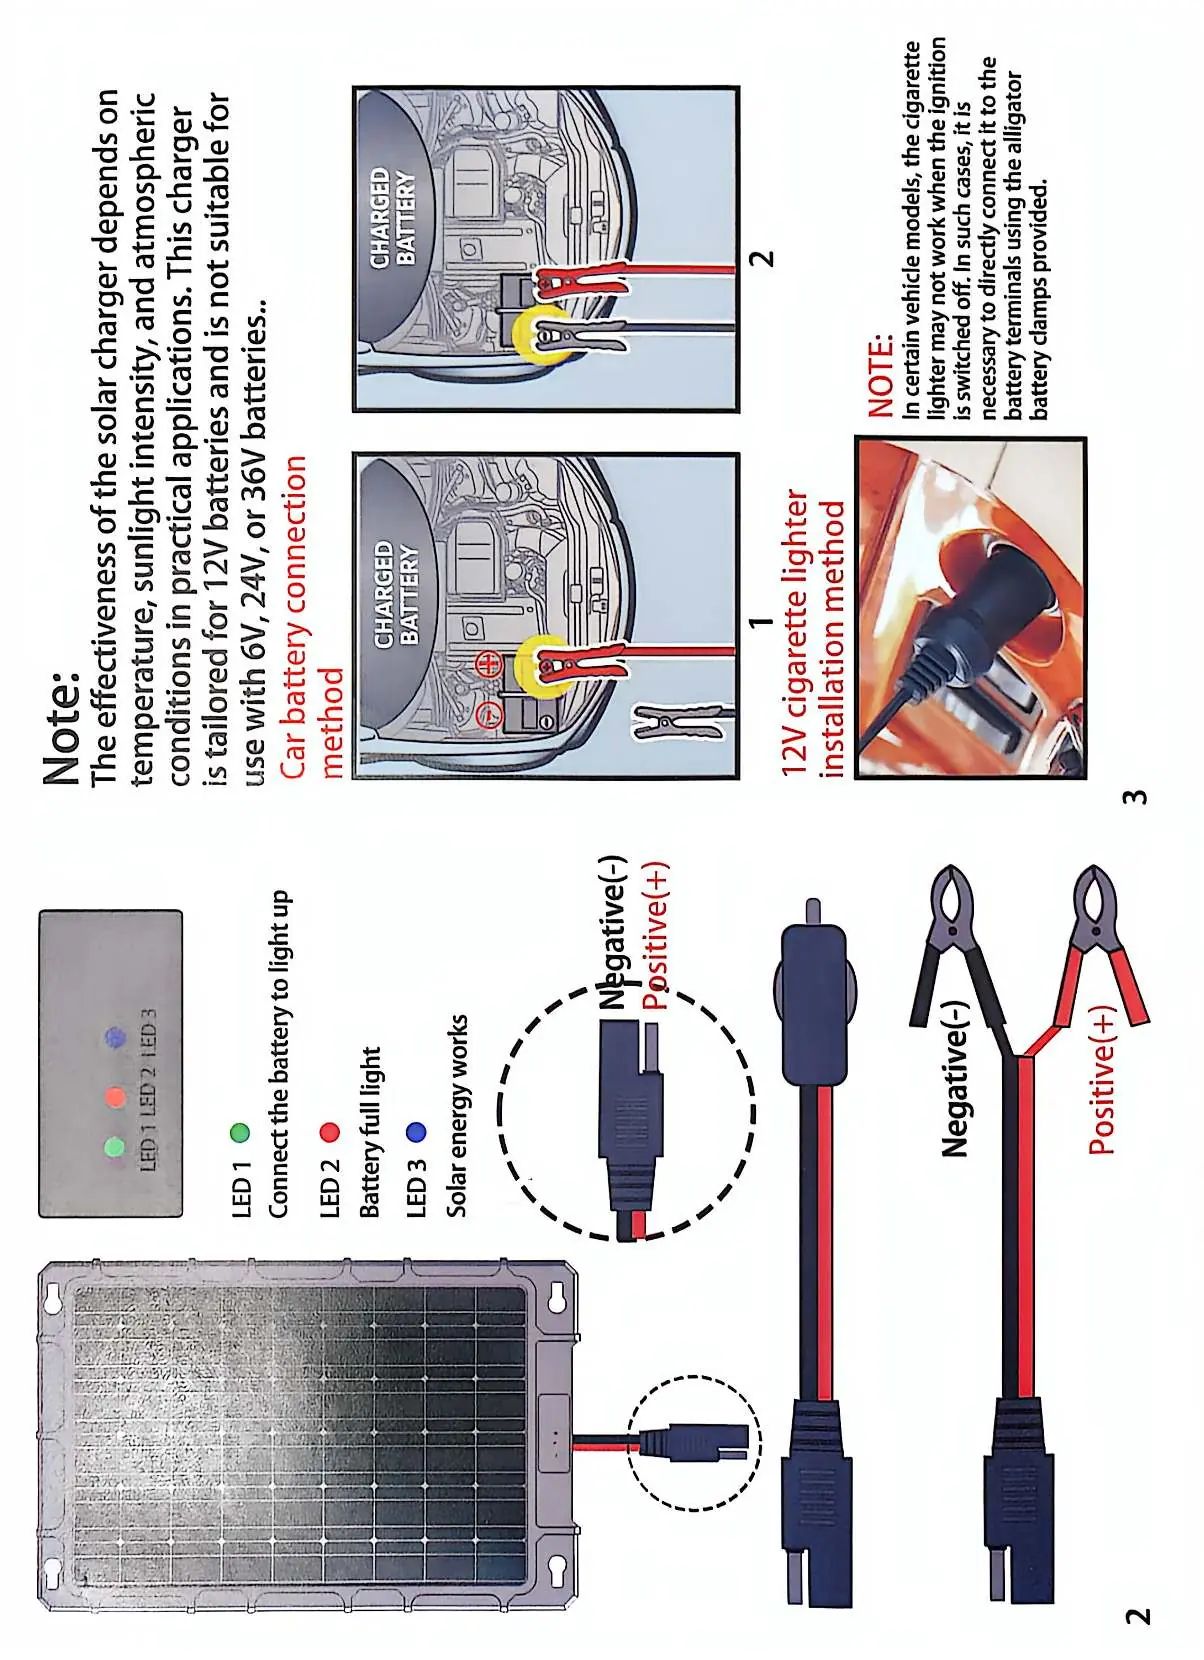
- 12V cigarette lighter method: Plug the adapter directly into the vehicle's cigarette lighter socket. Note that in some vehicle models, this socket may not receive power when the ignition is switched off; in such cases, direct battery connection is required.
- Car battery connection method: Use the provided alligator clamps to connect directly to the battery terminals. Ensure the positive (+) clamp is attached to the positive terminal and the negative (-) clamp to the negative terminal.
LED indicators
The device features three LED lights to monitor operation:
- LED 1 (Green): Indicates the battery is connected and ready to light up.
- LED 2 (Red): Indicates the battery is fully charged.
- LED 3 (Blue): Indicates that solar energy is being actively harvested and the system is working.
Practical help
Common problems
Some vehicles cut power to the cigarette lighter when the ignition is off. Use the provided alligator clamps to connect directly to the battery terminals instead.
Before use
- Verify the battery is a 12V system.
- Ensure the solar panel is placed in an area with adequate sunlight.
- Check that the connection cable is securely attached to the panel.
- Identify the positive (+) and negative (-) terminals on the battery.

Manual page author
Michael Turner
Technical manual editor
Reviews PDF manuals for structure, safety notes, and practical product details so readers can find the right information quickly.