Assembly Instructions for Glitzhome 2005600030 Pumpkin Yard Decoration
Quick assembly guide for the Glitzhome 2005600030 Pumpkin Yard Decoration. Learn how to assemble the stakes and attach the Welcome sign with these step-by-step instructions.
Quick answers from the manual
Quick answer
- To assemble the Glitzhome 2005600030, insert the four stakes into the bottom of the two pumpkins, then attach the Welcome sign to the pumpkin structure as shown in the assembly steps. p. 1
Key actions
- Insert stakes (Part C) into the bottom of the pumpkins (Part A). p. 1
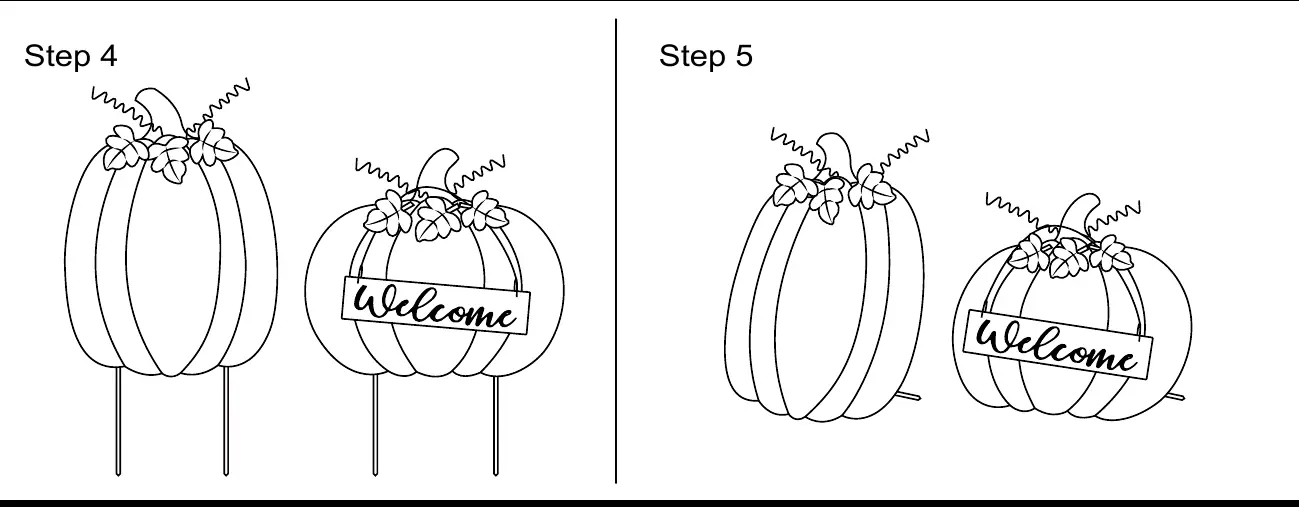
- Attach the Welcome sign (Part B) to the pumpkin. p. 1
Where to find it in the PDF
- Assembly Instructions p. 1
Table of contents
Manual images
Click an image to enlargeQuick guide from the manual
This document provides assembly instructions for the Glitzhome 2005600030 Pumpkin Yard Decoration. It details the parts included and the step-by-step process to assemble the stakes and attach the decorative sign.
Parts list
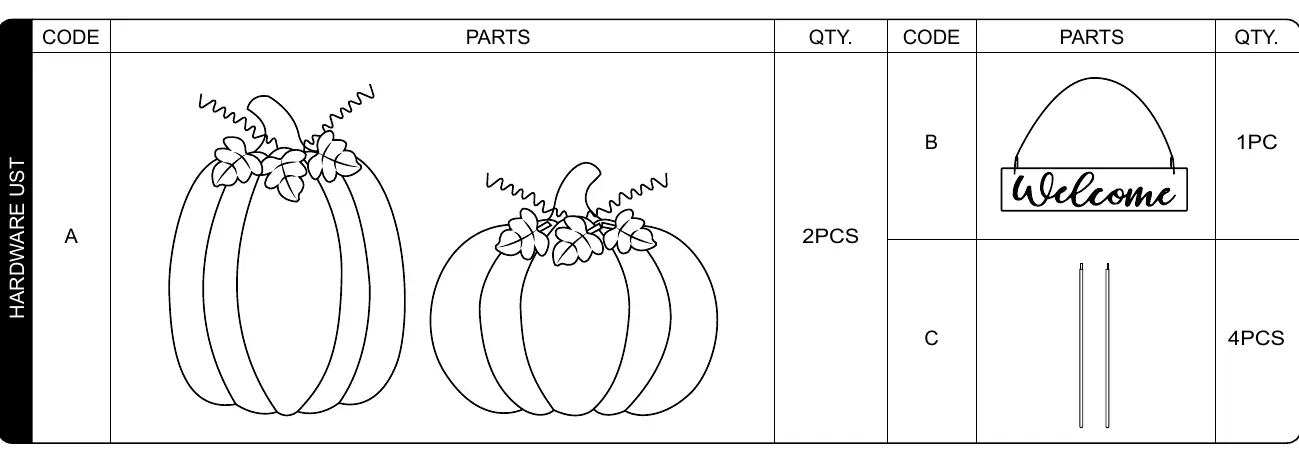
- Part A: Pumpkins (2 pcs)
- Part B: Welcome sign (1 pc)
- Part C: Stakes (4 pcs)
Assembly instructions
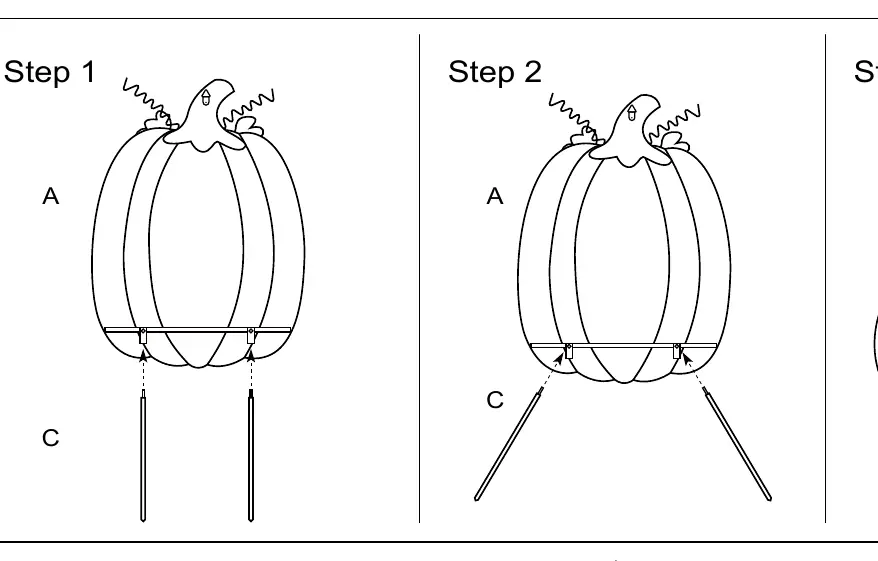
- Step 1: Insert the stakes (Part C) into the bottom of the pumpkins (Part A).
- Step 2: Ensure the stakes are securely positioned in the pumpkin base.
- Step 3: Prepare the Welcome sign (Part B) for attachment.
- Step 4: Attach the Welcome sign (Part B) to the pumpkin (Part A).
- Step 5: Verify the final assembly is stable and ready for placement in your yard.
Manufacturer information
Glitzhome Corporation, Ltd.
Practical help
Before use
- Verify all parts are present: 2 Pumpkins (Part A), 1 Welcome sign (Part B), and 4 Stakes (Part C).
- Ensure you have a clear, flat surface for assembly.
- Check that stakes are inserted fully into the pumpkin base for stability.
Images and diagrams
- The diagram illustrates the insertion of stakes into the bottom of the pumpkin figures.
- The diagram shows the attachment points for the Welcome sign onto the pumpkin structure.

Manual page author
Michael Turner
Technical manual editor
Reviews PDF manuals for structure, safety notes, and practical product details so readers can find the right information quickly.