Instructions for 12M PVC Inflatable Tent
Quick guide for setting up your 12M PVC Inflatable Tent. Includes step-by-step inflation instructions, accessory list, and dimensions to ensure proper assembly.
Table of contents
Manual images
Click an image to enlargeQuick guide from the manual
This guide provides instructions for the 12M PVC Inflatable Tent. It covers the setup process, including inflation sequences and securing the tent to the ground.
Product specifications
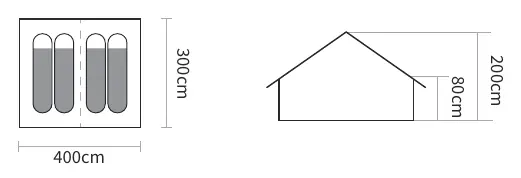
The tent features a footprint of 400cm by 300cm. The peak height is 200cm, with a side height of 80cm.
Included accessories
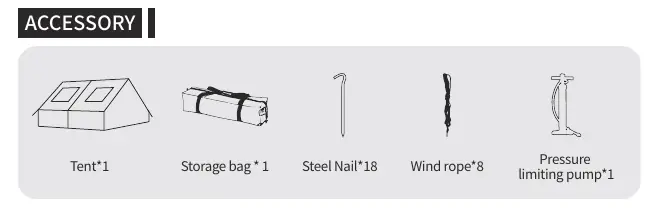
- 1x Tent
- 1x Storage bag
- 18x Steel nails
- 8x Wind ropes
- 1x Pressure limiting pump
Installation steps
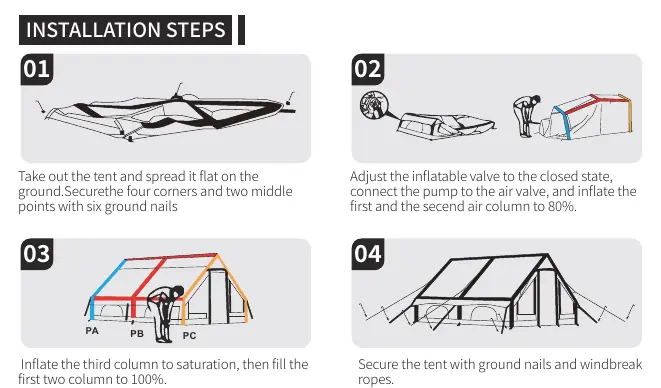
- Preparation: Take out the tent and spread it flat on the ground. Secure the four corners and two middle points using six ground nails.
- Initial Inflation: Adjust the inflatable valve to the closed state. Connect the pump to the air valve and inflate the first and second air columns to 80%.
- Full Inflation: Inflate the third column to saturation, then fill the first two columns to 100%. Note: The inflatable column can be identified through the air valve.
- Securing: Secure the tent with the remaining ground nails and windbreak ropes.
Manufacturer information
The Home Depot
Practical help
Common problems
Ensure the inflatable valve is in the closed state before connecting the pump.
Follow the specific sequence: inflate the first two columns to 80%, then the third to saturation, then the first two to 100%.
Before use
- Verify all 18 steel nails are present.
- Check for 8 wind ropes.
- Ensure the pressure limiting pump is included.
- Clear the ground of sharp objects before spreading the tent.

Manual page author
Emily Carter
User documentation editor
Prepares concise manual descriptions and highlights the most useful setup, operation, and maintenance information for readers.