User Manual for Hoselink Soaker Hose 4852/4853
Quick guide for the Hoselink Soaker Hose (4852/4853). Learn how to set up, connect, extend, and use your soaker hose for optimal garden watering.
Table of contents
Quick guide from the manual
The Hoselink Soaker Hose is designed for efficient garden watering. Key usage points include:
- Watering width: Covers up to 4 meters (2 meters on either side).
- Extension limit: Do not connect more than two 15m hoses together to avoid water pressure issues.
- Versatility: Can be used as a sprinkler (holes facing up) or for deep watering (jets facing down).
Kit Contents
- 1x 7.5m or 15m Soaker Hose
- 1x Hoselink Accessory Connector
Using the Soaker Hose
- Lay the soaker hose along the desired section of your garden.
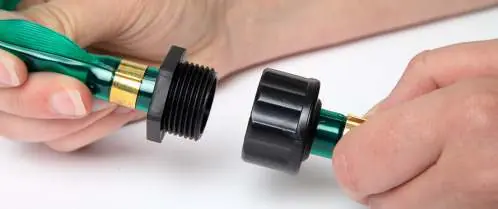
- Connect the Hoselink Accessory Connector to the black cap at the end of the soaker hose.
- Connect the assembly to your Hoselink-fitted hose.
Extending the length
To cover larger areas, you can connect two soaker hoses together:
- Remove the Hoselink Accessory Connector and stop cap from one of the hoses.
- Use the internal thread on one end and the external thread on the other to screw the two hoses together.
- Connect the Accessory Connector to the end of the second hose.
Practical help
Common problems
Low water pressure or poor flow
Do not connect more than two 15m hoses together, as this can cause water pressure issues.
Before use
- Ensure you have the Soaker Hose and the included Accessory Connector.
- Identify the garden area to be watered (the hose covers up to 4 meters wide).
- Decide if you need to use it as a sprinkler (holes up) or for deep watering (jets down).

Manual page author
David Miller
Documentation analyst
Organizes user manual content into clear summaries, with attention to model details, product context, and everyday usability.