IKEA PJÄTTERYD Wall Art Installation Guide
Learn how to safely install your IKEA PJÄTTERYD wall art set. This guide covers wall mounting requirements, necessary hardware considerations, and step-by-step installation instructions.
Quick answers from the manual
Quick answer
- This manual provides instructions for installing the PJÄTTERYD wall art set, noting that wall screws are not included due to varying wall materials. p. 1
Key actions
- Select appropriate screws for your specific wall material, as they are not included. p. 1
- Install the wall art pieces following the provided layout diagram. p. 1
First start
- Prepare the wall, install the necessary mounting hardware (not included), and hang the art pieces. p. 1
Show 2 more answers Show less
Technical specifications
| Parameter | Value | Meaning | Pages |
|---|---|---|---|
| Dimensions | 82 x 65 cm, 38,5 x 65 cm, 24 x 32 cm | Sizes of the individual wall art pieces | p. 1 |
Where to find it in the PDF
- Installation guide and dimensions p. 1
Quick guide from the manual
The IKEA PJÄTTERYD wall art set does not include screws for wall mounting. Because wall materials vary significantly (e.g., drywall, concrete, wood), you must consult a local hardware store to purchase the appropriate screw and anchor system for your specific wall type.
Installation
Follow these steps to mount your wall art:
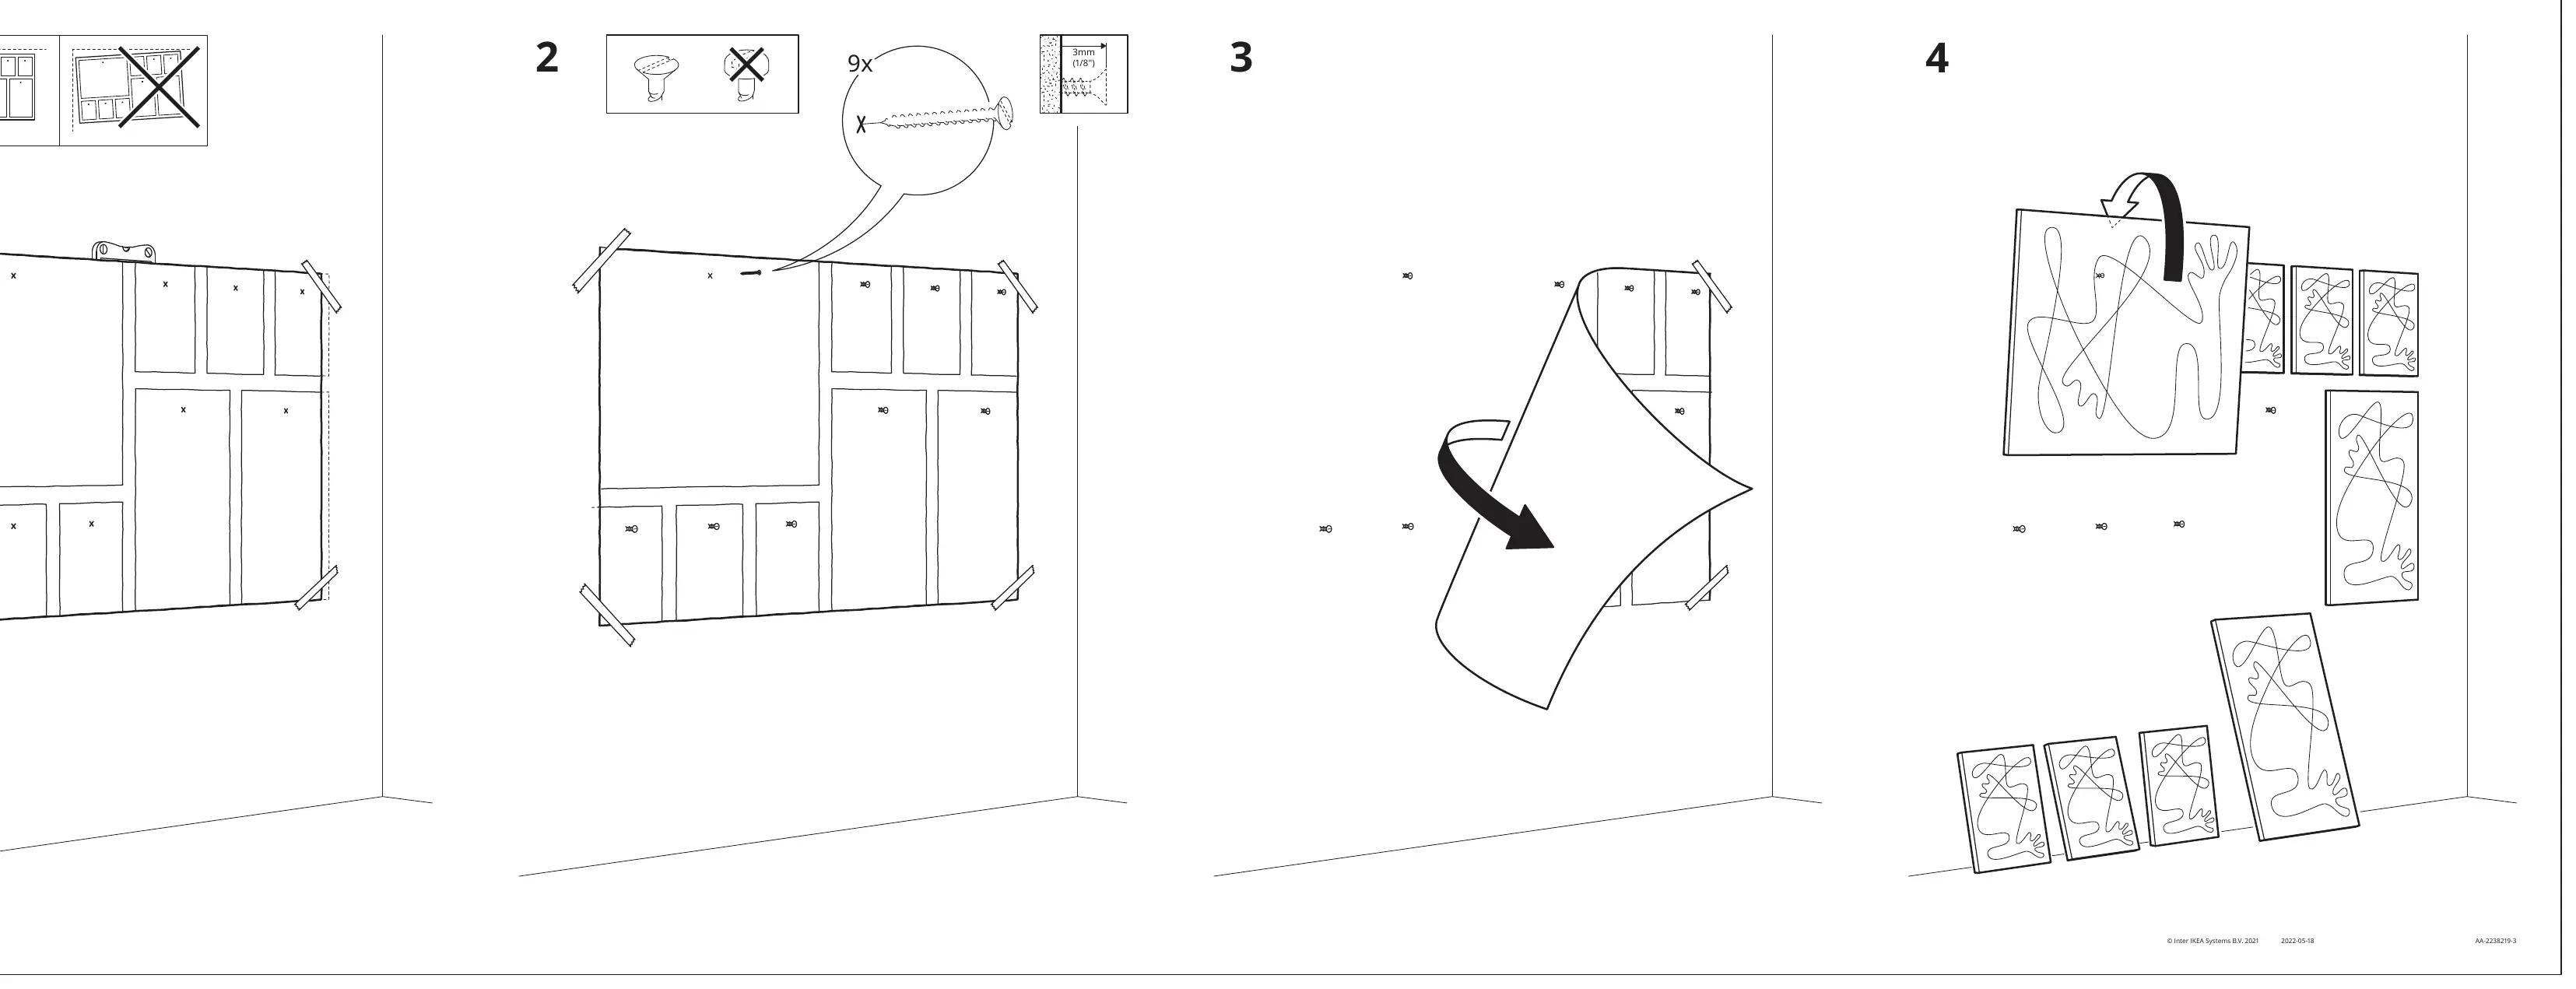
- Plan the layout: Determine the desired arrangement of the paintings on your wall.
- Prepare the wall: Mark the mounting points. Select and install the correct screws and wall plugs suitable for your wall material.
- Mount the art: Carefully hang the frames onto the installed screws.
- Final check: Ensure all pieces are securely attached and aligned according to your layout.
Manufacturer information
IKEA
Practical help
Common problems
Screws are missing from the package
Screws are not included because wall materials vary. You must purchase screws and wall plugs suitable for your specific wall type (e.g., drywall, concrete, wood) at a local hardware store.
Before use
- Identify your wall material (drywall, concrete, brick, etc.)
- Purchase appropriate screws and wall plugs for your wall type
- Plan the layout of the art pieces on the wall
- Ensure you have a drill and level if needed

Manual page author
Emily Carter
User documentation editor