IKEA PLÖJKER Nightstand Assembly Instructions
Assembly guide for the IKEA PLÖJKER nightstand. Includes essential safety warnings regarding wall attachment, required tools, and step-by-step installation instructions.
Table of contents
Manual images
Click an image to enlargeQuick guide from the manual
The IKEA PLÖJKER nightstand requires assembly. The most critical safety instruction is to permanently attach the furniture to the wall to prevent tipping, which can cause serious or fatal crushing injuries.
Safety and wall mounting
Wall screws and plugs are not included with the product because different wall materials require different types of fixing devices. You must assess the suitability of your wall to ensure it can withstand the forces generated by the furniture. If you are uncertain about which screws or plugs to use, consult a professional.
Tools required
You will need a screwdriver (flat-head and cross-head) and a pencil for marking.
Assembly instructions
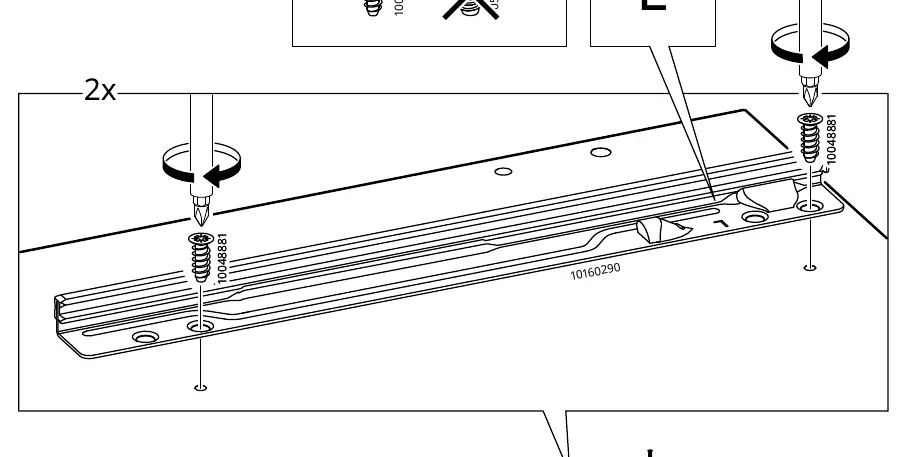
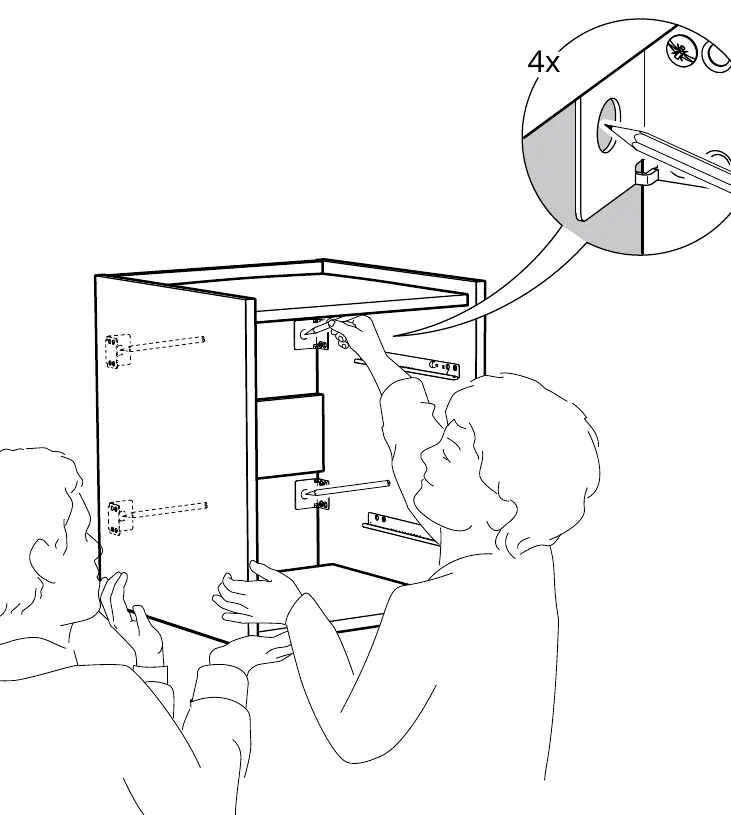
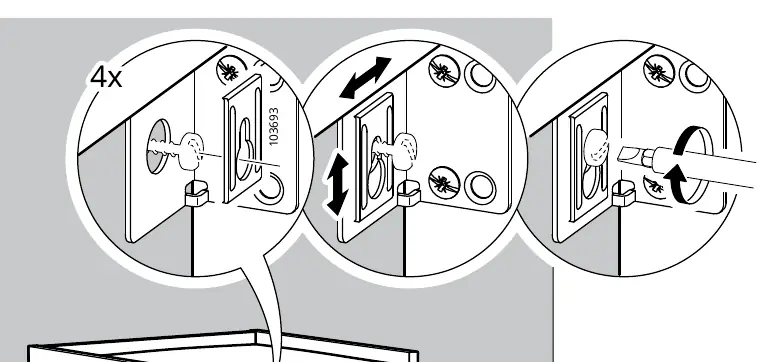
The assembly process involves multiple steps, primarily using cam locks and dowels. Follow the numbered diagrams in the manual carefully:
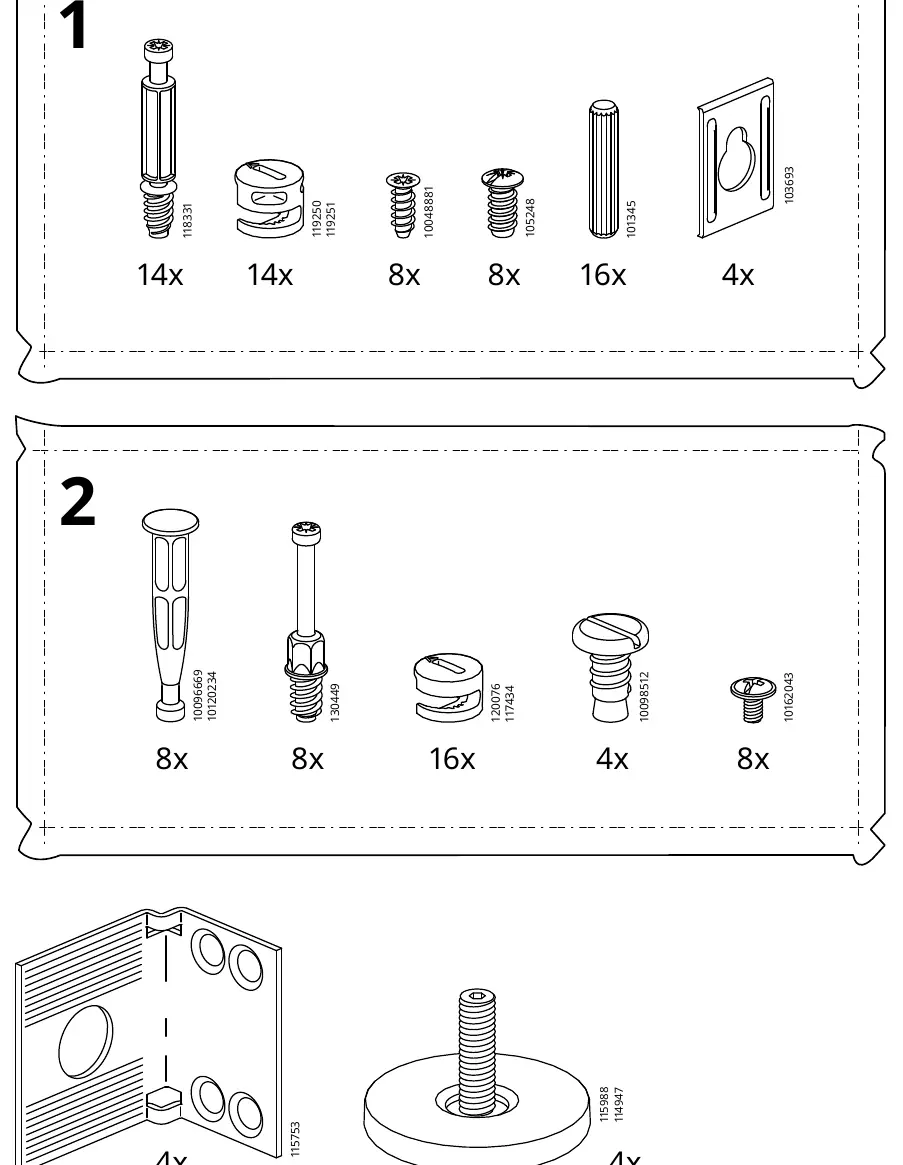
- Identify all parts before starting.
- Follow the sequence of steps 1 through 37.
- Ensure cam locks are tightened correctly.
- Do not use power tools to avoid damaging the furniture.
Manufacturer information
IKEA
Practical help
Common problems
Must be attached to the wall using the provided devices to prevent serious injury.
Wall screws and plugs are not included; purchase ones suitable for your specific wall material and load.
Before use
- Check wall material suitability
- Ensure you have a screwdriver (flat and cross)
- Verify all parts are present as per the parts list
- Do not use power tools

Manual page author
Michael Turner
Technical manual editor
Reviews PDF manuals for structure, safety notes, and practical product details so readers can find the right information quickly.