Assembly Instructions for Manomano 01DTSHRAX0806SDNW-V1 8x6 Shiplap Shed
A comprehensive assembly and maintenance guide for the 8x6 Shiplap Shed. Includes step-by-step construction, base preparation, timber treatment requirements, and troubleshooting tips.
Table of contents
Quick guide from the manual
This document provides assembly instructions for the 8x6 Shiplap Shed. Key requirements include assembly by two adults, a level and firm base, and immediate wood treatment after construction to maintain the anti-rot guarantee. Ensure you have all parts and tools (Phillips screwdriver, Stanley knife, wood saw, step ladder, hammer, and drill with 2mm bit) before starting.
Site preparation and base
Leave a minimum of 60cm around the perimeter for maintenance and airflow. Avoid placing the building under large trees. The base must be level and firm, such as 75mm concrete on 75mm hard-core or slabs on 50mm sharp sand. The floor should be at least 25mm above surrounding ground level to prevent flooding.
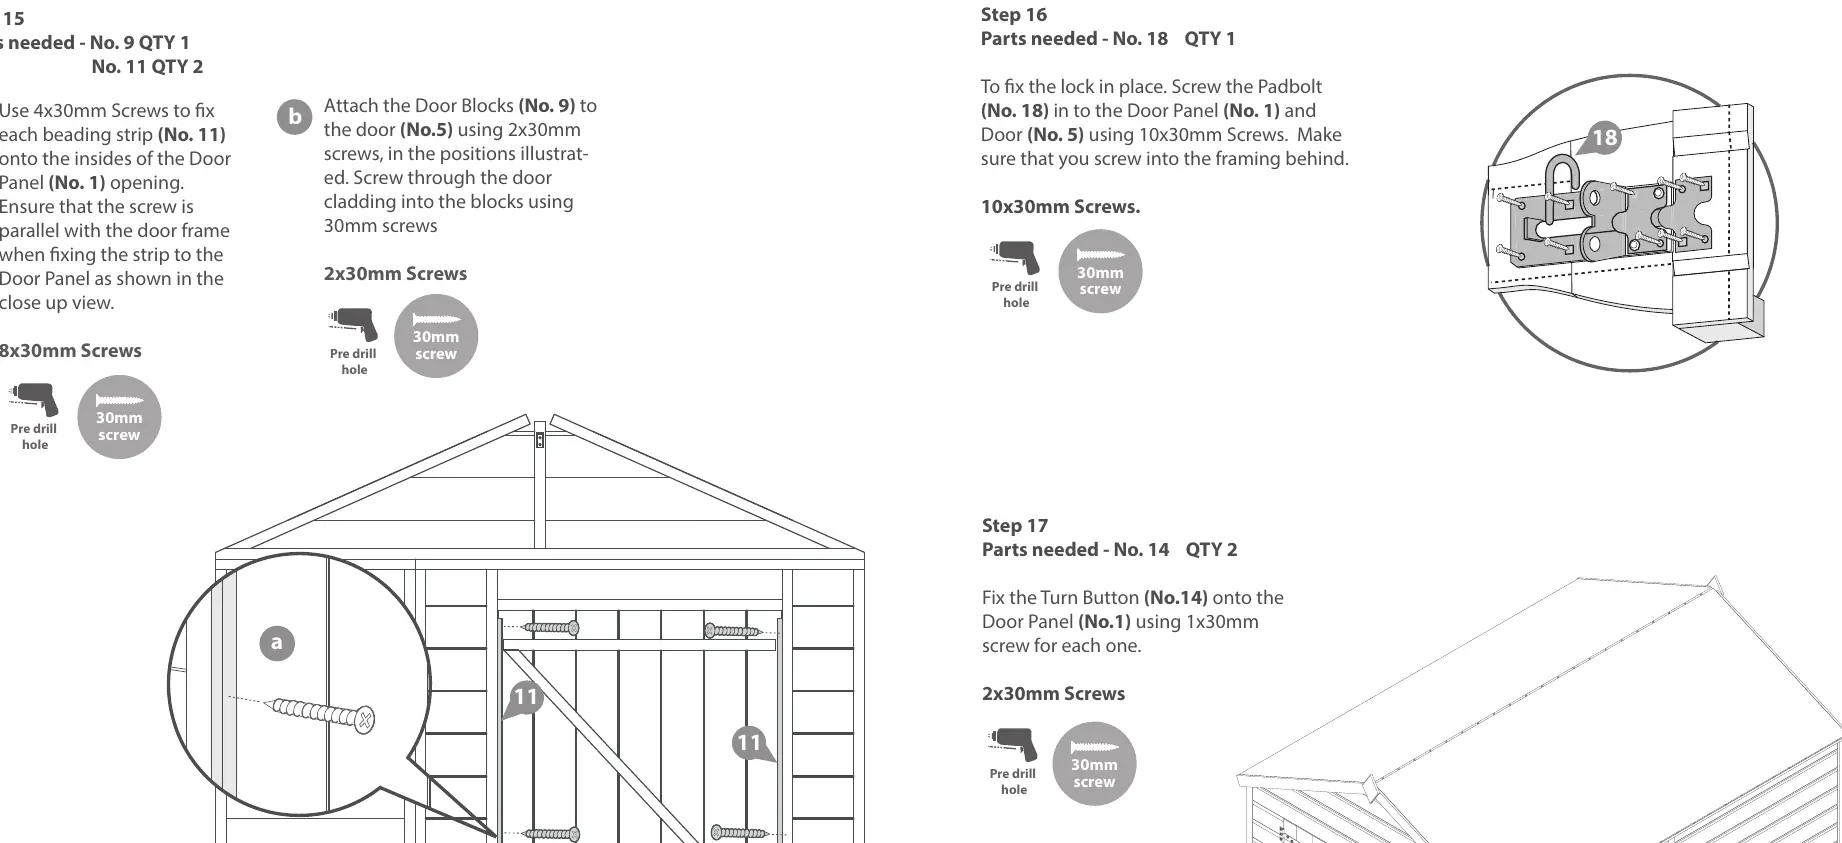
Assembly steps
Pre-assembly: Remove transportation blocks from the bottom of each panel. Step 1: Fix T-hinges to the door panel. Step 2: Secure floor panels together. Steps 3-6: Assemble side, gable, and door panels using 50mm screws. Step 7: Attach gable tops. Step 8: Install the ridge bar. Step 9-10: Fix roof panels and secure with 60mm and 40mm screws. Step 11: Attach the building to the floor. Steps 12-17: Apply roofing felt, cover trims, fascias, finials, door beading, padbolt, and turn buttons.
Maintenance and wood characteristics
Timber is a natural material affected by weather. Swelling may occur during rain, and warping during dry spells. Apply wood preservative immediately after assembly and annually thereafter. Use a silicon sealant on windows to prevent water ingress. If mould appears, use an anti-mould cleaner. Remove snow from the roof to prevent damage.
Practical help
Common problems
This is a natural process. Spray with water during dry spells and shelter during heavy rain. Apply preservative annually.
Ensure good ventilation by leaving doors/windows open occasionally. Use an anti-mould cleaner to remove existing growth.
Wear gloves when handling rough sawn timber.
Before use
- Check all parts against the list.
- Ensure you have a Phillips screwdriver, Stanley knife, wood saw, step ladder, hammer, and drill with 2mm bit.
- Prepare a level, firm base (concrete or slabs).
- Ensure 60cm clearance around the building.
- Have two adults available for assembly.
Specs in practice
- Overall Dimensions
- 1905mm (W) x 2432mm (D) x 2222mm (H).
- Base Dimensions
- 2350mm (W) x 1753mm (D).
Images and diagrams
- The manual provides specific diagrams for panel configurations (Apex vs Reverse Apex).
- Step-by-step illustrations show screw placement and pre-drilling requirements.
- Detailed views show how to attach hinges and door furniture.
Model compatibility
- The building is dip-treated with Aquatan; it requires additional preservative and waterproofing treatment immediately after assembly.
- Not suitable for placement under large trees due to potential damage.

Manual page author
Emily Carter
User documentation editor
Prepares concise manual descriptions and highlights the most useful setup, operation, and maintenance information for readers.