Assembly Instructions for MAUL MAULvega 938 30 Coat Rack
Step-by-step assembly guide for the MAUL MAULvega 938 30 coat rack. Includes a complete parts list and visual assembly instructions to ensure proper setup.
Quick answers from the manual
Quick answer
- The MAULvega 938 30 is a coat rack. This document provides the assembly instructions and parts list required to build the unit. p. 1
Key actions
- Assemble the base by securing the bottom pole section with the screw and washer. p. 1
- Attach hooks to the top pole section using the provided screws and Allen key. p. 1
Problems and fixes
Tighten the screw at the bottom of the base.
p. 1Where to find it in the PDF
- Assembly Diagram p. 1
- Product Overview and Disposal p. 2
Table of contents
Assembly Guide for MAUL MAULvega 938 30
This guide provides instructions for assembling the MAUL MAULvega 938 30 coat rack. Please ensure all parts are present and accounted for before beginning the assembly process.
Parts List
- 1: Hook (6x)
- 2: Top pole section (1x)
- 3: Middle pole section (1x)
- 4: Bottom pole section (1x)
- 5: Base (1x)
- 6: Screw for base (1x)
- 7: Washer (1x)
- 8: Screw for hooks (6x)
- 9: Allen key (1x)
- 10: Knob (6x)
Assembly Instructions
Follow these steps to assemble the coat rack:
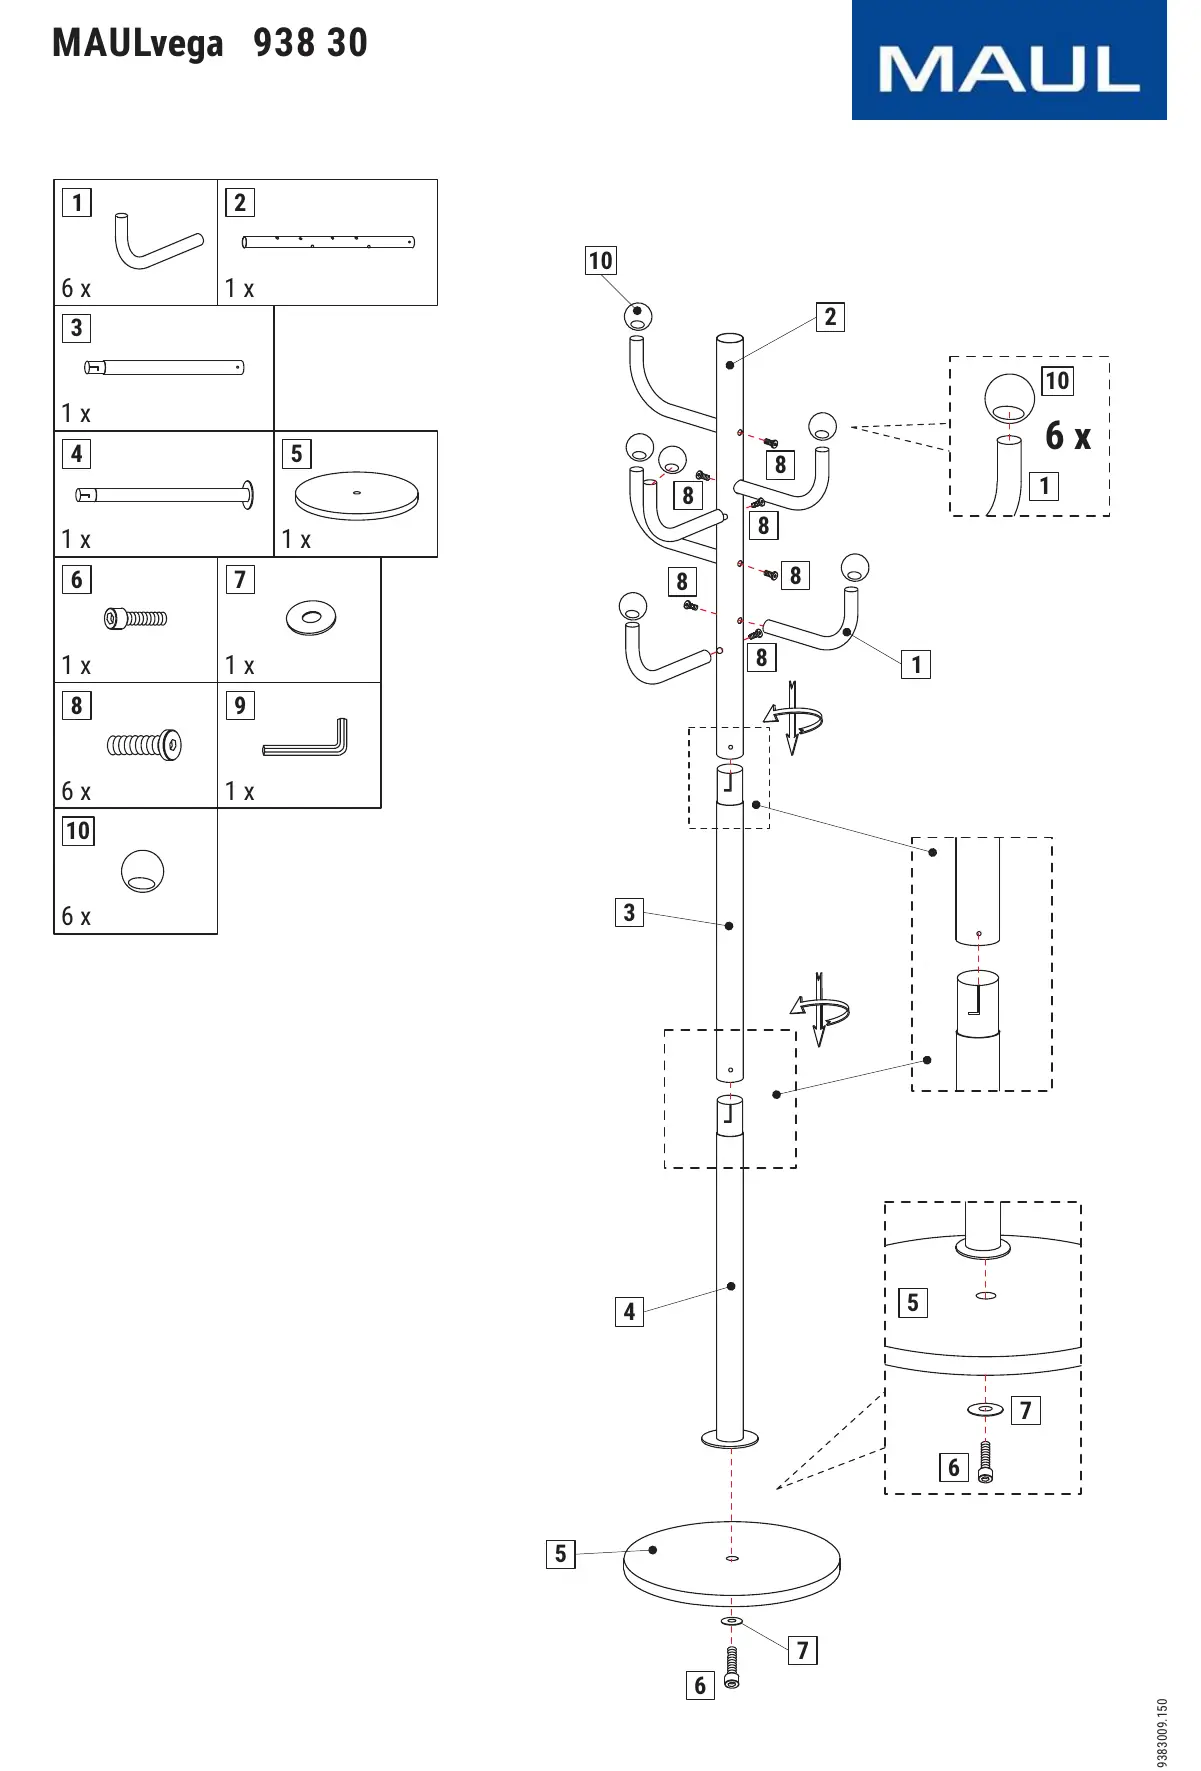
- Base Assembly: Place the base (5) on a flat, stable surface. Align the bottom pole section (4) with the center of the base. Secure the pole to the base from underneath using the screw (6) and washer (7).
- Pole Assembly: Connect the pole sections (4, 3, and 2) together. Ensure each section is screwed in tightly to maintain stability.
- Hook Attachment: Attach the hooks (1) to the top pole section (2) using the provided screws (8). Use the included Allen key (9) to tighten them securely.
- Finishing: Screw the knobs (10) onto the ends of each hook (1).
Manufacturer information
Jakob Maul GmbH
Practical help
Common problems
Check the screw at the base (part 6) and ensure it is fully tightened against the washer (part 7).
Use the provided Allen key (part 9) to tighten the screws (part 8) connecting the hooks to the pole.
Before use
- Verify all parts are present according to the parts list (6 hooks, 6 knobs, 6 screws, etc.).
- Ensure you have a flat, stable surface for assembly.
- Check that all screws are tightened securely during assembly.
- Do not overtighten screws to avoid damaging the threads.

Manual page author
Emily Carter
User documentation editor
Prepares concise manual descriptions and highlights the most useful setup, operation, and maintenance information for readers.