User Manual for MicroTouch DT-190P-M1 Medical Grade Touch Monitor
Quick guide for the MicroTouch DT-190P-M1 medical-grade touch monitor, covering setup, OSD menu navigation, mounting instructions, and troubleshooting.
Table of contents
Manual images
Jump to the sectionQuick guide from the manual
This document provides essential instructions for the MicroTouch DT-190P-M1 medical-grade touch monitor. It covers safe installation, connection procedures, OSD menu configuration, and basic troubleshooting to ensure optimal performance and safety.
Product Setup and Use
The monitor features multiple input options. Connect the power supply to a grounded 100-240V AC outlet. Use the provided USB cable to connect the touch output to your computer. For video, you can use DisplayPort (DP), HDMI, or VGA. Digital connections (DP or HDMI) are preferred for better performance.

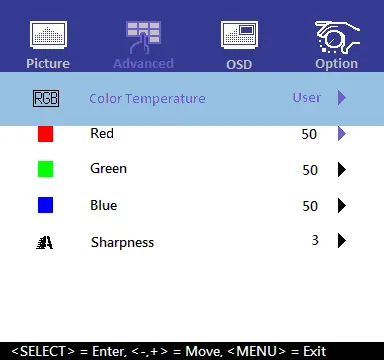
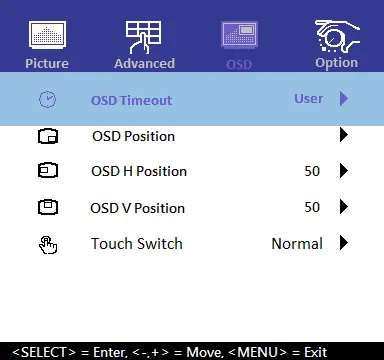
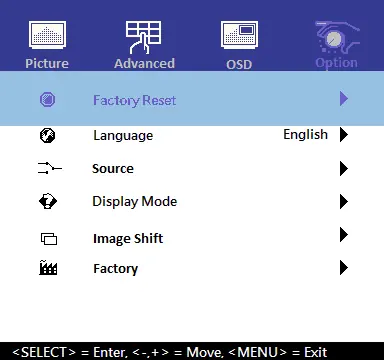
On-Screen Display (OSD)
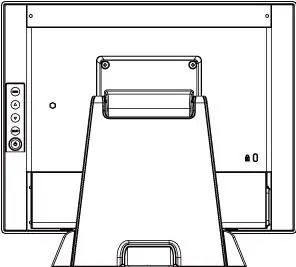
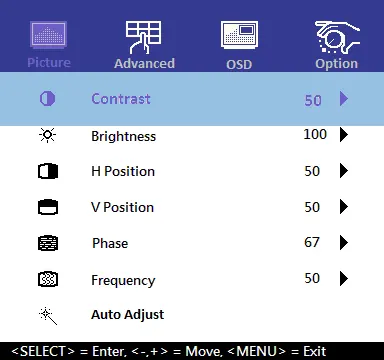
The OSD controls are located on the right rear side of the monitor. Use the buttons to navigate menus, adjust brightness, contrast, and color settings. You can also lock the OSD and power button functions by holding the Select button for 5 seconds to access the lock menu.
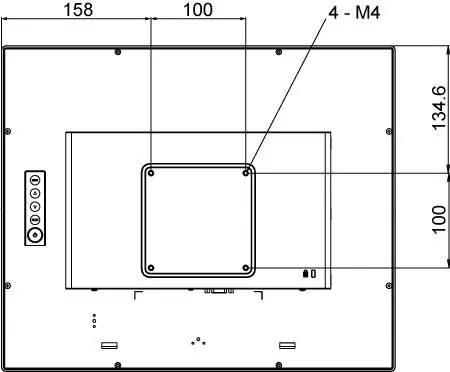
Mounting Options
The monitor supports a 100mm x 100mm VESA mount. When mounting, ensure you use four M4 diameter screws with a length of 8mm to avoid damaging the internal components.
Cleaning and Maintenance
Always turn off and disconnect the monitor from power before cleaning. Use a soft, dry cloth for ventilation areas. For the screen, apply a glass cleaning solution to a soft cloth and wipe gently. Never spray cleaning solution directly onto the monitor or use abrasive solvents.
Troubleshooting
If you encounter issues, check all cable connections first. If the display is dim, adjust brightness and contrast via the OSD. For "Out of Range" messages, ensure your computer's resolution matches the monitor's supported timings. If touch functionality fails, verify the USB connection and ensure the screen is free of protective sheets or obstructions.
Practical help
Common problems
Check that the video source is on, the input signal matches the connection, and the power cable is fully seated.
This occurs with VGA input; switch to HDMI or DP, or reduce the computer's resolution to a supported timing.
Ensure the USB cable is connected, remove any protective sheets from the screen, and cycle the power.
If using the optional wired remote, ensure it is securely connected.
Before use
- Ensure the power outlet is grounded (100-240V AC).
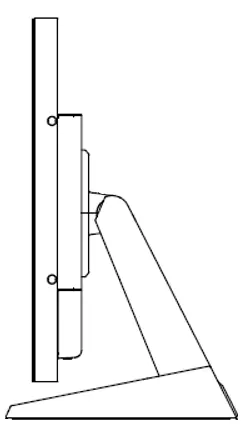
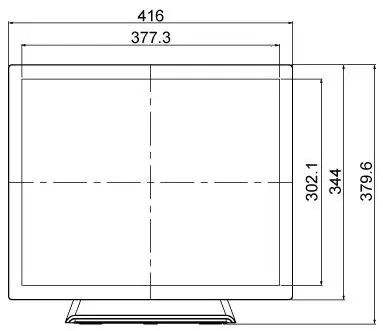
- Verify that the monitor is placed on a stable surface with at least 10 cm of ventilation space.
- Connect the USB cable for touch functionality.
- Remove any protective sheets from the screen before powering on.
- Ensure the environment is within the operating temperature (0°C to 40°C) and humidity (20-90%) ranges.
Images and diagrams
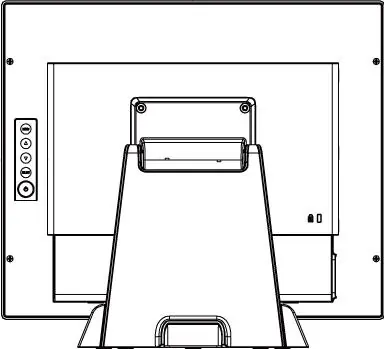
- The rear panel contains the DC power input, DP, HDMI, VGA, RJ11 (for remote), and USB (touch) ports.
- The OSD keypad is located on the right rear side of the monitor.
- VESA mounting requires 4 x M4 screws with 8mm length.
Model compatibility
- Plug and Play support for Windows 7 or later, Linux (Kernel 3.2+), and Android 1.0+.
- Legacy operating systems prior to 2007 may require specific drivers.

Manual page author
David Miller
Documentation analyst
Organizes user manual content into clear summaries, with attention to model details, product context, and everyday usability.