Installation and Assembly Guide for Millwood Pines Sephine 2-Tier Floating Shelf
Quick assembly and installation guide for the Millwood Pines Sephine 2-Tier Floating Shelf. Includes parts list, mounting instructions, and care tips.
Quick answers from the manual
Quick answer
- The Millwood Pines Sephine is a 2-tier floating shelf. Assembly requires tightening bolts to 50% initially, then fully tightening once all parts are in place. p. 1
Key actions
- Tighten bolts to 50% during assembly, then fully tighten. p. 1
Maintenance and reset
- Clean regularly with a soft and dry cloth. Avoid abrasive cleaners. p. 1
Where to find it in the PDF
- Parts and Care p. 1
- Assembly and Mounting p. 2
Table of contents
Manual images
Click an image to enlargeQuick guide from the manual
This guide provides instructions for the assembly and wall mounting of the Millwood Pines Sephine 2-Tier Floating Shelf. The most important assembly rule is to tighten bolts only up to 50% initially, and fully tighten them only after all parts are in place.
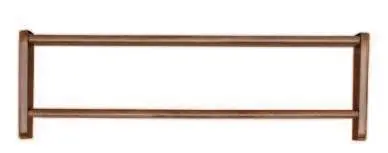
Product parts
The package includes the wooden shelf components and necessary hardware (bolts and fasteners).
Assembly and installation
Assembly:
- Assemble the shelf components.
- Tighten bolts to 50% capacity during the initial assembly phase.
- Once all parts are aligned and in place, fully tighten all bolts.
Installation:
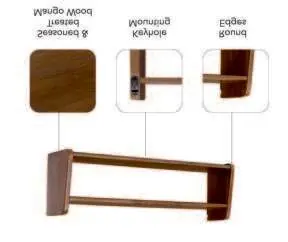
- The shelf features keyhole mounting slots on the back.
- Prepare the wall surface and install the mounting hardware.
- Align the keyhole slots on the shelf with the wall fasteners to secure the unit.
Care and maintenance
- Clean the shelf regularly using a soft and dry cloth.
- Avoid the use of abrasive cleaners to protect the finish.
- Wipe up any spills immediately.
Practical help
Common problems
Ensure all bolts are fully tightened after the initial 50% assembly step.
Avoid using abrasive cleaners; use only a soft, dry cloth for cleaning.
Before use
- Verify all parts are present according to the parts list
- Have a screwdriver ready for assembly
- Identify wall mounting points
- Ensure the wall surface is suitable for mounting

Manual page author
David Miller
Documentation analyst
Organizes user manual content into clear summaries, with attention to model details, product context, and everyday usability.