Quick Start Guide for Philips 24E2G2200 Monitor
Quick start guide for the Philips 24E2G2200 monitor. Includes instructions for stand assembly, cable connections, and basic tilt adjustments.
Quick answers from the manual
Quick answer
- This guide provides basic setup instructions for the Philips 24E2G2200 monitor, including stand assembly, cable connections, and tilt adjustment. p. 1
Key actions
- Assemble the stand p. 1
First start
- Connect the power adapter and video cables (HDMI or DP) to the ports on the back of the monitor. p. 1
Show 2 more answers Show less
Technical specifications
| Parameter | Value | Meaning | Pages |
|---|---|---|---|
| Tilt | +20° / -5° | Vertical tilt adjustment range | p. 1 |
Where to find it in the PDF
- Quick Start Guide p. 1
Table of contents
Manual images
Click an image to enlargeQuick guide from the manual
This document provides essential setup instructions for the Philips 24E2G2200 monitor. Before beginning, ensure you have a clean, smooth surface to place the monitor on to prevent screen damage.
Assembly
To assemble the monitor stand:
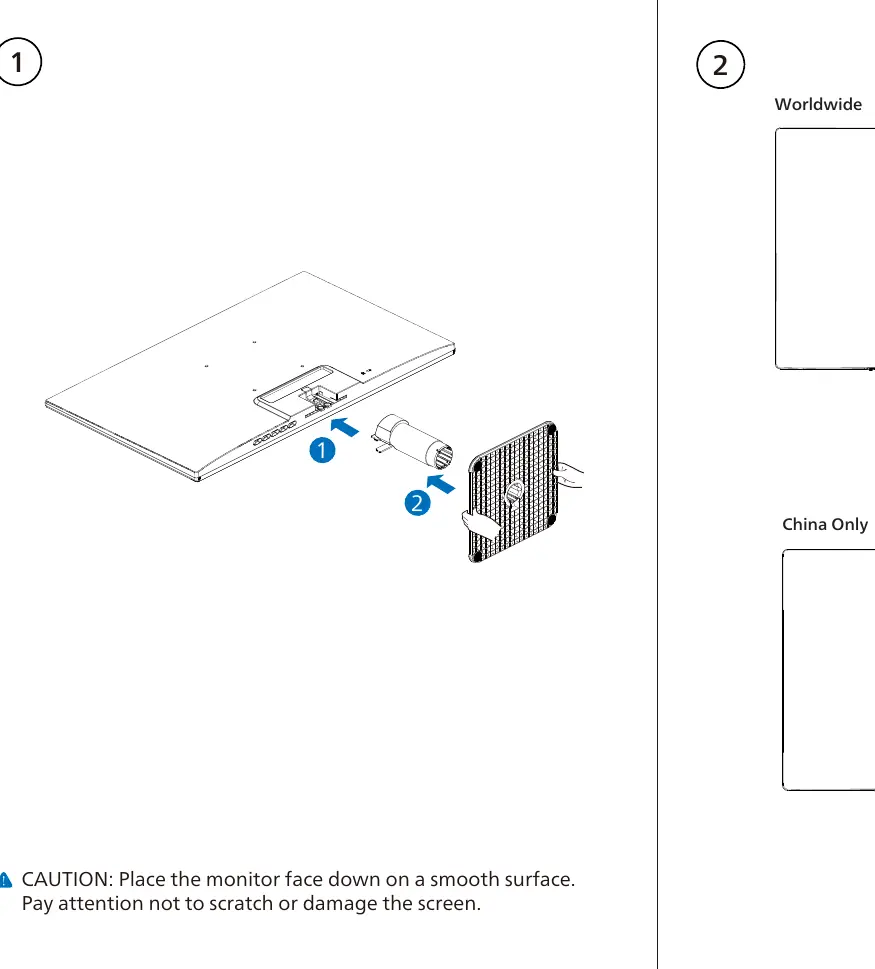
- Place the monitor face down on a smooth surface.
- Attach the stand base to the monitor body as shown in the assembly diagram.
Connections
The monitor features the following connection options located on the rear panel:
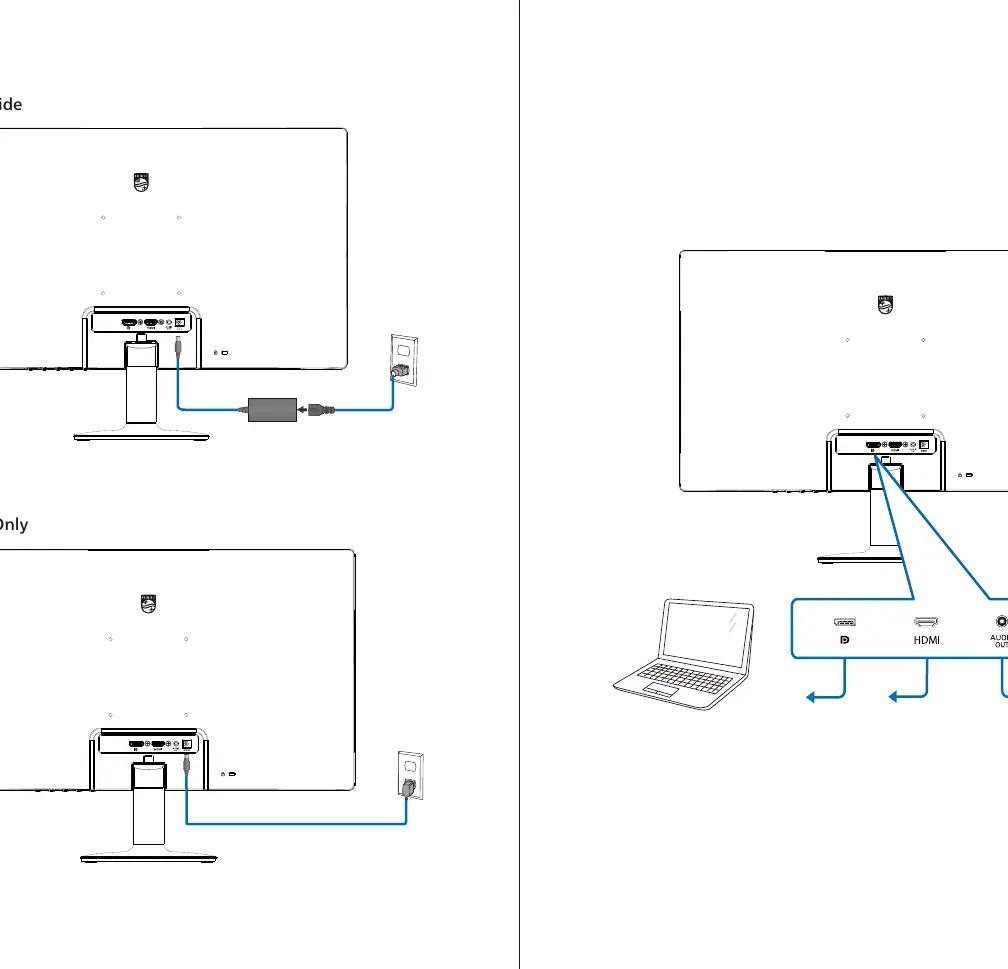
- Power input
- HDMI port
- DisplayPort (DP)
- Audio output
Adjustments and Controls
The monitor supports vertical tilt adjustment ranging from -5° to +20°. The OSD (On-Screen Display) menu is controlled via the button/joystick located on the rear of the monitor.
Manufacturer information
Philips
Practical help
Common problems
Always place the monitor face down on a smooth, clean surface before attaching the stand.
Before use
- Ensure the surface is smooth and clean
- Verify all cables (HDMI/DP) are included
- Check power adapter compatibility

Manual page author
David Miller
Documentation analyst