Quick Start Guide for Philips 246E1 LCD Monitor
Quick start guide for the Philips 246E1 LCD monitor. Includes assembly instructions, connection diagrams, OSD menu navigation, and setup tips.
Quick answers from the manual
Quick answer
- This guide provides setup instructions for the Philips 246E1 monitor, including stand assembly, cable connections, and OSD menu navigation. p. 1
Key actions
- Assemble the stand and attach it to the monitor. p. 1
- Connect power and video cables (HDMI, DP, or USB-C). p. 1
First start
- Connect the AC/DC adapter to power and the video cable to your computer, then press the power button. p. 1
Show 2 more answers Show less
Technical specifications
| Parameter | Value | Meaning | Pages |
|---|---|---|---|
| Tilt | -5° to +20° | Vertical tilt adjustment | p. 1 |
| VESA Mount | 100mm | Wall mount standard | p. 1 |
Where to find it in the PDF
- Quick Start Guide p. 1
Table of contents
Manual images
Click an image to enlargeQuick Start Guide
This guide covers the initial setup and basic operation of the Philips 246E1 LCD monitor. For detailed support, visit the official Philips website.
Package Contents
Ensure your package includes the following items (cables may vary by region):
- Monitor display
- Stand base and neck
- AC/DC Adapter
- USB C-C cable
- DisplayPort (DP) cable
- HDMI cable
Assembly
Follow these steps to assemble the monitor:
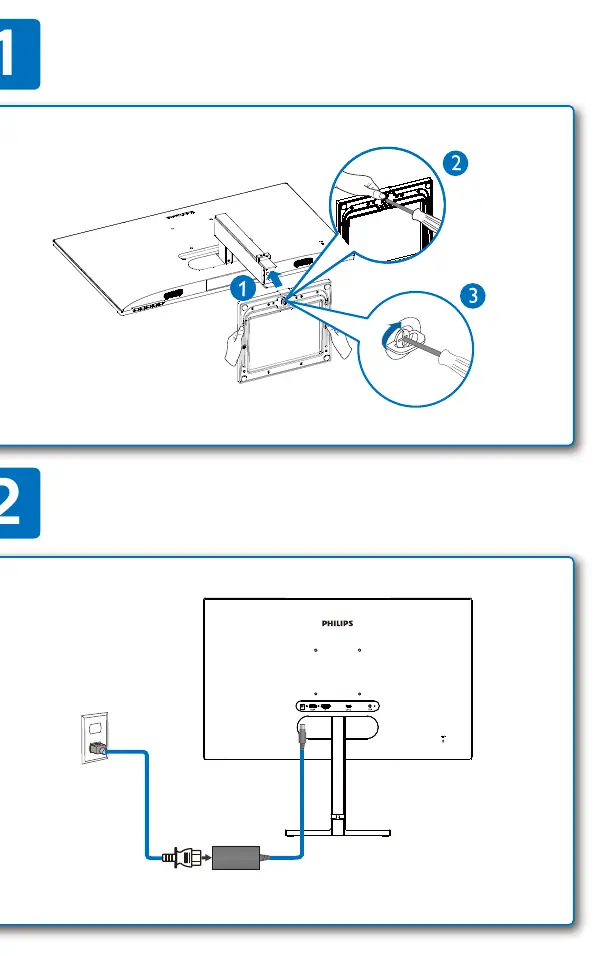
- Attach the stand neck to the base.
- Secure the stand to the monitor panel.
- Connect the power cable and necessary video cables.
Connections
The monitor supports multiple input sources. Connect your device using the appropriate cable:
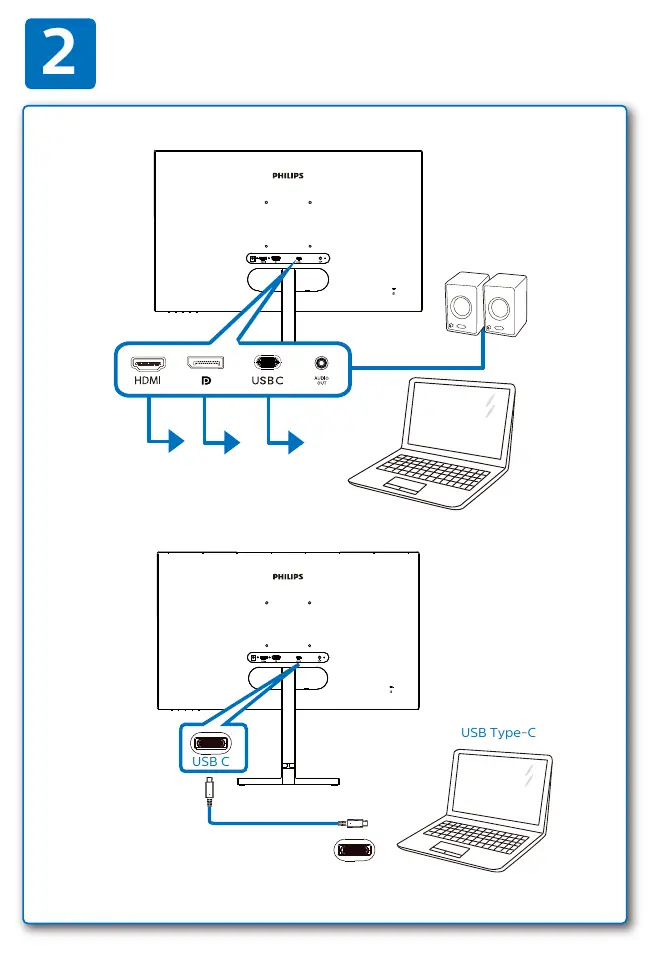
- HDMI: For standard video/audio connection.
- DisplayPort (DP): For high-performance video connection.
- USB-C: For video and data transfer.
OSD Menu Navigation
Use the joystick/buttons on the back of the monitor to navigate the On-Screen Display (OSD) menu:
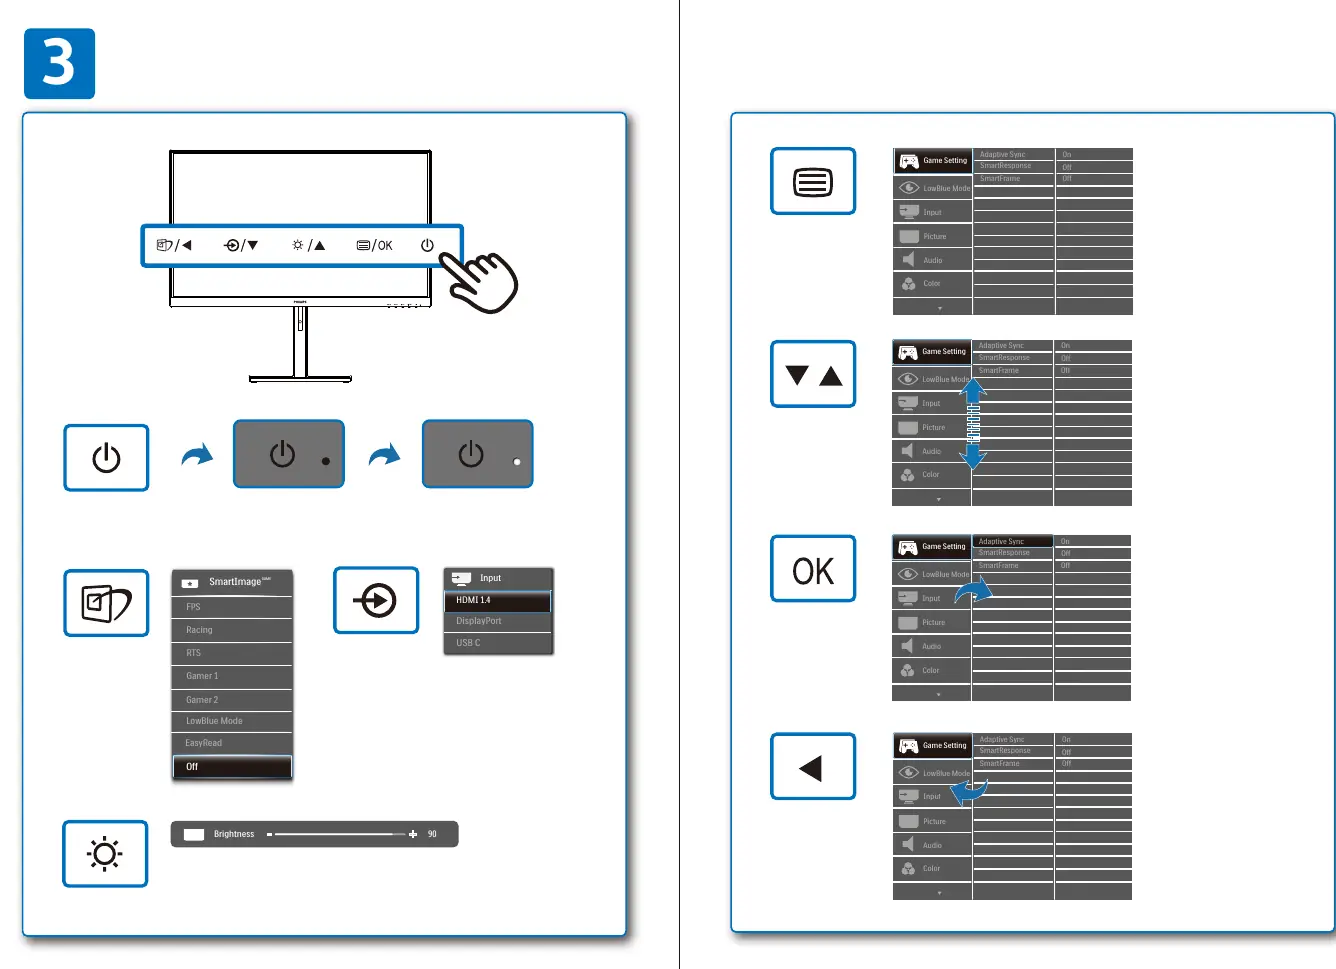
- Menu/OK: Open the menu or select an option.
- Navigation: Move up, down, left, or right through settings.
- Power: Turn the monitor on or off.
Available settings include Picture, Input, Game Setting, Adaptive Sync, Audio, LowBlue Mode, SmartResponse, SmartFrame, and Color.
Adjustments
The monitor supports the following physical adjustments:
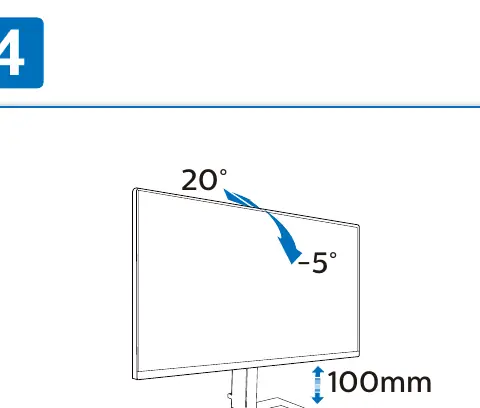
- Tilt: -5° to +20°.
- VESA Mount: 100mm standard.
Manufacturer information
Philips
Practical help
Before use
- Check package contents (AC/DC adapter, cables)
- Ensure stable surface for assembly
- Verify cable types (HDMI, DP, USB-C) for your device
Images and diagrams
- Assembly steps 1-3
- Cable connection ports
- OSD menu joystick navigation

Manual page author
Michael Turner
Technical manual editor