Quick Start Guide for Philips 2000 Series Monitor
Quick setup guide for the Philips 2000 Series monitors, including models 24E1N2100A, 27E1N2100A, 24E1N2100AW, and 27E1N2100AW. Includes assembly, cable connection, and control instructions.
Quick answers from the manual
Quick answer
- This guide provides instructions for assembling the stand, connecting cables, and using the basic controls of the Philips 2000 Series monitors. p. 1
Key actions
- Assemble the stand by attaching it to the monitor neck. p. 1
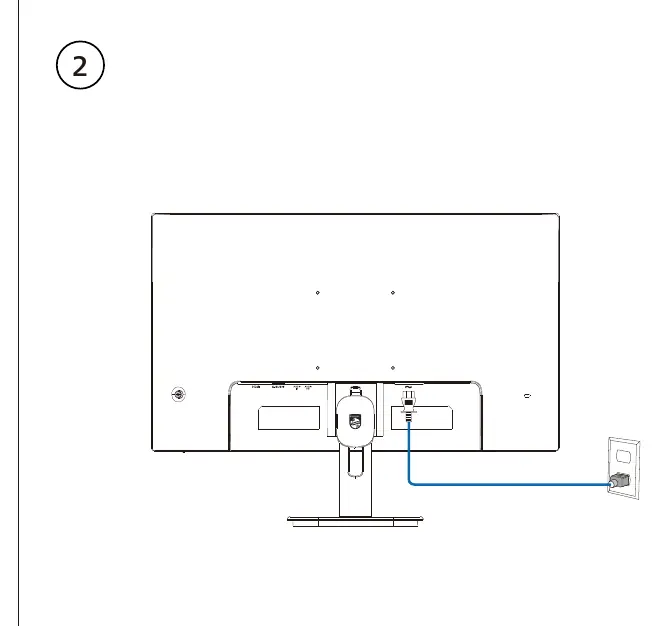
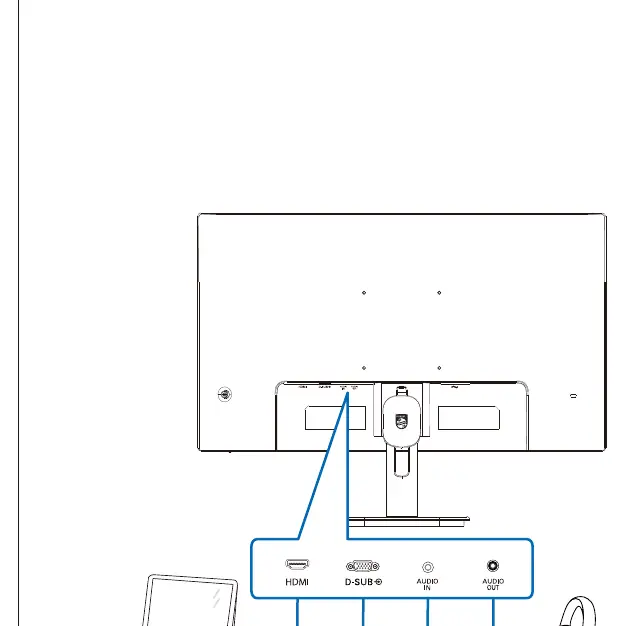
- Connect power, HDMI, VGA, and audio cables to the rear ports. p. 1
First start
- Place the monitor face down on a smooth surface, attach the stand, connect cables, and power on. p. 1
Show 2 more answers Show less
Technical specifications
| Parameter | Value | Meaning | Pages |
|---|---|---|---|
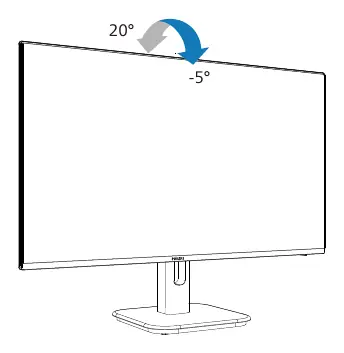
| Tilt | -5° to 20° | Vertical tilt range | p. 1 |
Where to find it in the PDF
- Quick Start Guide p. 1
Table of contents
Manual images
Click an image to enlargeQuick Start Guide
This guide provides essential setup instructions for the Philips 2000 Series monitors, covering models 24E1N2100A, 27E1N2100A, 24E1N2100AW, and 27E1N2100AW.
Safety Precautions
To prevent damage to the screen, always place the monitor face down on a smooth, clean surface during assembly.
Assembly and Setup
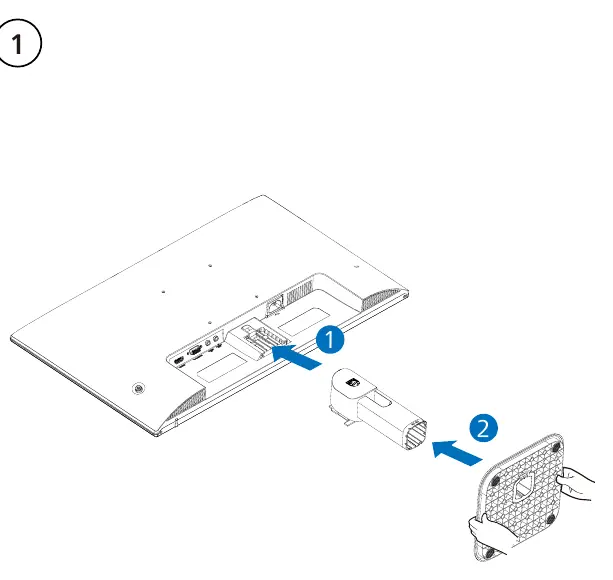
- Attach the Stand: Insert the stand base into the monitor neck until it clicks securely into place.
- Connect Cables: Connect the necessary cables (Power, HDMI, VGA, Audio) to the corresponding ports located on the back of the monitor.
- Power On: Connect the power cable to a wall outlet and turn on the monitor.
Monitor Controls
The monitor features on-screen display (OSD) controls for adjustments:
- Input: Select the video source.
- Volume: Adjust audio levels.
- SmartImage: Access image presets.
- Menu: Open the main settings menu.
Adjustments
The monitor stand allows for tilt adjustment ranging from -5° to 20°.
Support
For further assistance, software downloads, or FAQs, visit www.philips.com/support.
Official resources from the manual
Manufacturer information
Philips
Practical help
Before use
- Place monitor face down on a smooth surface to avoid scratches
- Ensure all required cables (HDMI, VGA, Audio, Power) are available
- Verify the desk surface is stable
Images and diagrams
- Step 1: Stand assembly procedure
- Step 2: Cable connection layout
- Step 3: Control button locations
- Step 4: Tilt adjustment range

Manual page author
Emily Carter
User documentation editor