Quick Start Guide for Philips S Line 191S8/201S8 Monitor
A quick setup guide for the Philips S Line 191S8/201S8 LCD monitor, covering stand assembly, cable connections, OSD menu navigation, and tilt adjustments.
Quick answers from the manual
Quick answer
- This guide provides instructions for assembling the Philips S Line 191S8/201S8 monitor, connecting cables, and using the OSD menu. p. 1
Key actions
- Assemble the stand p. 1
- Connect power and video cables p. 1
- Navigate OSD menu p. 1
First start
- Attach the stand, connect the power and video cables, then press the power button. p. 1
Show 1 more answers Show less
Where to find it in the PDF
- Quick Start Guide p. 1
Table of contents
Manual images
Click an image to enlargeQuick guide from the manual
This document provides a quick setup guide for the Philips S Line 191S8/201S8 monitor. It covers the basic assembly, cable connections, and OSD menu navigation to get your display running quickly.
Assembly
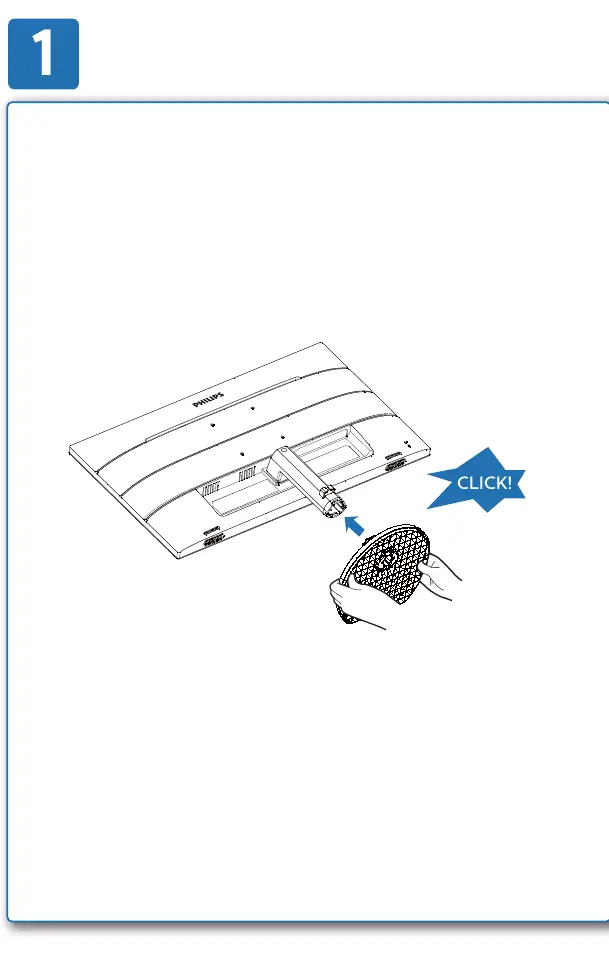
To assemble the monitor, attach the stand to the base until it clicks into place.
Connections
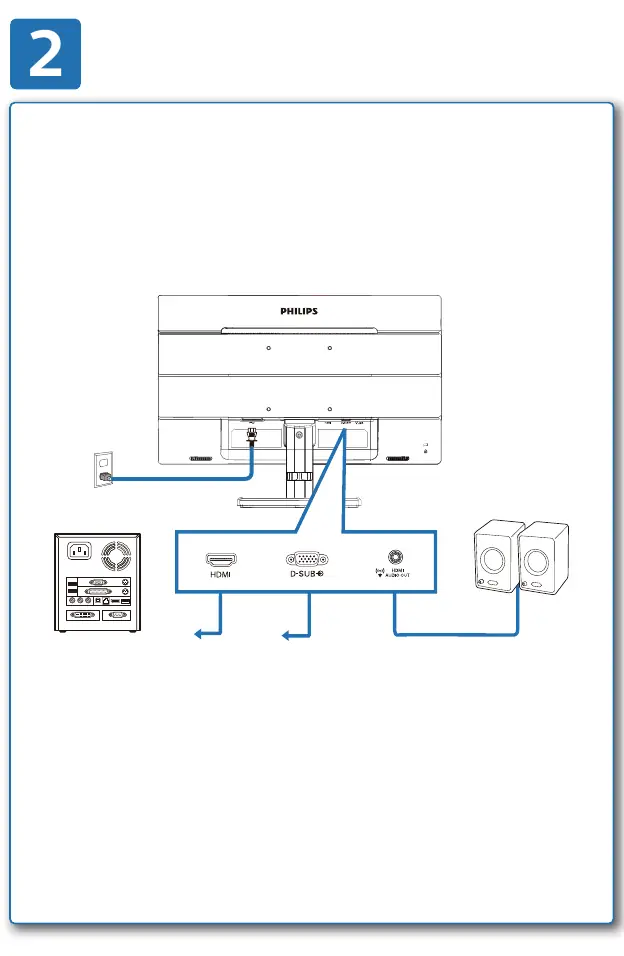
Connect the power cable to the power port. Connect your video source using either the VGA or HDMI cable, depending on your computer's output.
Controls and OSD Menu
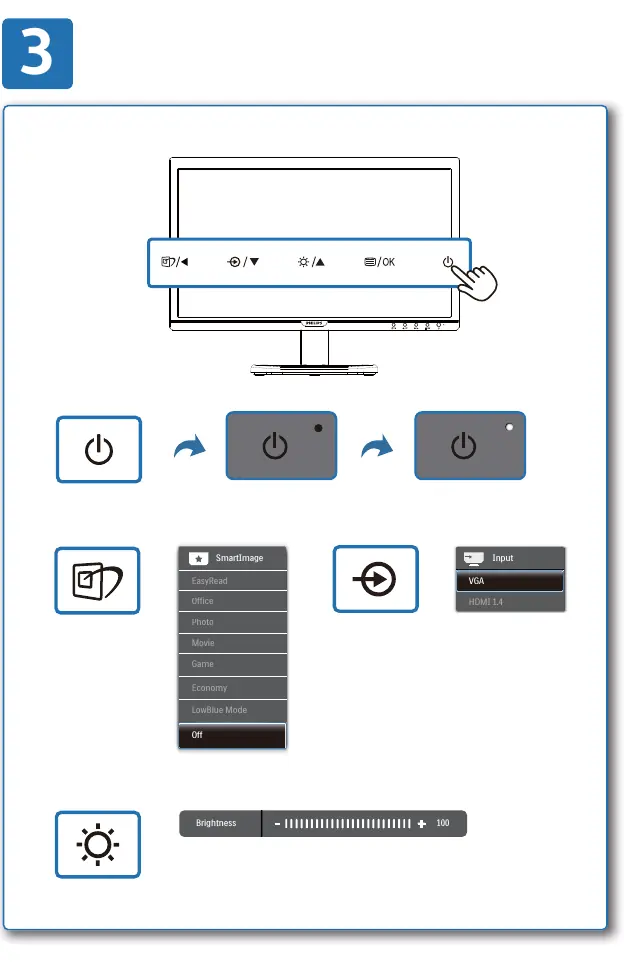
The monitor features a power button and OSD menu navigation buttons. Use the menu button to open the OSD, and the arrow buttons to navigate and select options.
Adjustments
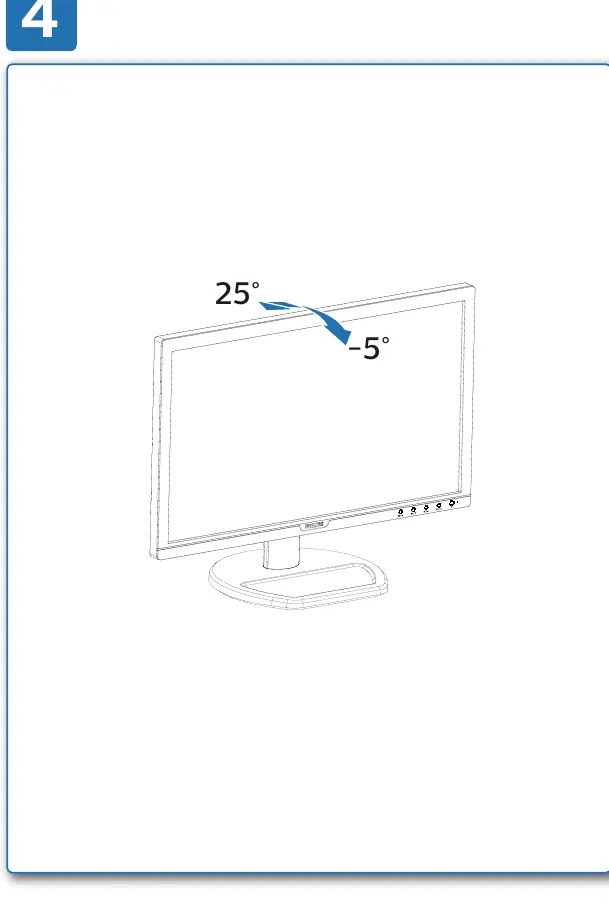
The monitor supports tilt adjustment from -5° to 25° to ensure a comfortable viewing angle.
Manufacturer information
Philips
Practical help
Common problems
Check if the power cable is connected and the monitor is turned on. Ensure the video cable (VGA or HDMI) is securely connected to both the monitor and the computer.
Before use
- Ensure you have the power cable, VGA cable, and HDMI cable.
- Place the monitor on a flat, stable surface.
- Check for available ports on your computer.

Manual page author
Michael Turner
Technical manual editor