Plustek OpticFilm 135/135i Scanner User Guide
Quick guide for the Plustek OpticFilm 135/135i scanner, covering setup, installation, film holder usage, scanning procedures with QuickScan Plus, and troubleshooting.
Table of contents
Manual images
Jump to the sectionQuick guide from the manual
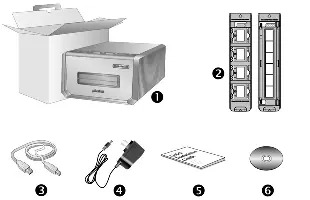
This guide provides essential instructions for setting up and operating your Plustek OpticFilm 135/135i scanner. It covers hardware installation, film holder usage, and the QuickScan Plus software workflow. Ensure you use the provided power adapter and USB cable to prevent malfunctions.
Connecting the scanner
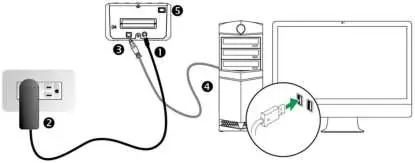
- Connect the power adapter to the scanner and a standard AC outlet.
- Connect the square end of the USB cable to the scanner and the rectangular end to your computer.
- Switch the scanner power on.
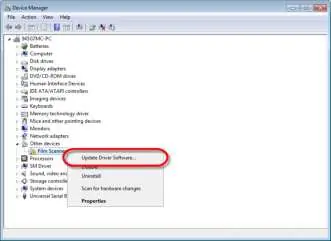
Installing the scanner
Insert the provided Setup/Application CD-ROM and follow the on-screen instructions. If the installation does not start automatically, run the install.exe file manually. For Windows 8/10, follow the on-screen prompts after connecting the device. If you encounter issues, you can manually update the driver via the Windows Device Manager.


Using film holders
The scanner includes two holders: one for 35mm mounted films (max 4) and one for 35mm filmstrips (max 6 frames). Always insert film with the emulsion (non-glossy) side down. The scanner automatically detects the holder type and defines crop areas.
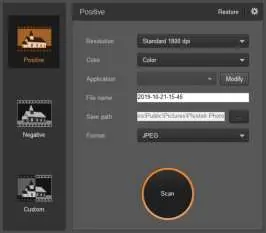
Scanning with QuickScan Plus
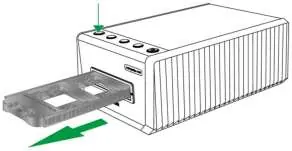
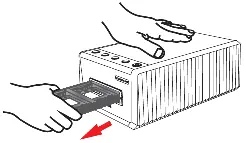
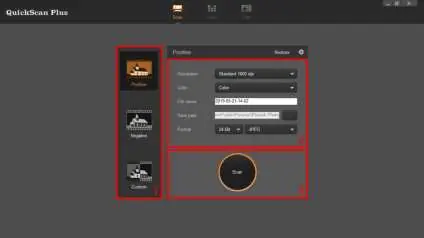
Launch the QuickScan Plus application from your desktop. The Scan screen allows you to set parameters like resolution, color mode, and file format. Once configured, insert the film holder into the front slot until it is pulled in, then click the Scan button. After scanning, you can use the View and Edit screens to rotate, delete, or apply filter effects to your images before saving.


Maintenance and safety
- Use the scanner in a dry, indoor location.
- Avoid dusty environments and keep the scanner covered when not in use.
- Do not disassemble the scanner; this voids the warranty and poses an electrical shock risk.
- Keep the area around the AC adapter clear for emergency access.
- Handle slides and negatives with clean hands and store them in a cool, dry place.
Official resources from the manual
Practical help
Common problems
Check all physical connections, ensure the USB cable is the one provided, and verify the scanner is powered on. If necessary, manually update the driver in Device Manager.
Disconnect and reconnect power/USB cables to trigger an automatic eject. If it fails, manually pull the holder out from the front.
Ensure the scanner was not bumped during the process. Eject and reinsert the film holder, then scan again.
Close background applications or reduce the scanning resolution (DPI).
Before use
- Ensure the scanner is placed on a stable, flat surface.
- Clean film material by blowing off dust or using a non-abrasive cloth.
- Ensure the scanner is not in a damp or dusty environment.
- Verify that the USB cable and power adapter are securely connected.
- Ensure the film holder is inserted with the emulsion side down.
Specs in practice
- Hardware Resolution
- Up to 7200 dpi for OpticFilm 135i and 3600 dpi for OpticFilm 135.
- Dynamic Range
- 3.4, indicating the scanner's ability to capture detail in shadows and highlights.
Images and diagrams
- The front slot is for inserting film holders; the rear slot requires 15cm of clearance.
- The Eject button LED indicates status: Blue (ready), Blinking Blue (scanning), Orange (ejected/error).
Model compatibility
- 7200 dpi resolution is only available on Windows 64-bit operating systems.
- Windows 8/10 users should follow on-screen instructions after connecting the scanner.

Manual page author
Emily Carter
User documentation editor
Prepares concise manual descriptions and highlights the most useful setup, operation, and maintenance information for readers.