Installation Instructions for QuickBOLT 17962DF Black Split Top QB2
A comprehensive installation guide for the QuickBOLT 17962DF Black Split Top QB2 solar roof mount. Includes recommended materials, step-by-step installation procedures, and torque requirements for asphalt, EPDM, and TPO roofs.
Quick answers from the manual
Quick answer
- The QuickBOLT 17962DF is installed by predrilling into the rafter, applying sealant (optional), placing the Microflashing and L-Foot, inserting the Miniflashing, and driving the bolt until the Microflashing is compressed. p. 2
Key actions
- Drill a hole using a 15/64" drill bit. p. 2
- Compress the Microflashing using a minimum torque of 150 lbs/inch. p. 2
Problems and fixes
Drive the bolt further until the Microflashing is fully compressed.
p. 2Technical specifications
| Parameter | Value | Meaning | Pages |
|---|---|---|---|
| Torque | 150 lbs/inch | Minimum torque to compress Microflashing | p. 2 |
Where to find it in the PDF
- Cover Page p. 1
- Installation Instructions p. 2
Table of contents
Manual images
Click an image to enlargeQuick guide from the manual
This document provides installation instructions for the QuickBOLT 17962DF Black Split Top QB2, designed for use on asphalt, EPDM, and TPO roofs. The installation requires specific tools and adherence to torque specifications to ensure the Microflashing is properly compressed and the L-Foot is secure.
Recommended materials
- Tools to locate and mark rafter
- Drill with a 15/64" drill bit
- MFG approved sealant (optional)
- Tool for separating shingles
- 1/2" Nut Setter
Installation instructions
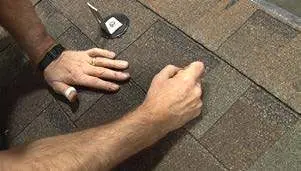
- Locate and mark the rafter.
- Predrill the hole.
- Optional: Fill the predrilled hole with MFG approved sealant.
- Optional: Place a ring of sealant around the bottom of the Microflashing washer.
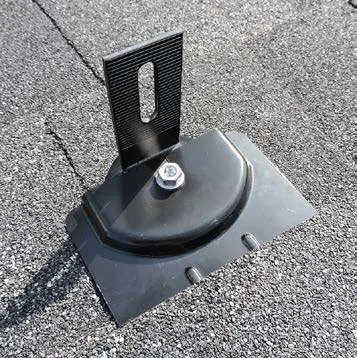
- Place the Microflashing, then L-Foot.
- Insert the Miniflashing under the shingles, over the L-Foot.
- Insert the Bolt over Miniflashing and drive until the Microflashing is compressed and Miniflashing is secure.
Torque requirements
To compress Microflashing properly with QB2, use a 150 lbs/inch minimum torque. The Bolt will compress the Microflashing, and when fully compressed, the L-Foot will not rotate.
Practical help
Common problems
Ensure the bolt is driven until the Microflashing is fully compressed. The L-Foot should not rotate when properly installed.
Before use
- Locate and mark the rafter
- Ensure you have a 15/64" drill bit
- Have a 1/2" nut setter ready
- Prepare MFG approved sealant if required

Manual page author
David Miller
Documentation analyst
Organizes user manual content into clear summaries, with attention to model details, product context, and everyday usability.