Installation Guide for QuickBOLT 17667DF Roof Mount
Quick guide for installing the QuickBOLT 17667DF Low Profile QB1 roof mount. Includes required materials, step-by-step installation instructions for asphalt, EPDM, and TPO roofs.
Quick answers from the manual
Quick answer
- The 17667DF is a Low Profile QB1 mount designed for asphalt, EPDM, and TPO roofs. Installation requires a rafter locator, drill with 3/16 inch bit, M6 deep socket hex driver, shingle separation tool, and a 1/2 inch wrench. p. 1, 2
Key actions
- Apply sealant to the Microflashing washer and place it over the predrilled hole. p. 2
- Drive the bolt, attach the L-Foot and Nut, insert the Miniflashing, and tighten. p. 2
Where to find it in the PDF
- Title Page p. 1
- Installation Instructions p. 2
Table of contents
Quick guide from the manual
This document provides installation instructions for the QuickBOLT 17667DF Low Profile QB1 mount. It is designed for use on asphalt, EPDM, and TPO roofs. Ensure you have all required tools before beginning the installation process.
Recommended materials
- Rafter locator
- Chalk or a crayon
- Drill with a 3/16 inch drill bit
- M6 deep socket hex driver
- Tool for separating shingles
- 1/2 inch wrench
Installation instructions
After locating the rafter and predrilling the hole, follow these steps:
- Place a ring of sealant around the bottom of the Microflashing washer.
- Place the Microflashing over the predrilled hole.
- Drive the bolt until it compresses the Microflashing.
- Place the L-Foot and Nut.
- Insert the Miniflashing under the shingles.
- Tighten the Nut to secure the Miniflashing.
Practical help
Before use
- Locate the rafter
- Have a rafter locator
- Have a drill with 3/16 inch bit
- Have an M6 deep socket hex driver
- Have a tool for separating shingles
- Have a 1/2 inch wrench
Images and diagrams
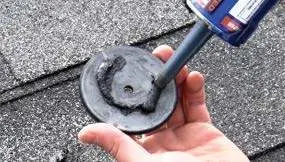
- The installation process involves 6 steps, starting with applying sealant to the Microflashing washer, positioning it over the predrilled hole, driving the bolt, attaching the L-Foot and Nut, inserting the Miniflashing, and finally...

Manual page author
Michael Turner
Technical manual editor
Reviews PDF manuals for structure, safety notes, and practical product details so readers can find the right information quickly.