User Manual for Raider 32" 4K Gaming Monitor
Quick guide for the Raider 32" 4K Gaming Monitor. Includes setup instructions, OSD menu settings, connection diagrams, and technical specifications.
Table of contents
Manual images
Click an image to enlargeQuick Guide
This monitor is designed for high-performance gaming. Before use, ensure the monitor is placed in a well-ventilated area with at least 5cm of clearance around the back. Connect the power supply to a grounded outlet and use the provided cables to connect your PC or console. The monitor will automatically detect the input source.
Connections
The monitor features the following ports:
- DC 24V: Power input.
- HDMI1 & HDMI2: High-definition multimedia inputs.
- DP1 & DP2: DisplayPort inputs for high refresh rates.
- AUDIO OUT: 3.5mm output for external speakers or headphones.
Monitor Controls
The monitor is controlled via a joystick located on the back:
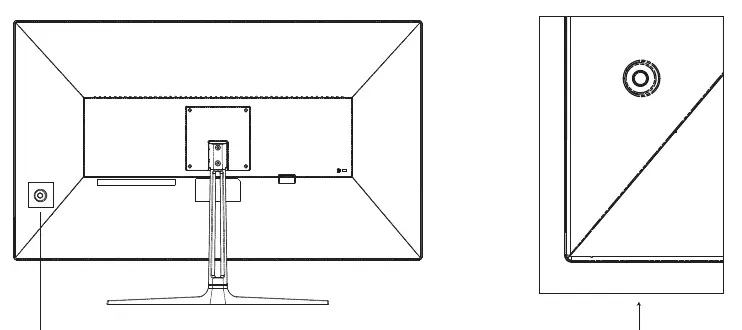
- Power: Press and hold for 3 seconds to power off; press once to open the menu.
- Up/Down/Left/Right: Navigate the OSD menu and adjust values.
- Lamp switch: Click to change light color, press and hold to turn off.
OSD Menu Settings
Access the OSD menu to adjust display parameters:
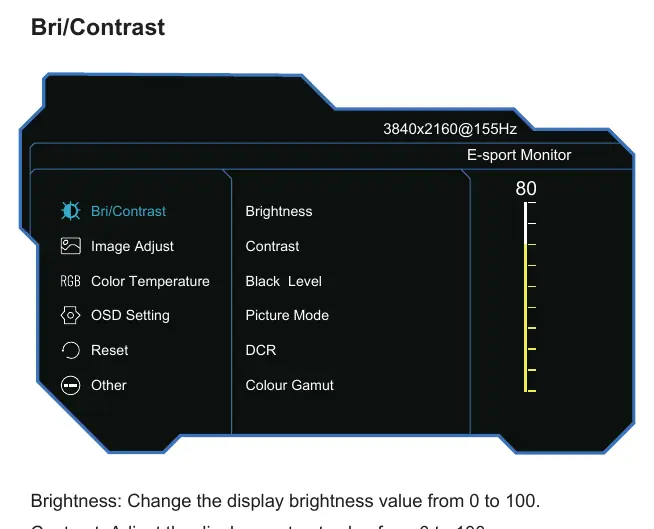
- Bri/Contrast: Adjust Brightness, Contrast, Black Level, Picture Mode (Standard, Eye Protect, Game, FPS, Movie, RTS), DCR, and Colour Gamut.
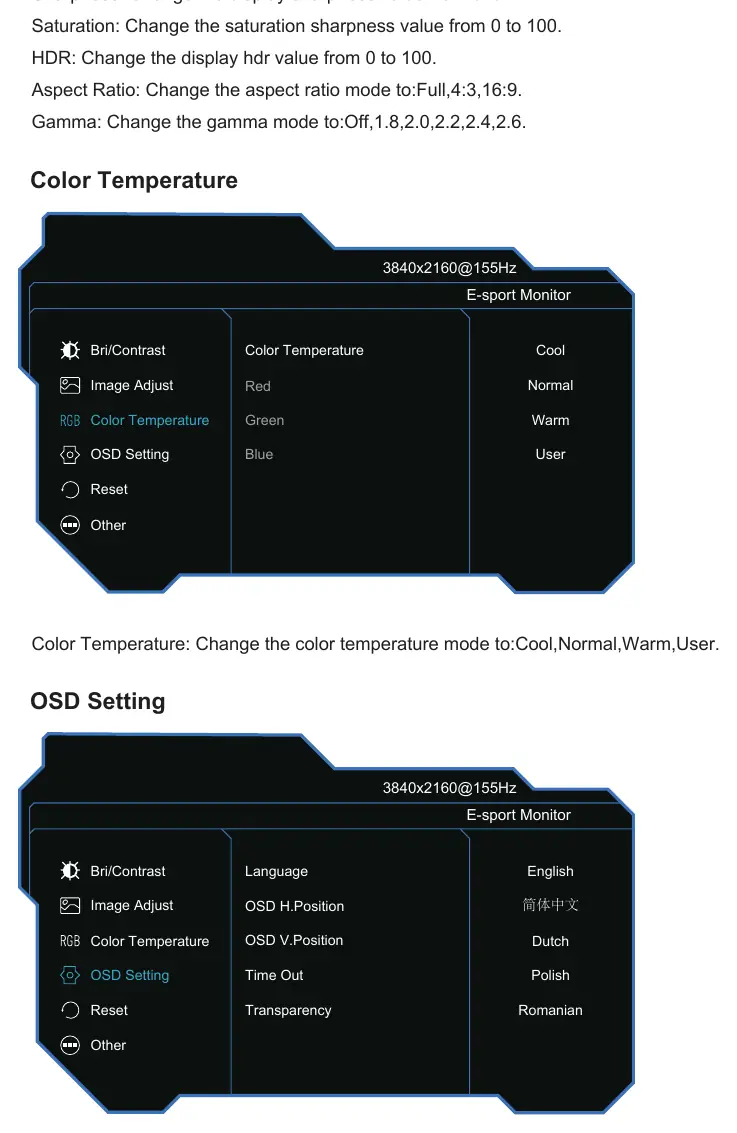
- Image Adjust: Control Sharpness, Saturation, HDR, Aspect Ratio, and Gamma.
- Color Temperature: Select Cool, Normal, Warm, or User-defined settings.
- OSD Setting: Change language, menu position, transparency, and timeout.
- Other: Configure Source Input, Over Drive, Volume, Low Blue Light, FreeSync/VRR, and MPRT.
Specifications
Key technical specifications include:
- Resolution: 3840x2160 @ 155Hz
- Panel Type: LED (IPS/ADS)
- Brightness: 400cd/m²
- Response Time: 1ms (with OD)
- Power: DC 24V, 4A (Typical 42W)
Practical help
Common problems
Check power connection and ensure the indicator light is blue.
Ensure the correct input source (DP1, DP2, HDMI1, HDMI2) is selected in the source menu.
Before use
- Ensure the monitor is placed in a well-ventilated area with at least 5cm clearance.
- Connect the power supply to a compatible mains power outlet.
- Connect the appropriate video cable (HDMI or DP) to your computer.
- Verify the power indicator turns blue after pressing the power button.
Specs in practice
- Response Time
- 1ms (with Over Drive enabled)
- Power Consumption
- Typical 42W, Standby <0.5W
Images and diagrams
- The monitor features a 5-way joystick control on the back for power and OSD navigation.
- Input ports include two HDMI and two DisplayPort connections.
Model compatibility
- Supports FreeSync and G-Sync.
- Supports HDR.

Manual page author
Michael Turner
Technical manual editor
Reviews PDF manuals for structure, safety notes, and practical product details so readers can find the right information quickly.