Installation Guide for Resistex Miks Recessed Luminaire
Quick installation guide for the Resistex Miks recessed luminaire. Includes step-by-step mounting instructions, wiring diagrams, safety precautions, and maintenance tips.
Table of contents
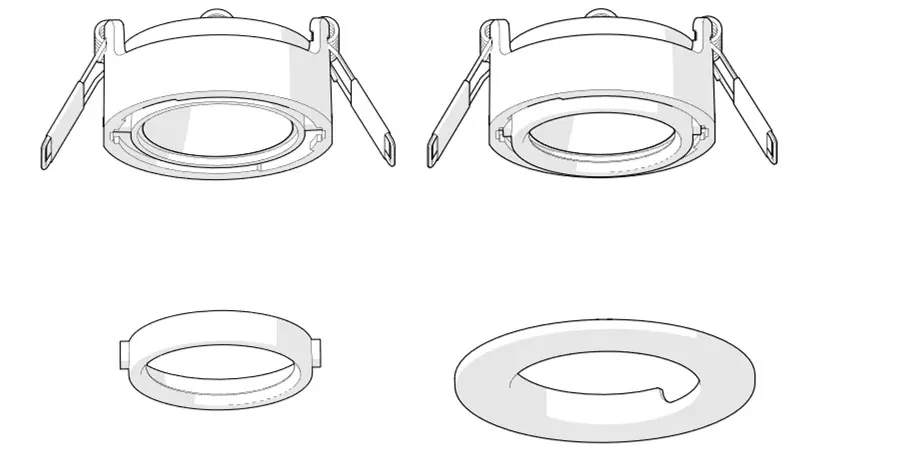
Manual images
Click an image to enlargeQuick guide from the manual
This document provides essential installation and maintenance instructions for the Resistex Miks recessed luminaire. Installation must be performed by a professional installer in compliance with local electrical standards and regulations.
Safety notes
- Power: Never work on the luminaire while voltage is present.
- Handling: Risk of electrostatic discharge (ESD). Handle with precautions.
- Compliance: Ensure the installation meets all relevant electrical standards.
Installation


- Preparation: Cut a hole in the ceiling with a diameter of 69mm (+/- 1mm).
- Wiring: Connect the electrical supply to the terminal block, ensuring correct L (Live) and N (Neutral) connections.
- Mounting: Insert the fixture into the ceiling cutout. The spring clips will secure the luminaire in place.
Maintenance
Do not use chemicals or abrasive products to clean the fixture. Keep these instructions for future dismantling or maintenance. Additional information regarding Resistex luminaires can be found on the official website at www.Resistex-sa.com.
Official resources from the manual
Practical help
Common problems
Verify that the ceiling cutout diameter is exactly 69mm (+/- 1mm).
Ensure the L (Live) and N (Neutral) wires are correctly inserted into the terminal block as indicated in the diagram.
Before use
- Ensure power is turned off at the main breaker before starting.
- Verify the ceiling cutout diameter is 69mm.
- Ensure a professional installer is performing the electrical connection.
- Handle the fixture with ESD precautions.

Manual page author
Emily Carter
User documentation editor
Prepares concise manual descriptions and highlights the most useful setup, operation, and maintenance information for readers.