Furniture / Clothes Racks
SoBuy FRG 109-II Heavy Duty Clothes Rail Assembly Instructions
Quick assembly guide for the SoBuy FRG 109-II heavy-duty clothes rail. Includes a complete parts list, step-by-step installation instructions, and height adjustment details for your telescopic garment rack.
Table of contents
Manual images
Click an image to enlargeQuick guide from the manual
The SoBuy FRG 109-II is a telescopic, heavy-duty clothes rail designed for indoor use. This guide provides the necessary steps to assemble the unit. Ensure you have a measuring tape available before starting. The rack features adjustable height settings to fit your space.
Parts list
Before beginning assembly, verify that all components are present:
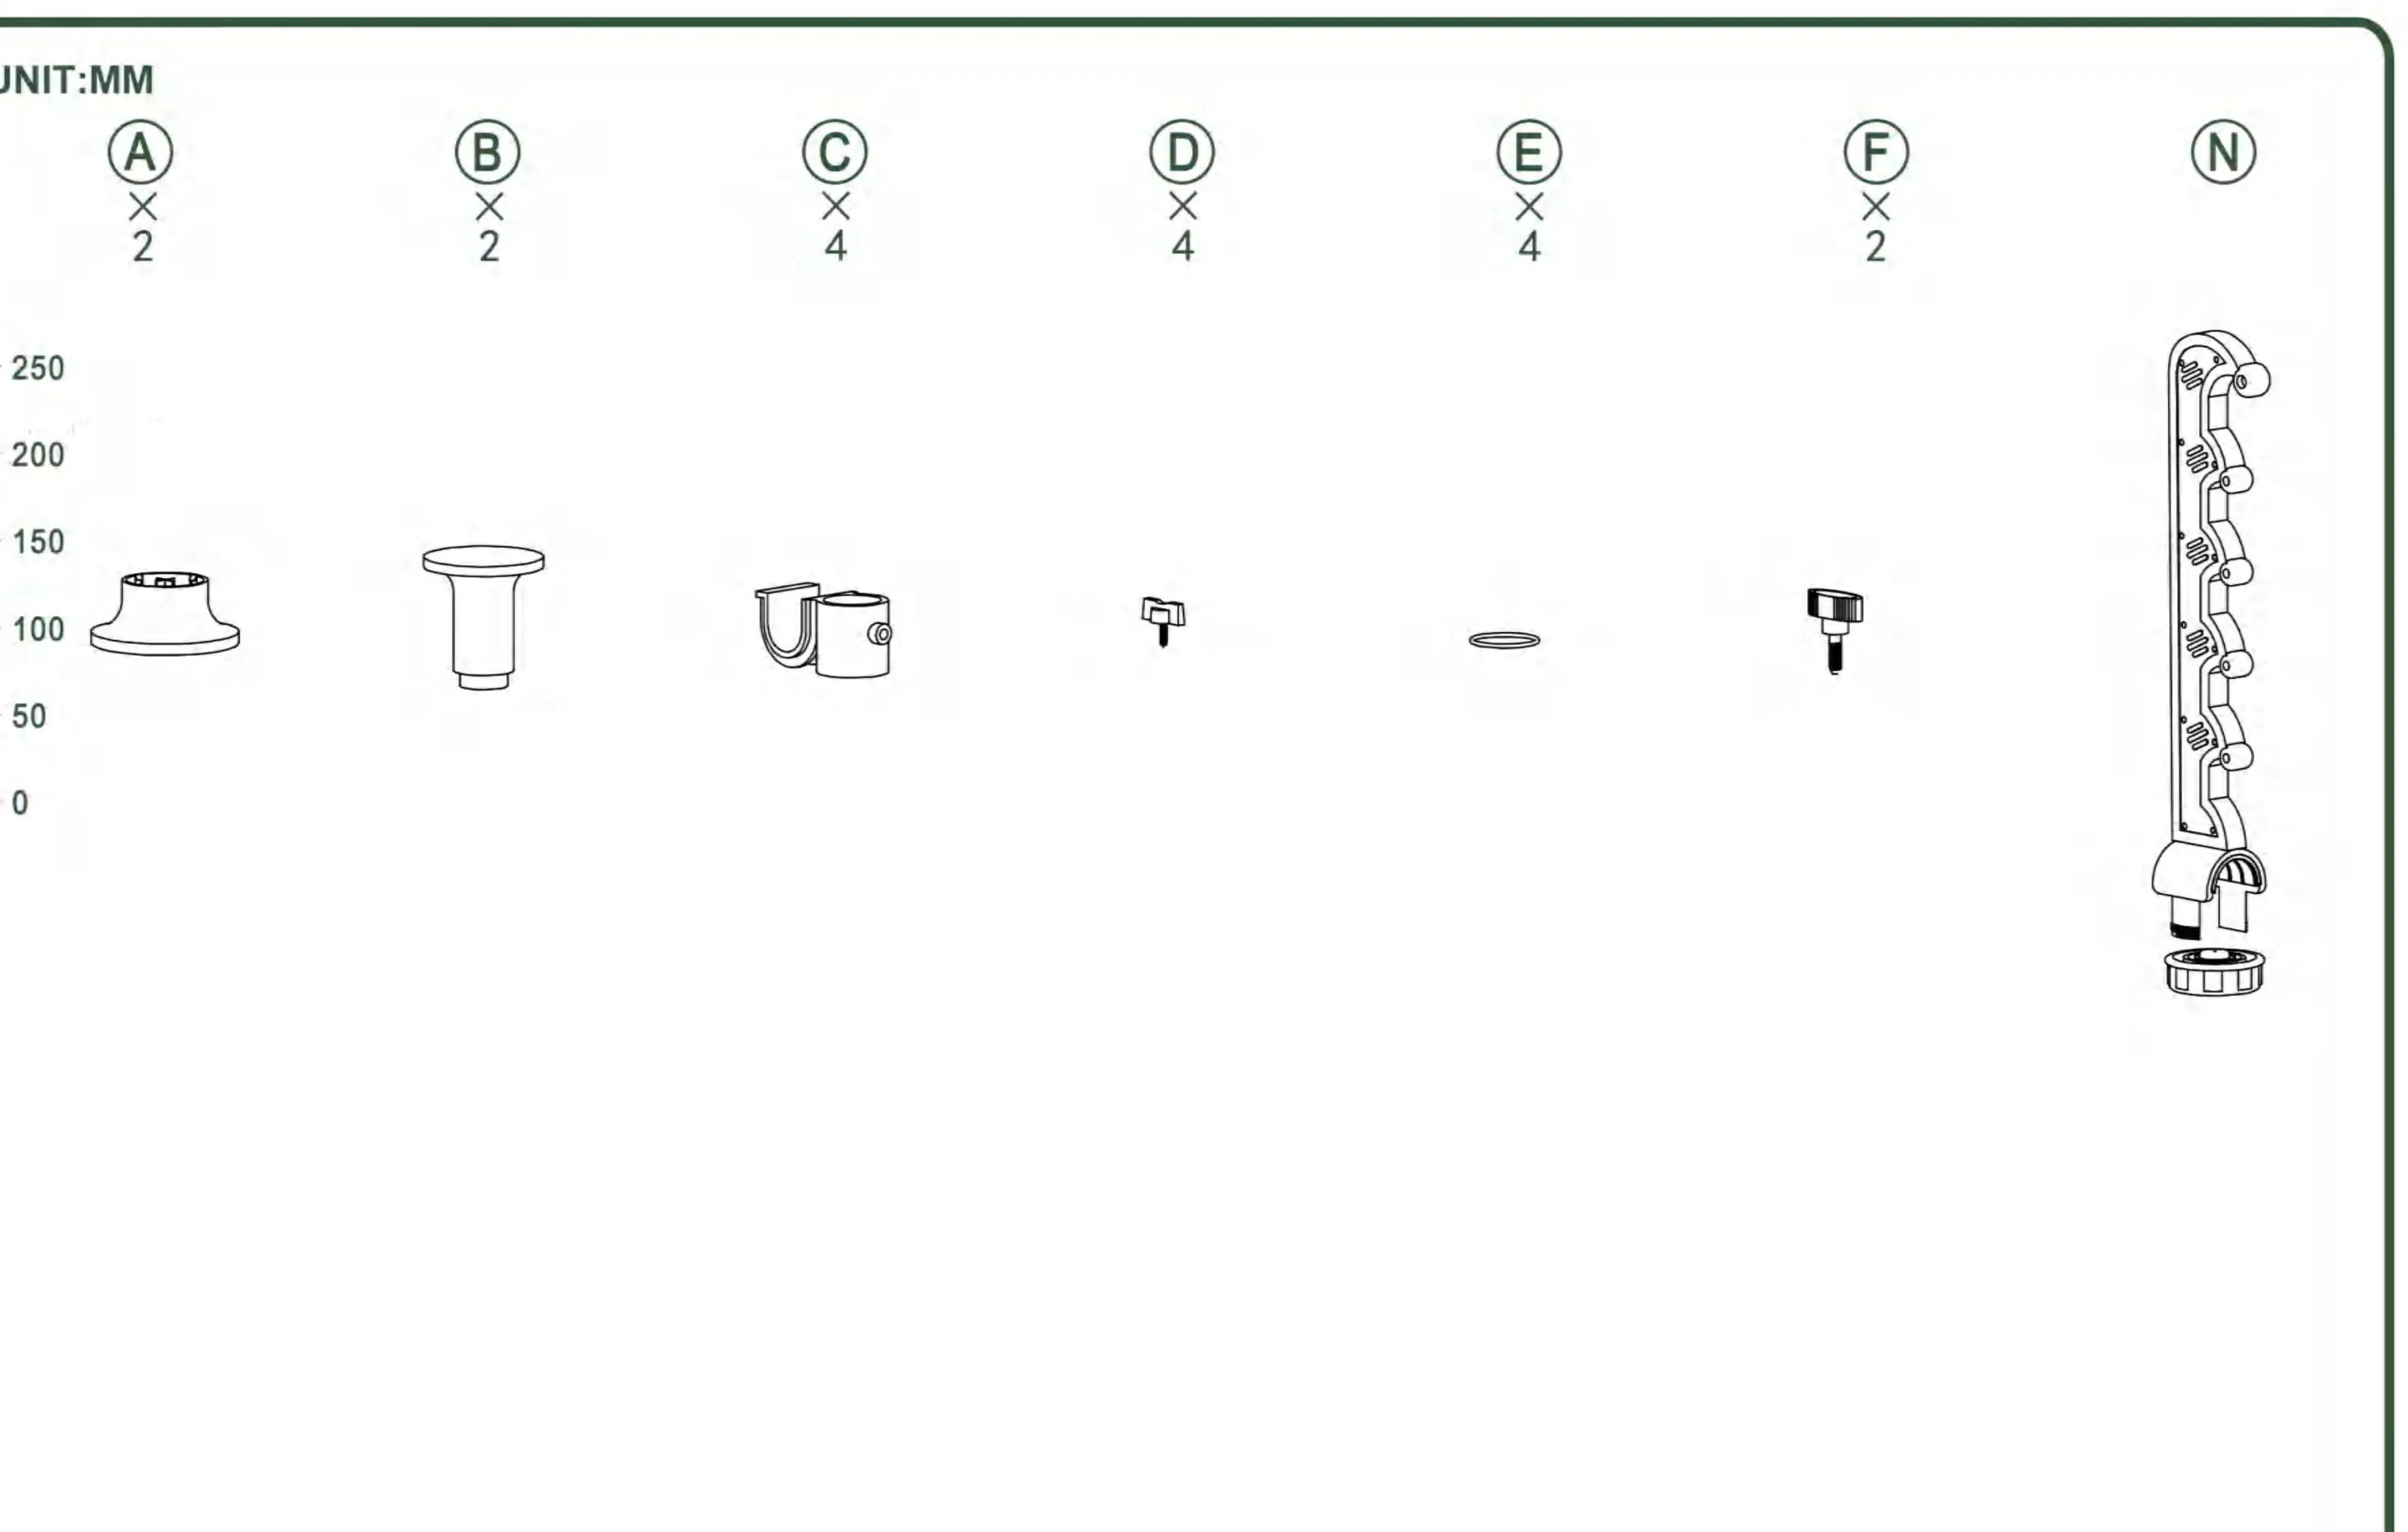
- Poles: 1 (x2), 2 (x4), 3 (x2), 6 (x1)
- Hardware/Accessories: A (x2), B (x2), C (x4), D (x4), E (x4), F (x2), N (x1)
Assembly instructions
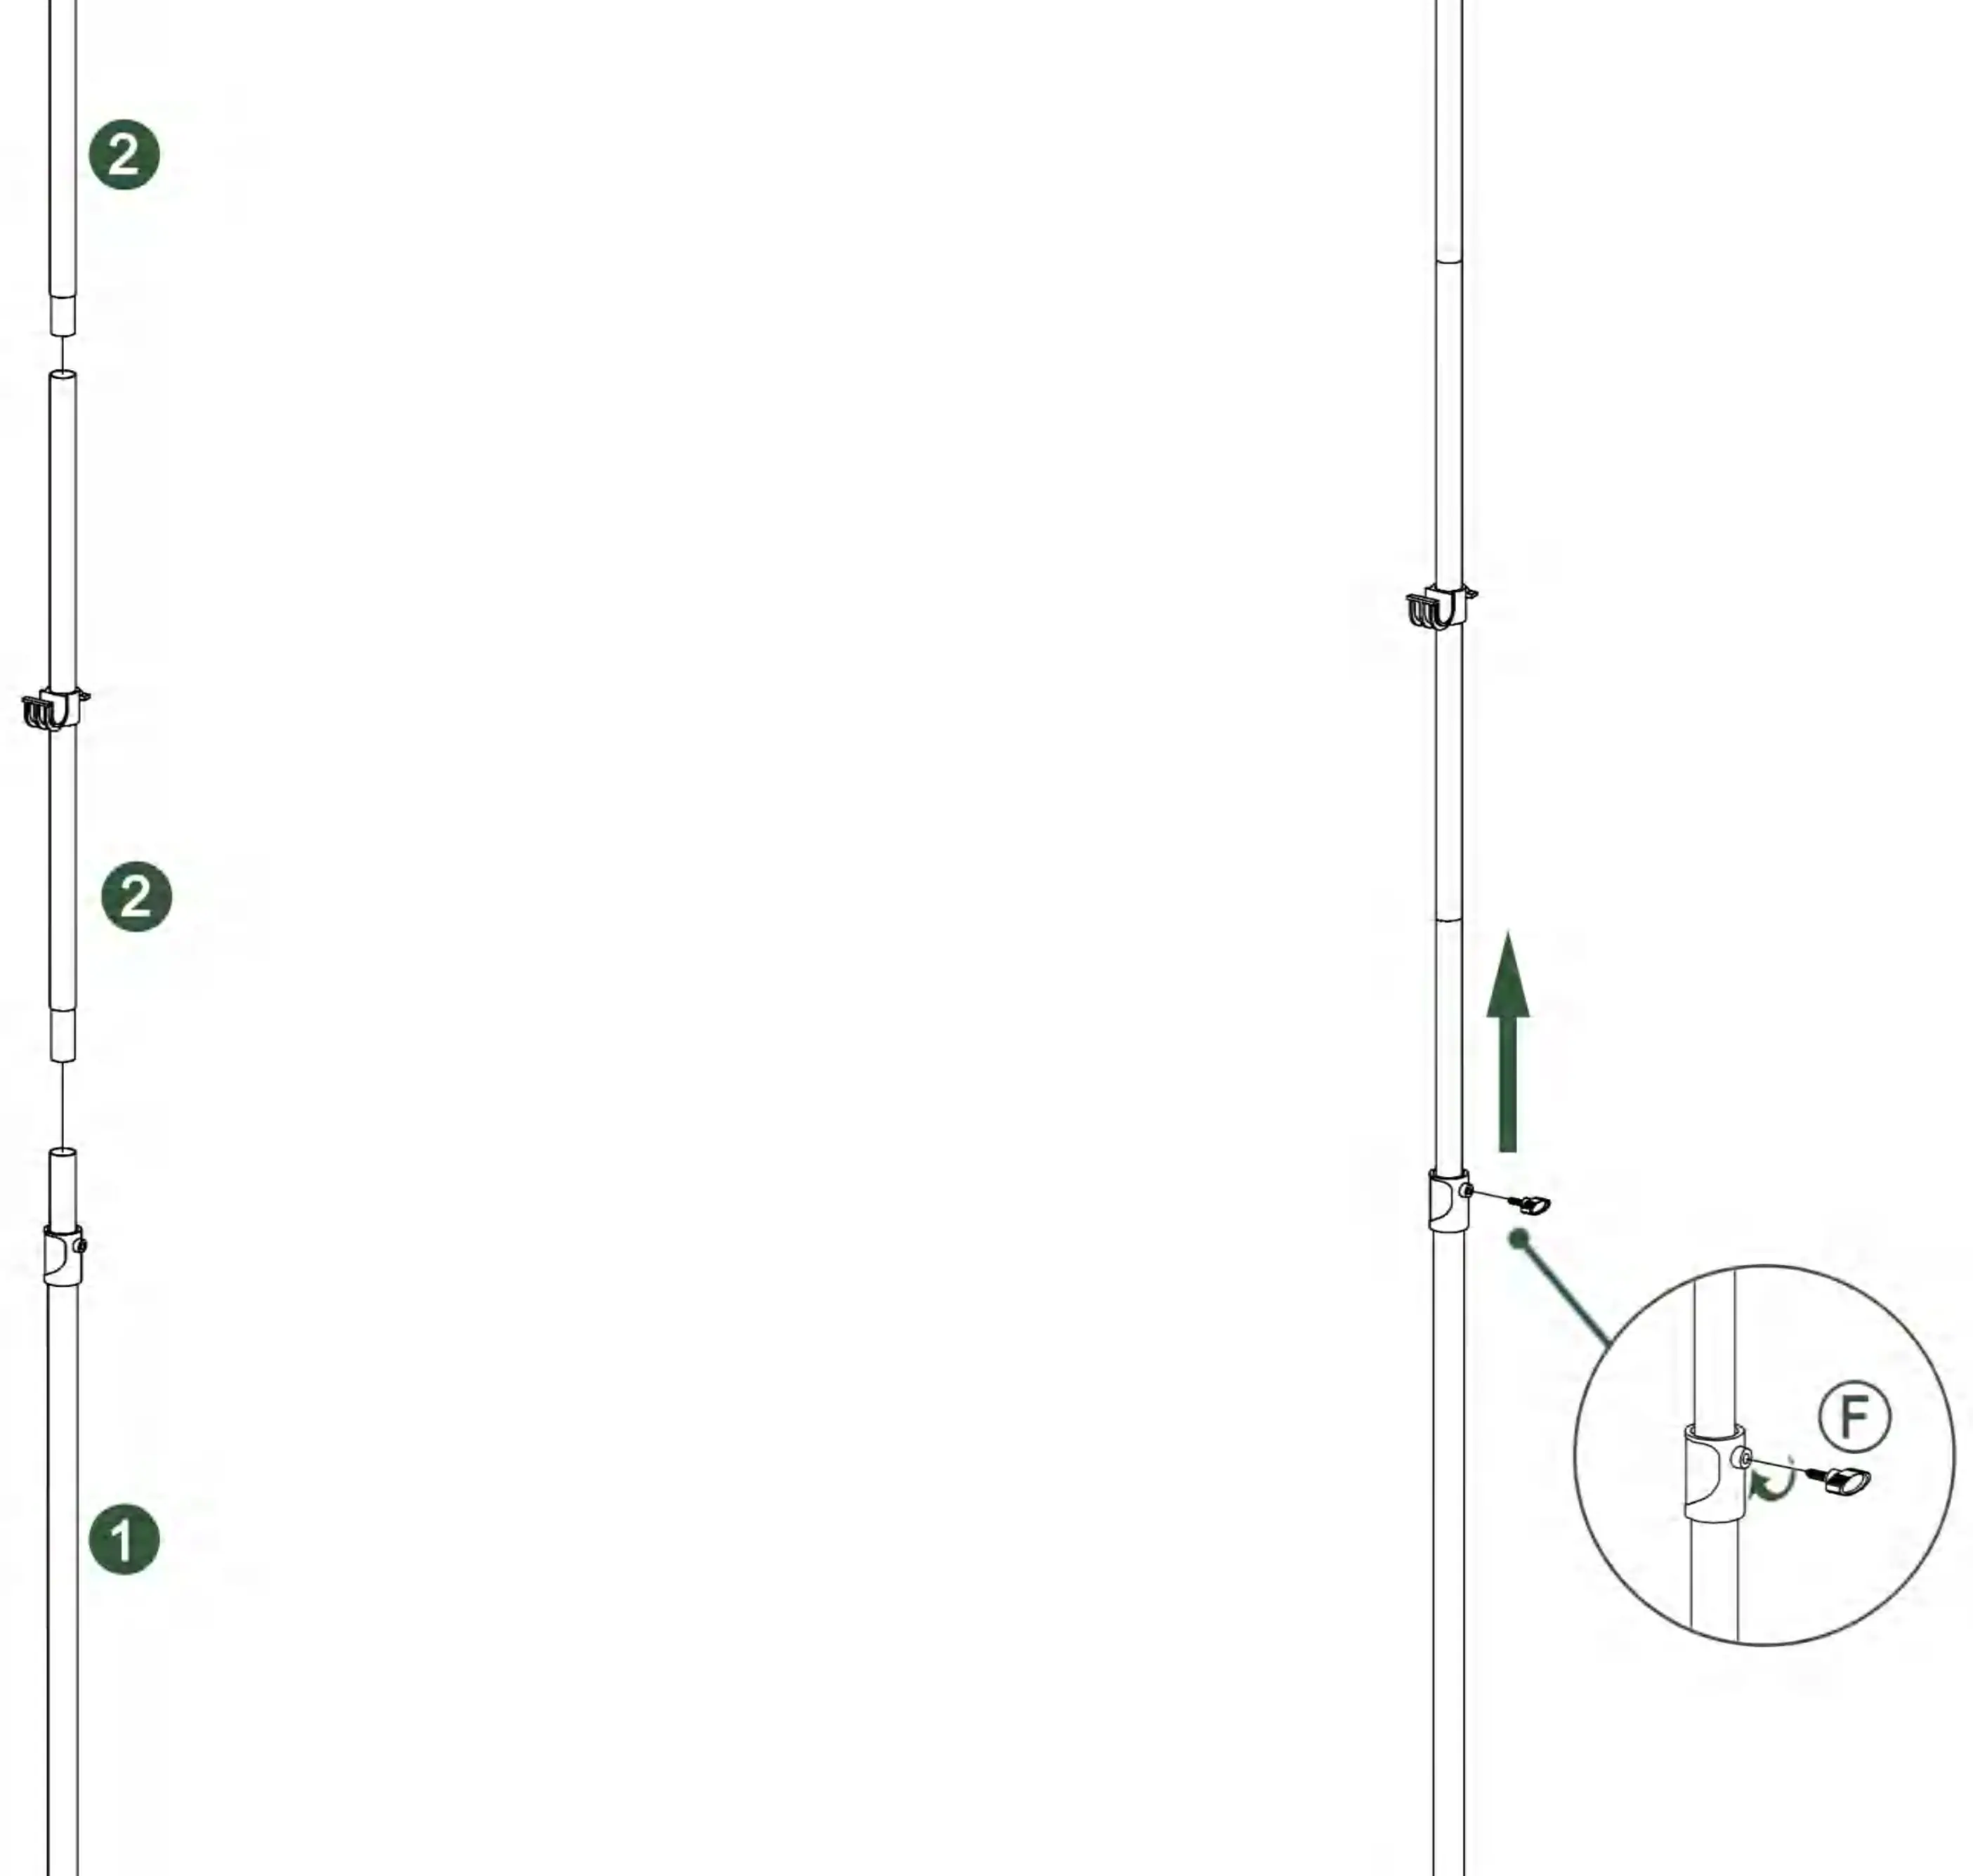
- Base Assembly: Attach the base components (A) to the bottom of the main poles (1).
- Pole Preparation: Insert the pole sections (2) and secure them using the provided fasteners (C, E, D).
- Main Structure: Connect the pole sections (1 and 2) to create the vertical supports. Use the fasteners (B) at the top.
- Securing: Use the fasteners (F) to lock the pole sections in place once the desired height is achieved.
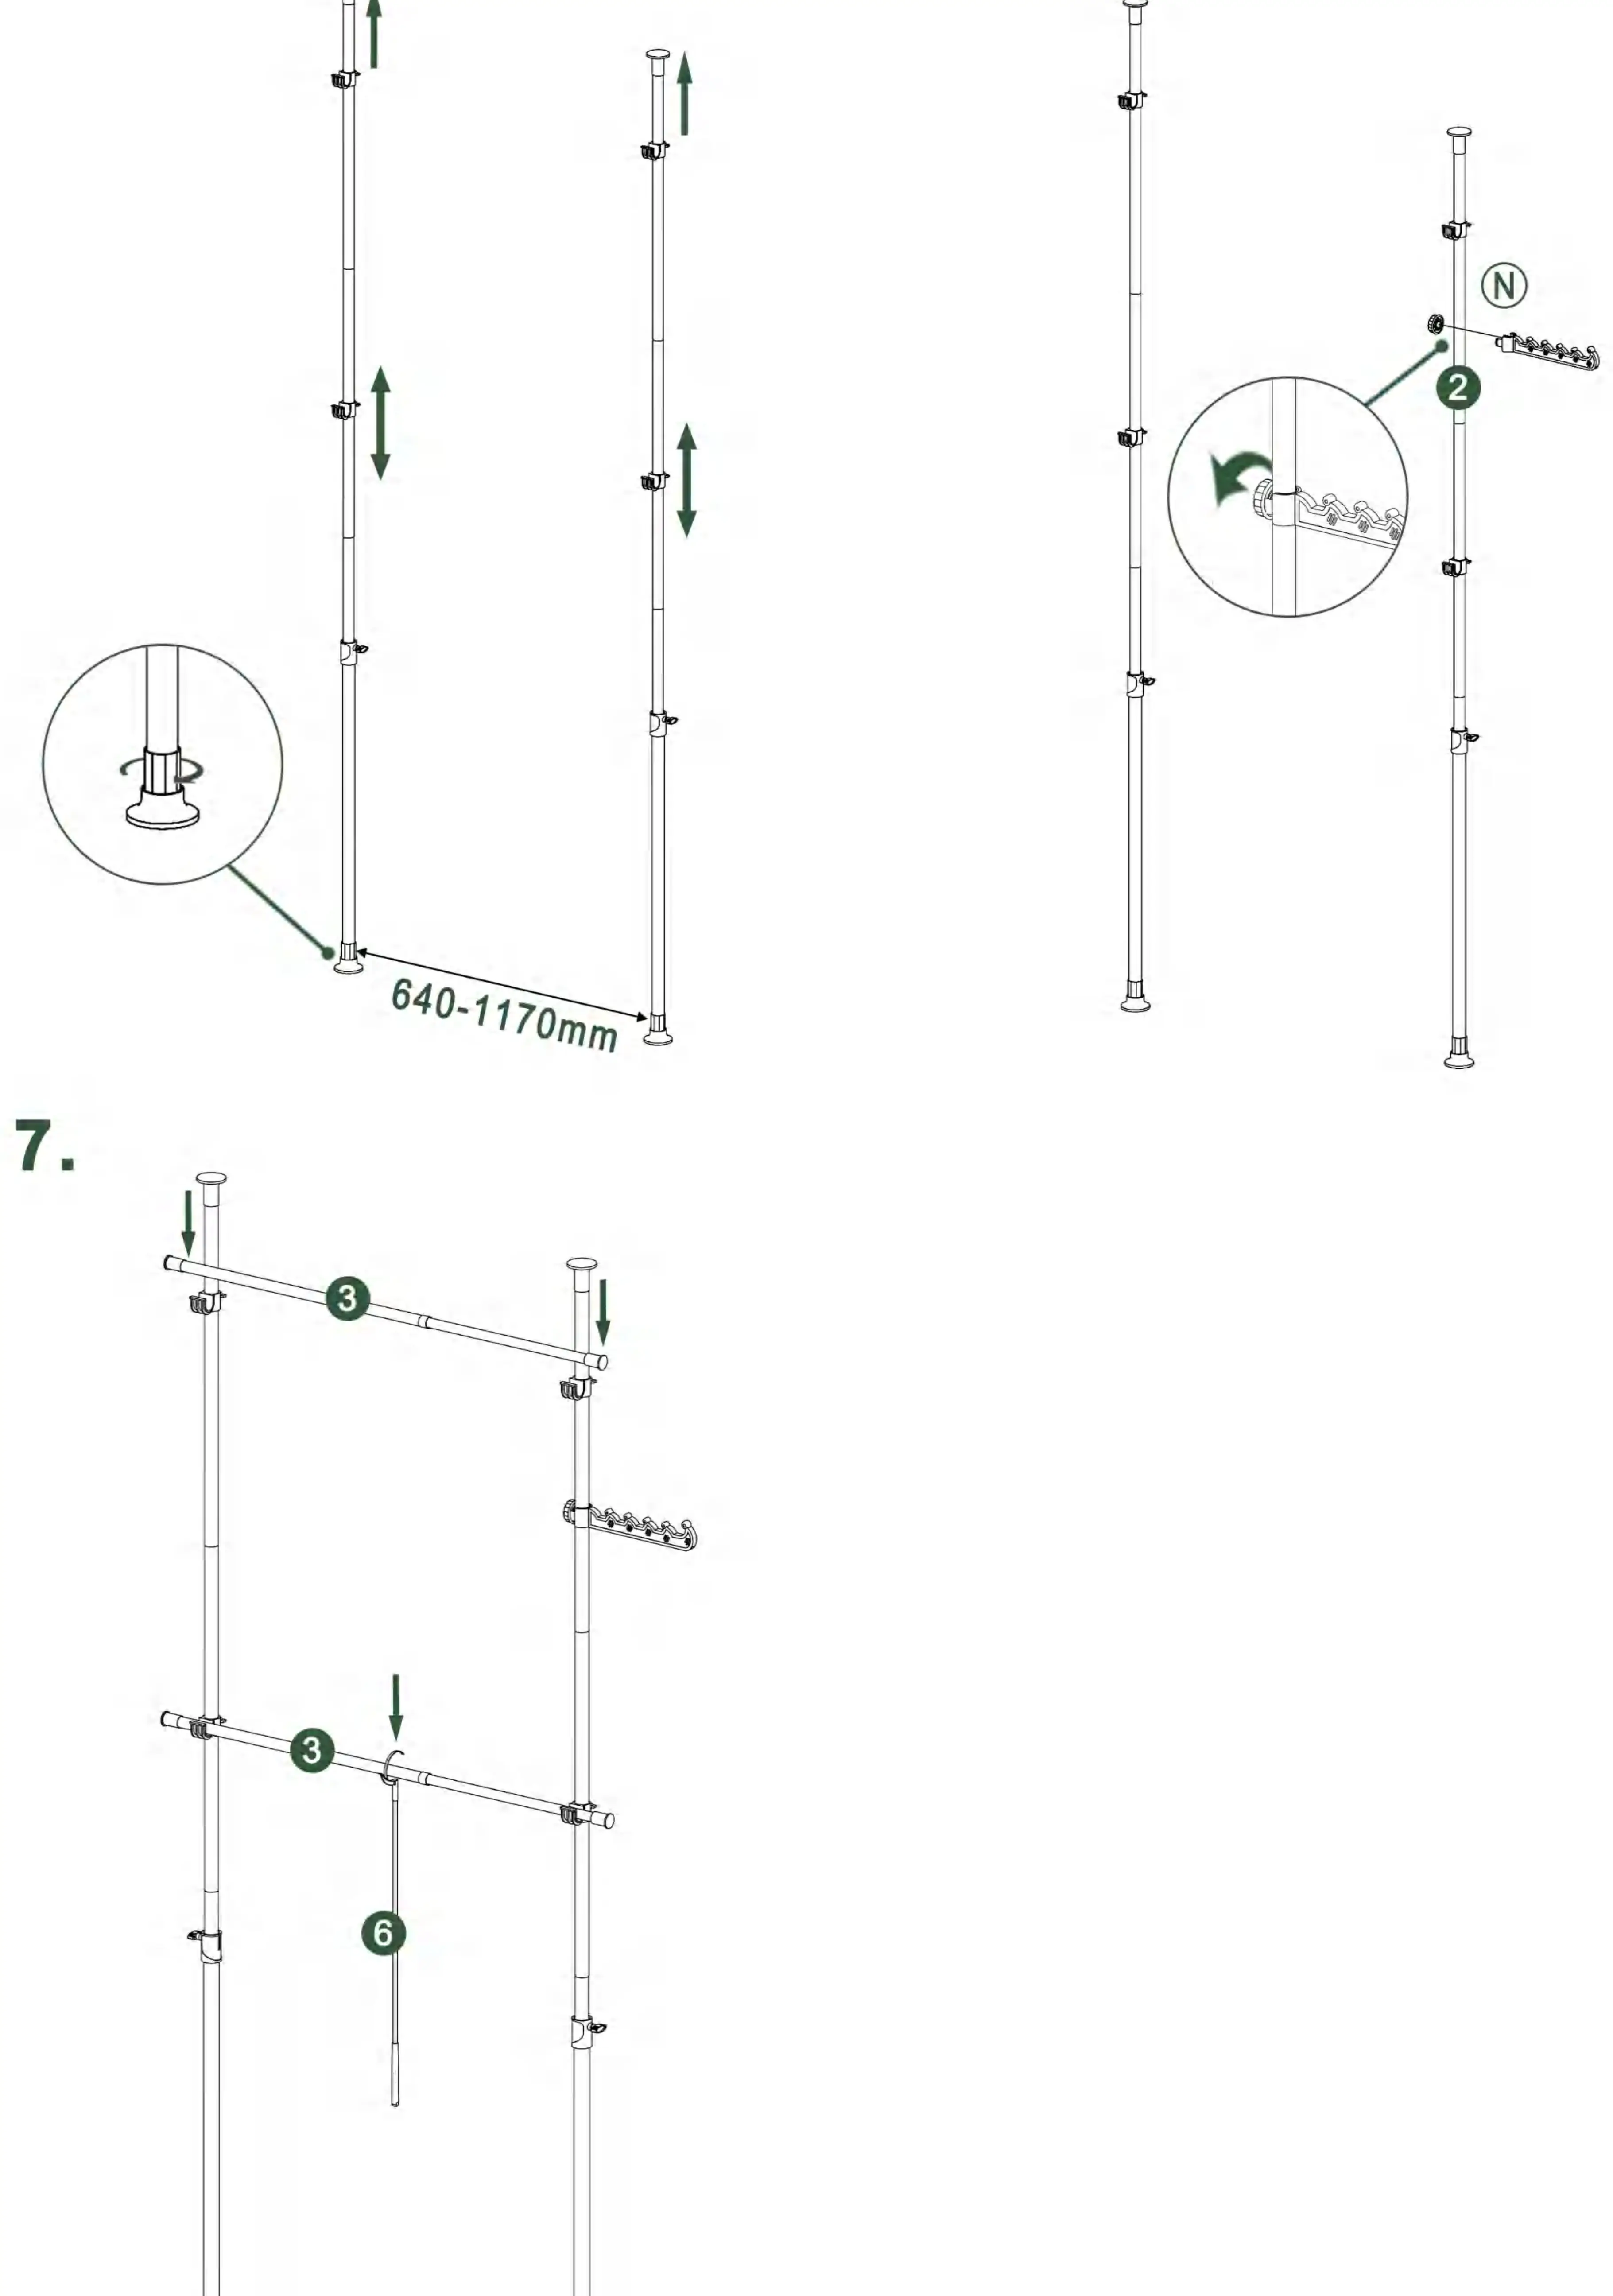
- Height Adjustment: The rack is telescopic and can be adjusted between 640mm and 1170mm. Extend the poles to the required height and tighten the base mechanism.
- Accessories: Attach the accessory rack (N) to the vertical pole (2) as shown in the diagram.
- Crossbars: Install the crossbars (3) between the two vertical poles and attach the hanging hook (6).
Practical help
Common problems
Rack is unstable
Ensure the telescopic poles are fully extended and locked firmly against the ceiling and floor. Check that all fasteners (D, F) are tightened securely.
Height adjustment issues
Verify that the total height is within the 640mm to 1170mm range. If the pole is too short or too long, it will not lock properly.
Before use
- Measure the available space to ensure it fits the 640-1170mm height range.
- Have a measuring tape ready for accurate installation.
- Verify all parts (A-F, N, 1-3, 6) are present according to the parts list.
- Ensure the mounting surface (floor and ceiling) is solid and level.
Specs in practice
- Height adjustment range
- The rack is telescopic, allowing for a height between 640mm and 1170mm.
Images and diagrams
- The diagrams use numbered parts (1, 2, 3, 6) and lettered hardware (A-F, N) to guide the assembly sequence.
- Arrows in the diagrams indicate the direction of insertion or tightening for fasteners.
Model compatibility
- Designed for indoor use only.
- Ensure the ceiling and floor are stable enough to support the tension of the telescopic poles.

Manual page author
Michael Turner
Technical manual editor
Reviews PDF manuals for structure, safety notes, and practical product details so readers can find the right information quickly.