User Manual for Total 12V Li-Ion Cordless Drill
Quick guide for the Total 12V Li-Ion Cordless Drill, covering battery installation, torque adjustment, speed settings, drilling operations, and essential safety precautions.
Table of contents
Manual images
Jump to the sectionQuick guide from the manual
This document provides essential operating instructions for the Total 12V Li-Ion Cordless Drill. Always ensure the tool is switched off and the battery is removed before performing any adjustments, maintenance, or changing accessories. Wear appropriate personal protective equipment, including safety glasses, hearing protection, and a dust mask during operation.
Functional description
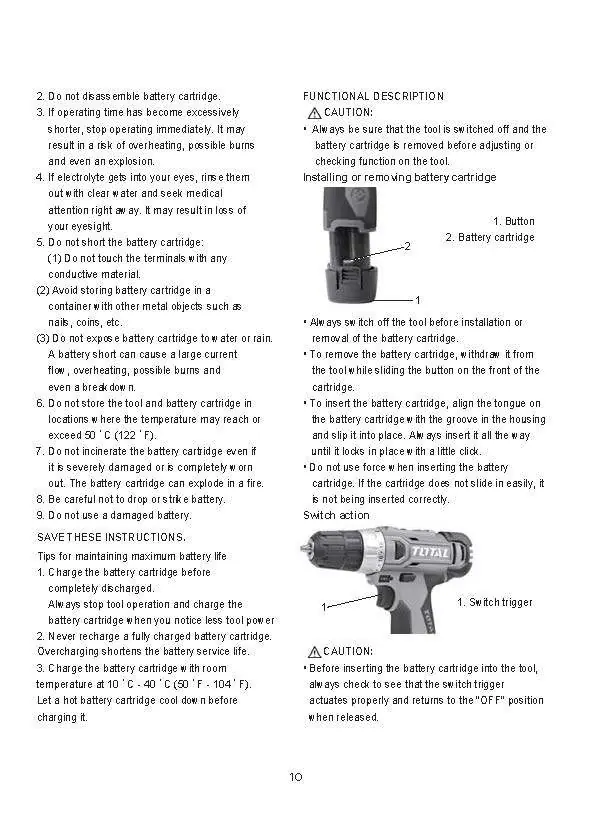
The drill features a switch trigger for operation and speed control. To install the battery, align the tongue on the battery cartridge with the groove in the housing and slide it into place until it locks with a click. To remove, slide the button on the front of the battery cartridge while withdrawing it from the tool.
Operation and settings
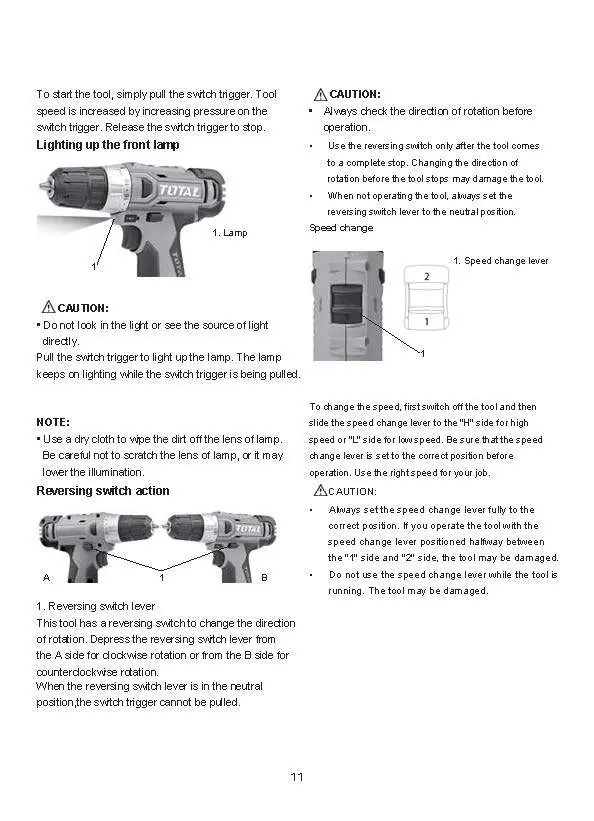
- Speed change: Use the speed change lever to select between high (H) and low (L) speeds. Always ensure the lever is fully set to the correct position before operation.
- Reversing switch: Use the lever to change the direction of rotation. Ensure the tool has come to a complete stop before changing direction.
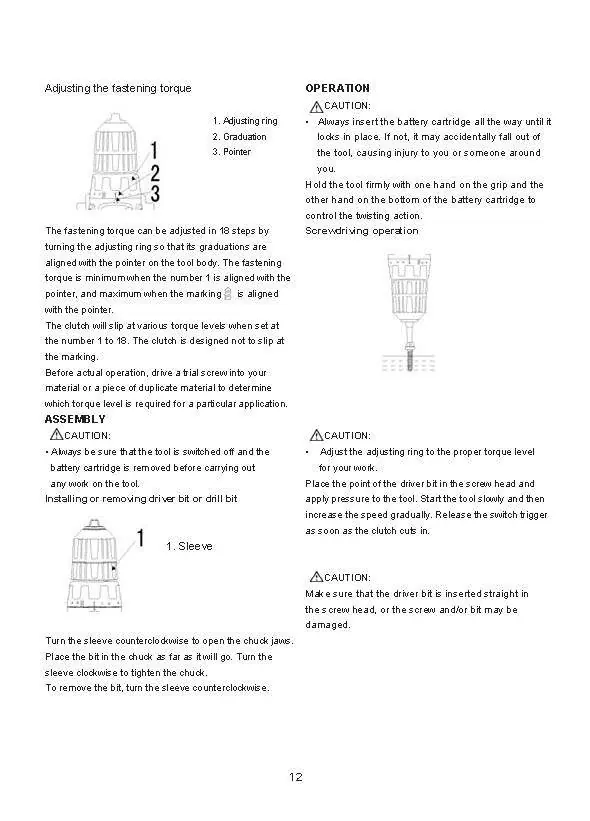
- Torque adjustment: The fastening torque can be adjusted in 18 steps by turning the adjusting ring. Align the desired number with the pointer on the tool body.
- Drilling: For wood, use bits with a guide screw. For metal, use a center-punch to create an indentation before drilling to prevent the bit from slipping.
Maintenance and safety
Keep the tool and battery cartridge clean and free from oil and grease. Do not expose the battery to fire or temperatures above 50°C. If the tool is operated continuously until the battery is discharged, allow it to rest for 15 minutes before using a fresh battery. All repairs should be performed by authorized service centers using identical replacement parts.
Practical help
Common problems
Avoid excessive pressure on the tool, as it does not speed up drilling and may damage the bit or shorten the tool's service life.
Use a center-punch and hammer to make an indentation at the point to be drilled before starting.
Set the reversing switch to reverse rotation to back the bit out. Hold the tool firmly to prevent it from backing out abruptly.
Before use
- Ensure the switch trigger is in the OFF position.
- Check that the battery is fully charged.
- Verify the speed change lever is fully set to the desired position (H or L).
- Ensure the correct torque setting is selected for the application.
- Wear safety glasses, hearing protection, and a dust mask.
Specs in practice
- Torque Setting 18+1
- Provides 18 levels of fastening torque plus a drill mode.
- No-load speed (High)
- 0-1250 RPM, suitable for faster drilling applications.
- No-load speed (Low)
- 0-350 RPM, suitable for high-torque screwdriving.
Images and diagrams
- The adjusting ring allows for 18-step torque control.
- The speed change lever is located on top of the tool housing.
- The reversing switch lever is located above the trigger for easy access.
- The battery cartridge features a release button on the front.
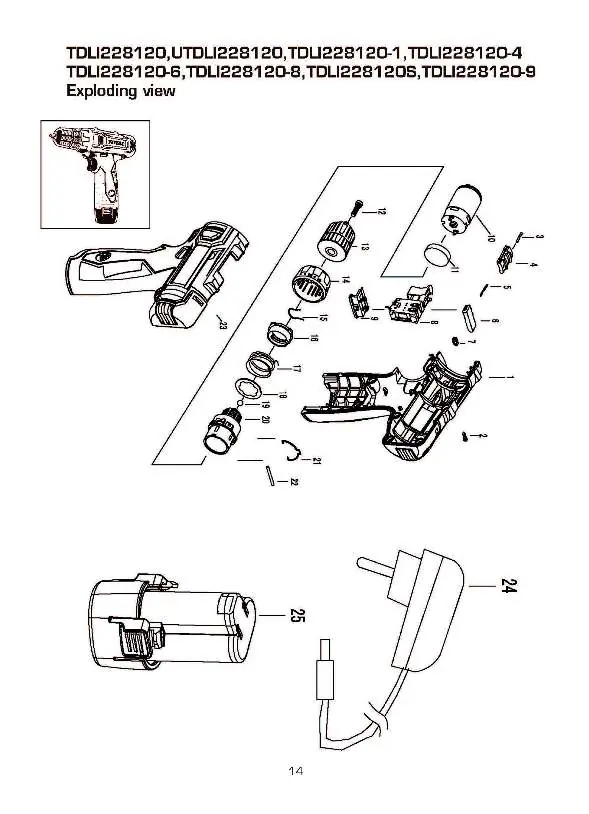
Model compatibility
- Use only accessories and attachments recommended by the manufacturer.
- Use only the charger specified by the manufacturer for the battery pack.
- Use only specifically designated battery packs for this tool.

Manual page author
David Miller
Documentation analyst
Organizes user manual content into clear summaries, with attention to model details, product context, and everyday usability.