Electronics / Positioning Systems
Quick Start Guide for Trimble Alloy GNSS Receiver
Get started with your Trimble Alloy GNSS Receiver. This guide covers initial setup, power connection, display configuration, and network settings (Wi-Fi and Ethernet).
Table of contents
Manual images
Click an image to enlargeQuick Start Guide
This guide provides essential instructions for setting up the Trimble Alloy GNSS Receiver. It covers hardware identification, power connection, display configuration, and network setup for both Wi-Fi and Ethernet.
What's in the Box
Ensure your package includes the following items:
- Alloy accessory kit (P/N 109ACC-00)
- Power supply (65 W, 19 V, 3.43 A, 100-240 V AC)
- Power cord kit (USA, EU, UK, AUS, or Japan)
- 1.5 m cable (DB9(F) Y to OS/7P/M to Power Jack)
- 1.8 m cable (DB9/M-DB9/F, Data)
- 2 m Ethernet 10BaseT CAT5 cable
- 2.4 GHz stick antenna (SMA)
- USB Mini-B to A cables (Host and Plug)
- Tripod clip (EM/TM3) with screws
- Smart battery
Device Overview
The front panel features the display, power button, escape button, enter button, and navigation keys. The back panel contains the satellite tracking antenna port, Wi-Fi antenna, serial ports 1 and 2, 10/100 Ethernet/PoE port, Mini-B USB socket, 10 MHz external reference input, and external power/LEMO ports 3 and 4.

Connecting Power
Follow these steps to connect the power cable:
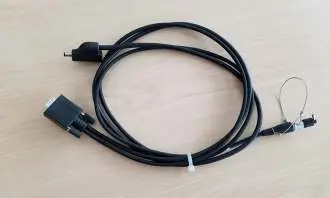
- Remove the protection cap from power port 3 or 4.
- Remove the protection cap from the LEMO end of the cable.
- Align the red dot on the LEMO end of the cable with the red line on the LEMO socket.
- Insert the cable plug into the Alloy LEMO socket.
- Connect the DC barrel connector to the power supply.
Display Settings
To rotate the display:
- From the Home screen, press the Enter button to access the System Setup screen.
- Use the down arrow to highlight Rotation and press Enter.
- Press Enter again to select the setting.
- Use the right arrow key to select Reversed and press Enter. Note that navigation arrow keys will also be reversed.
Network Configuration
Setting up Wi-Fi
- Navigate to System Setup and select Wi-Fi Access Point.
- Ensure the setting is set to Enable.
- On your mobile device, connect to the receiver's serial number (e.g., AP 5737R0035).
- Use the password abcdeabcde.
- Open a web browser and enter 192.168.142.1 to access the web interface.
Setting up Ethernet
- Navigate to System Setup and select Ethernet.
- Configure DHCP settings. If disabled, manually enter the IP Address, Netmask, and Gateway.
- Restart the receiver to apply changes.
- Access the web interface by entering the configured IP address in a web browser on a computer connected to the same LAN.
For further assistance, visit realtimenetworks.trimble.com/Trimble-Alloy.aspx.
Official resources from the manual
Practical help
Common problems
No Internet access warning when connecting via Wi-Fi
This is normal behavior when connected to the receiver's local Wi-Fi network; you can still access the web interface.
Navigation keys feel reversed
Check if the display rotation is set to 'Reversed' in the System Setup menu.
Before use
- Verify all cables and accessories are present.
- Ensure the power supply is compatible (100-240V AC).
- Remove protection caps from power ports before connection.
- Ensure the antenna is connected for satellite tracking.
Specs in practice
- Power Supply
- 65 W, 19 V, 3.43 A, 100-240 V AC.
- Wi-Fi Encryption
- WPA2/AES.
- Default Wi-Fi Password
- abcdeabcde.
Images and diagrams
- Front panel includes Power, Escape, Enter buttons, and navigation keys.
- Back panel features satellite tracking, Wi-Fi, serial ports, Ethernet, and power ports.
Model compatibility
- Supports 10/100 Ethernet with Power over Ethernet (PoE).

Manual page author
Emily Carter
User documentation editor
Prepares concise manual descriptions and highlights the most useful setup, operation, and maintenance information for readers.