Xerox 100S14641 Envelope Tray Installation and Configuration Guide
A quick guide for installing and configuring the Xerox 100S14641 Envelope Tray. This manual provides step-by-step instructions for physical installation and the necessary printer software settings to enable the tray.
Table of contents
Manual images
Click an image to enlargeQuick guide from the manual
This document provides instructions for installing the Envelope Tray accessory on a Xerox printer and configuring the printer software to recognize the new hardware. The process involves two main phases: physical installation and software configuration via the printer's touchscreen interface.
Physical Installation
Follow these steps to install the envelope tray into your printer:
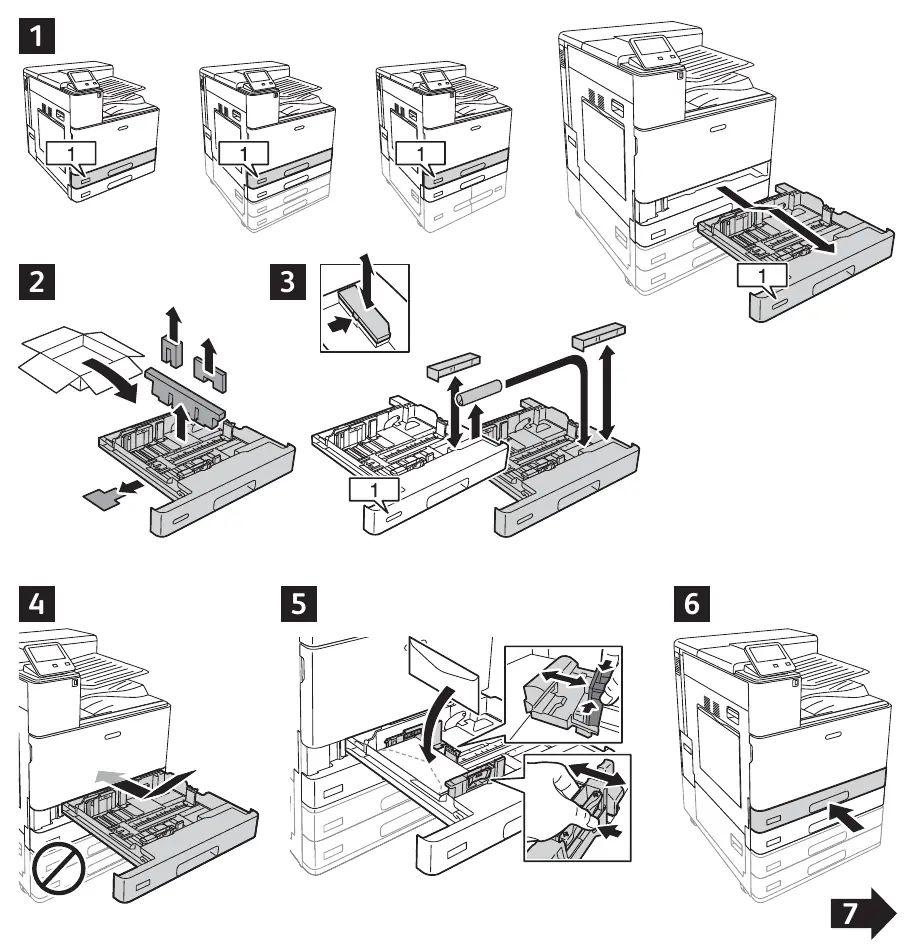
- Ensure the printer is prepared for the installation of the accessory.
- Align the envelope tray with the designated slot on the printer.
- Insert the tray into the printer until it is securely seated.
- Ensure the tray is fully engaged and aligned correctly with the printer chassis.
Printer Configuration
After physical installation, you must configure the printer software to recognize the tray:
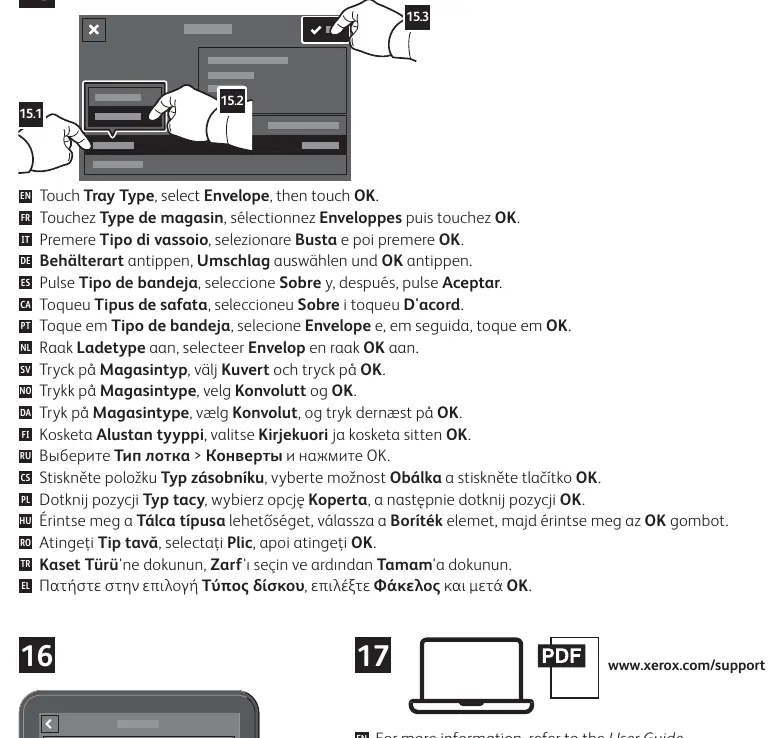
- Access the printer's touchscreen menu.
- Navigate to the tray settings menu.
- Select the option for Tray 1 Envelope Option.
- Set the status to Enabled and confirm by pressing OK.
- Navigate to the Tray Type settings.
- Select Envelope as the media type and confirm by pressing OK.
For further information or troubleshooting, please refer to the full User Guide available at www.xerox.com/support.
Official resources from the manual
Practical help
Before use
- Ensure the printer is powered off or in a safe state for accessory installation.
- Verify the envelope tray is compatible with your specific printer model.
- Clear the area around the printer to allow for easy installation.
- Ensure the tray is fully inserted and locked into position.
Images and diagrams
- Steps 1-6: Physical insertion of the tray into the printer.
- Steps 7-14: Touchscreen menu navigation to enable the tray.
- Steps 15-16: Final configuration of the tray type to Envelope.

Manual page author
Michael Turner
Technical manual editor
Reviews PDF manuals for structure, safety notes, and practical product details so readers can find the right information quickly.