Zebra TC7X Ethernet Cup Conversion Instructions
Step-by-step installation instructions for converting the Zebra TC7X Ethernet Cup. Includes safety precautions and hardware removal/installation steps.
Table of contents
Quick guide from the manual
This document provides instructions for the physical conversion of the Zebra TC7X Ethernet Cup. The process involves removing the existing cup, disconnecting cables, installing the new cup, and reconnecting cables. Important: This procedure must be performed by a qualified technician in an ESD-safe environment.
Safety and Prerequisites
- ESD Safety: This rework activity must be performed by a qualified technician or engineer.
- Workstation: Use an ESD-safe workstation.
- Protection: The technician must wear a grounded ESD strap.
- Tools Required: Phillips screwdriver.
Installation Procedure
Removing the Ethernet Cup
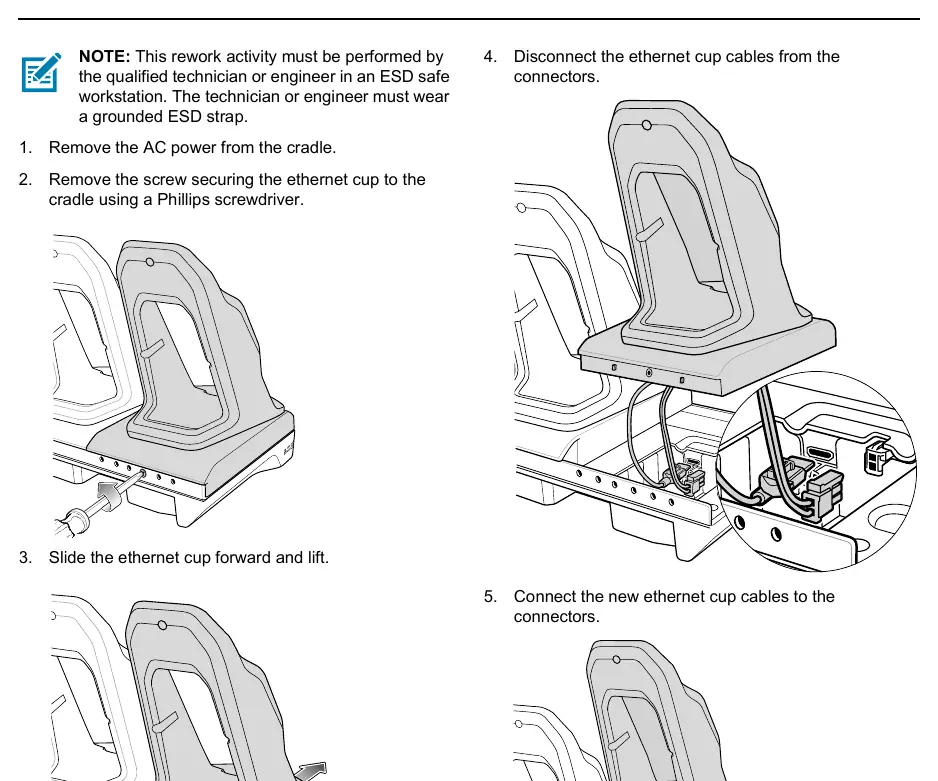
- Disconnect the AC power from the cradle.
- Use a Phillips screwdriver to remove the screw securing the ethernet cup to the cradle.
- Slide the ethernet cup forward and lift it off the cradle.
- Disconnect the ethernet cup cables from the connectors.
Installing the New Ethernet Cup
- Connect the new ethernet cup cables to the connectors.
- Align the new ethernet cup with the cradle and slide it back into position.
- Secure the new ethernet cup to the cradle using the screw and a Phillips screwdriver.
Manufacturer information
Zebra Technologies
Practical help
Common problems
Risk of electrostatic discharge (ESD) damage
Always wear a grounded ESD strap and perform the rework at an ESD-safe workstation.
Before use
- Ensure you are at an ESD-safe workstation
- Wear a grounded ESD strap
- Have a Phillips screwdriver ready
- Disconnect AC power from the cradle

Manual page author
David Miller
Documentation analyst
Organizes user manual content into clear summaries, with attention to model details, product context, and everyday usability.