Home Appliances / Small Kitchen Appliances
User Manual for AIWA 12-Cup Programmable Coffee Maker
Quick guide for the AIWA 12-Cup Programmable Coffee Maker. Learn how to brew coffee, set the auto-timer, clean the unit, and use the pause-and-serve feature.
Table of contents
Manual images
Click an image to enlargeQuick Start Guide
The AIWA 12-Cup Programmable Coffee Maker is designed for standard brewing and programmable auto-start. Before the first use, it is essential to run a brew cycle with water only to clean the internal components. Ensure the unit is placed on a dry, level, heat-resistant surface.
Controls
The control panel includes the following functions:
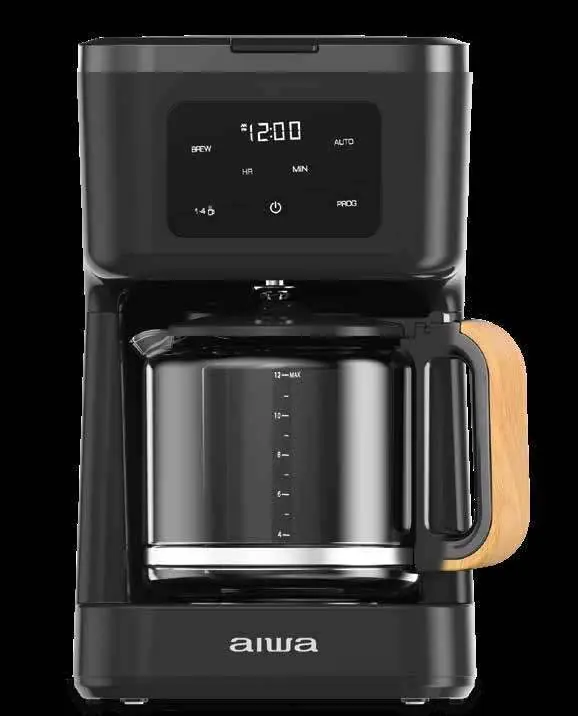
- HR (Hour) and MIN (Minute): Used to set the time for the clock or the auto-brew function.
- Power Button: Turns the coffee maker on or off.
- PROG (Program): Sets a future time for auto-brewing.
- Brew Button: Starts the brewing cycle.
- 1-4 Cups: Starts a brew cycle optimized for smaller volumes.
- AUTO Button: Activates the programmed auto-brew start time.
Brewing Coffee
- Fill the glass carafe to the desired level (up to 12 cups) with cool water and pour into the reservoir.
- Ensure the filter basket is properly seated.
- Insert a standard paper basket-style coffee filter and add coffee grounds according to your preference.
- Press the Power button to enter Stand-by mode.
- Press the Brew button to begin the cycle.
Note: If you remove the carafe during brewing, the pause-and-serve feature will temporarily stop the flow. Replace the carafe promptly to avoid spills.
Brewing 1-4 Cups
- Fill the carafe to the 4-cup mark with cool water and pour into the reservoir.
- Add coffee grounds to the filter.
- Press the Power button, then press the 1-4 Cups button.
- Press the Brew button within 3 seconds to start the cycle.
Programmable Auto Brew
- Prepare the coffee maker with water and grounds as you would for immediate brewing.
- Press the Power button to enter Stand-by mode.
- Press the PROG button and use the HR and MIN buttons to set the desired start time. Note the AM/PM indicator.
- Press the AUTO button to lock in the time. The light will illuminate.
Cleaning and Maintenance
To maintain optimal performance, clean the coffee maker regularly:
- Deep Cleaning: Fill the carafe with 1 cup of white vinegar and 3 cups of cool water. Pour into the reservoir. Press the 1-4 cups button, then the Brew button to run the cycle. Allow the unit to cool, then run a second cycle with clean, cold water only.
- Daily Cleaning: Wash the filter basket and glass carafe in warm, soapy water. Wipe the exterior with a damp cloth.
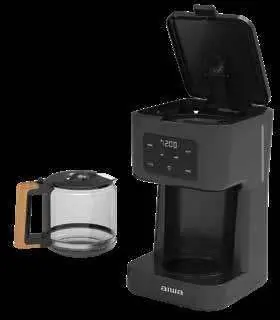
Carafe Lid Removal
To remove the lid for cleaning, open it to a vertical position and gently pull upward to release the tabs from the notches on the handle. To replace, align the tabs with the notches and press down until they engage.
Practical help
Common problems
Smoke or slight odor during first use
This is normal for the first few minutes of initial use and will disappear after a few cycles.
Coffee dripping stops when carafe is removed
This is the Pause and Serve feature. Ensure the carafe is placed back on the warming plate promptly to continue brewing.
Auto Brew not starting
Ensure the AUTO button light is illuminated. If the time was not set within 5 seconds of flashing, the unit returns to Stand-by mode.
Before use
- Unpack the unit and remove all tape and packaging materials.
- Wash the filter basket, glass carafe, and lid in warm, soapy water.
- Wipe the exterior surfaces with a soft, moist cloth.
- Run a full brew cycle with water only (no coffee) to clean the system.
- Ensure the unit is on a solid, level, heat-resistant surface.
Images and diagrams
- The control panel features a digital touch display for setting the clock and programming the auto-brew function.
- The water window allows you to monitor the water level during filling.
- The carafe lid has tabs that must be aligned with the handle notches for proper removal and replacement.
Model compatibility
- Uses standard paper basket-style coffee filters.

Manual page author
David Miller
Documentation analyst
Organizes user manual content into clear summaries, with attention to model details, product context, and everyday usability.