Electronics / Collaboration Devices
User Manual for BirdDog Eyes P400 PTZ Camera
Quick guide for the BirdDog Eyes P400 PTZ camera. Learn how to configure network settings, manage NDI streams, adjust PTZ controls, and set up A/V inputs.
Quick answers from the manual
Quick answer
- This manual provides instructions for setting up, configuring, and operating the BirdDog Eyes P400 PTZ camera, including network settings, NDI stream management, and PTZ control. p. 3, 4, 5, 6
Key actions
- Access the web configuration panel p. 5
- Update firmware p. 9
First start
- Powering the device p. 4
- Initial network connection p. 5
Problems and fixes
Device not visible on network or static IP details lost
Reset the BirdDog back to its default settings by using the Birddog Neuralyzer application.
p. 10
Cannot access web interface via friendly name
Ensure 'Bonjour' services are loaded on your computer.
p. 5Maintenance and reset
- Reset to factory defaults p. 10
Technical specifications
| Parameter | Value | Meaning | Pages |
|---|---|---|---|
| Power Consumption | Approximately 14 watts | Power usage in PoE mode | p. 4 |
| DC Input | 12vDC | Required DC power input | p. 4 |
| Default VISCA Address | 1 | Default serial interface address | p. 8 |
| Default VISCA Baudrate | 9600 | Default serial interface baudrate | p. 8 |
Where to find it in the PDF
- Getting to know P400 p. 4
- Booting up p. 5
- Operating P400 p. 5
- Password management p. 6
- A/V Setup p. 6
- NDI Encode p. 7
Table of contents
Manual images
Click an image to enlargeQuick guide from the manual
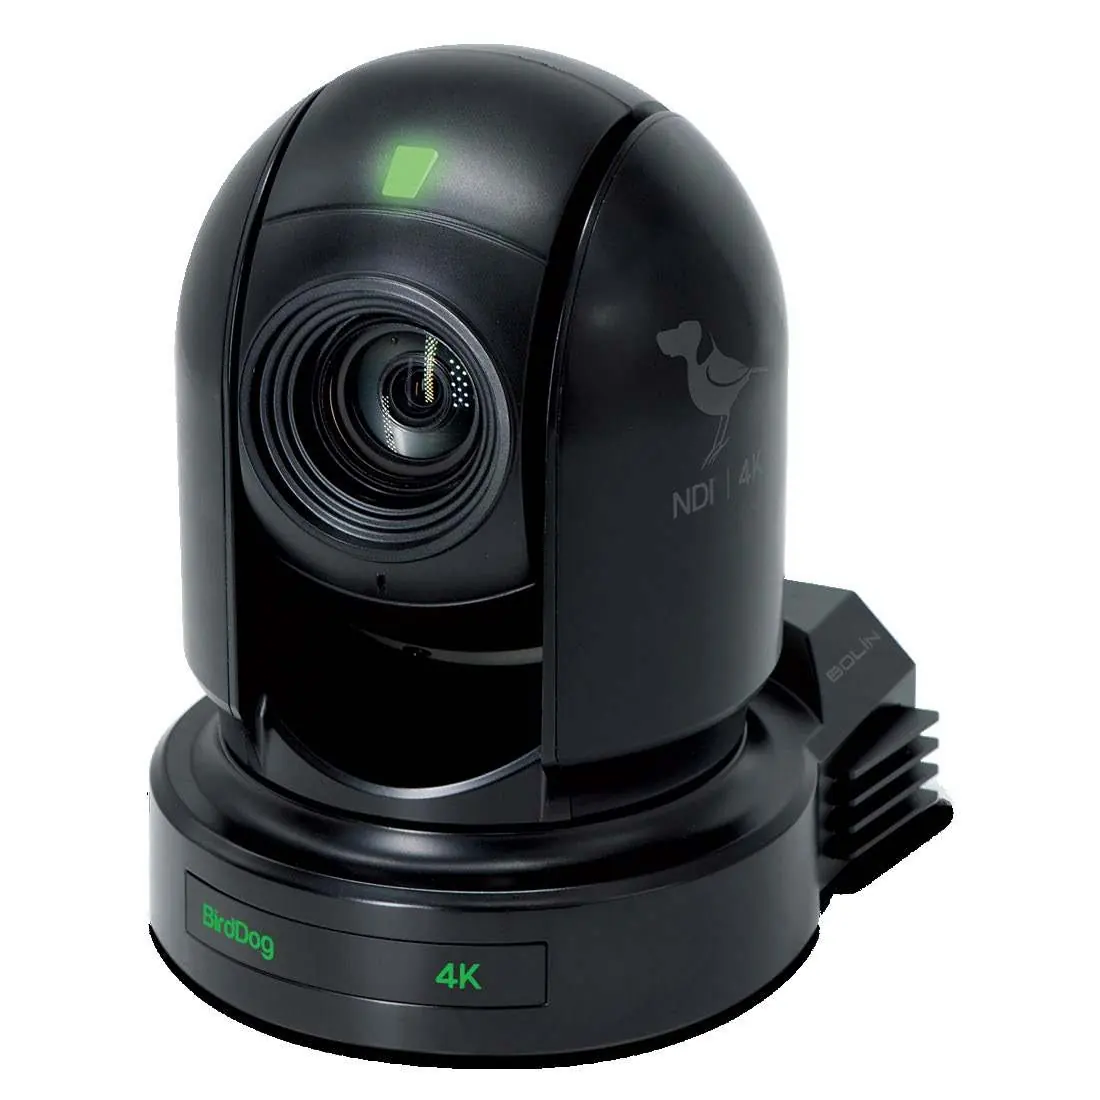
The BirdDog Eyes P400 is a professional PTZ camera designed for NDI workflows. This guide covers the essential setup, network configuration, and operational settings required to integrate the camera into your production environment.
Getting to know your P400
The rear panel of the P400 features various physical connectors for integration:
- Power: Supports PoE+ (802.11at) or 12V DC input.
- Video/Audio: Includes 6G/3G SDI, HDMI, Audio IN, and Audio OUT.
- Control/Data: RS422, RS232, and FW Upgrade ports.
Thermal Management: The unit is passively cooled. It is normal for the enclosure to feel warm. In extreme heat, using DC power is recommended over PoE to reduce heat generation.
Booting up and Web Configuration
Upon power-up, the lower GREEN LED indicates the system boot process. Once booted, the camera is visible on the network.
Accessing the Web Interface:
- Use a web browser to navigate to http://birddog-xxxxx.local/, where 'xxxxx' is the last 5 digits of the serial number.
- Windows users may need 'Bonjour' services installed.
- Default Password: 'birddog' (lowercase).
If the camera is not found via the friendly name, it will fall back to 192.168.100.100 if no DHCP server is detected.
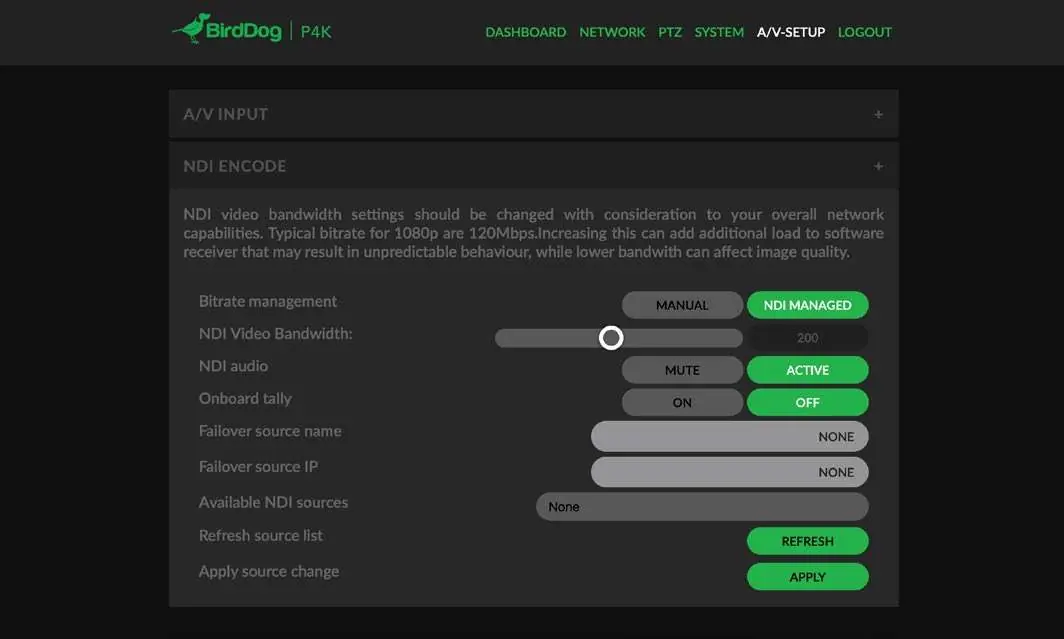
A/V Setup
The web dashboard allows for detailed A/V configuration:
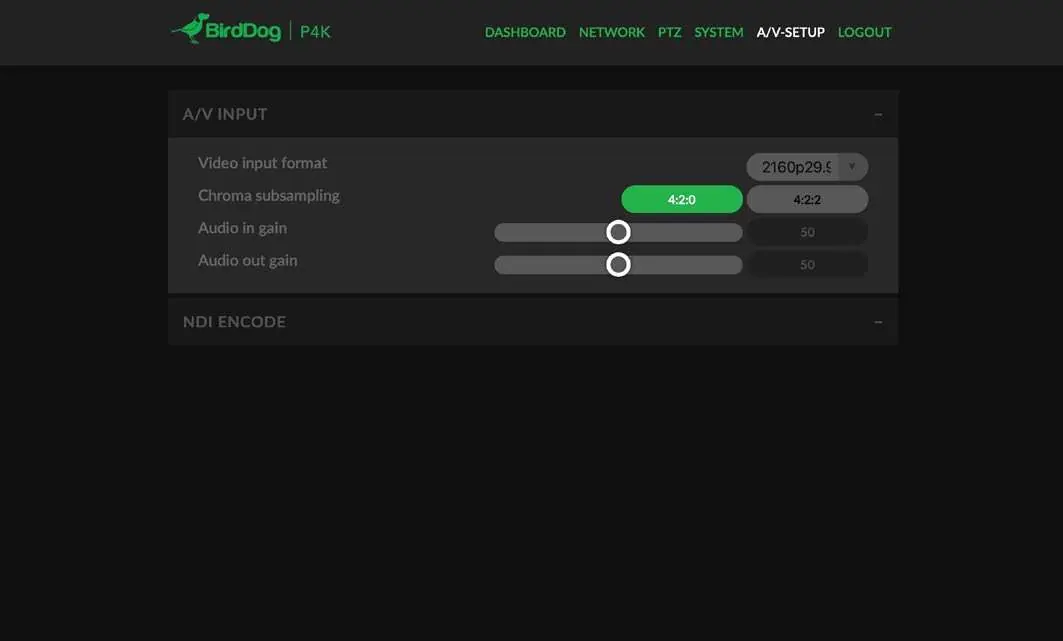
- Video Input Format: Select frame rate and resolution (UHD, HD, or 720p). Changes may take up to 60 seconds.
- Bitrate Management: 'NDI Managed' is recommended. Manual mode allows setting bitrates (HD ~100Mbps, UHD ~170Mbps).
- Onboard Tally: Communicates with receiver software (Red for Program, Green for Preview).
- Failover Source: Allows the receiver to automatically switch to a nominated NDI source if the P400 becomes unavailable.
PTZ Control
PTZ settings are managed via the web dashboard or the OSD (On Screen Display):
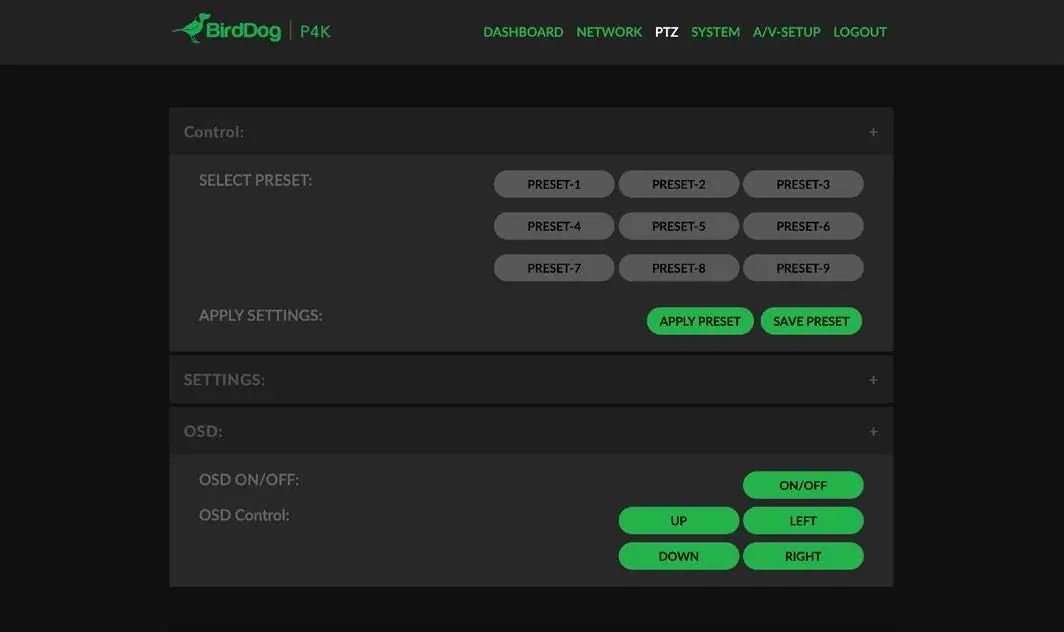
- Presets: Save and recall up to 9 presets.
- Settings: Default VISCA Address is 1, Baudrate is 9600.
- PT Max Speed: Adjusts the sensitivity and speed of PTZ movements.
- OSD: Use the OSD button to adjust camera image settings. Note that PTZ movement control is disabled while the OSD menu is open.
System and Network Settings
System Update: Firmware updates are performed via the web interface. Check bird-dog.tv/firmware-updates for the latest versions.

NDI Network Settings:
- TCP: Default, best for local networks.
- UDP: Recommended for networks with extended latency (WAN).
- Multicast: Useful for sending a single source to multiple receivers simultaneously.
- MultiTCP: Optimized for WAN environments to prevent packet loss.
Network Configuration: Devices default to DHCP. Static IP can be configured if required. If the device becomes unreachable, use the BirdDog Neuralyzer application to reset settings.
Official resources from the manual
Manufacturer information
BirdDog
Practical help
Common problems
Device not visible on the network
Ensure DHCP is active or check if the camera has fallen back to the default IP 192.168.100.100. Use the BirdDog Neuralyzer application to reset if necessary.
Cannot access web interface via friendly name
Ensure 'Bonjour' services are installed on your computer (pre-installed on Apple, requires plugin on Windows). Verify you are using the last 5 digits of the serial number.
PTZ movement not working
Ensure the OSD menu is closed. PTZ control is disabled while the OSD is active.
Video format change taking too long
Changing frame rates can take up to 60 seconds to complete.
Before use
- Verify power source (PoE+ 802.11at or 12V DC).
- Connect Ethernet cable to the network.
- Install Bonjour services if using a Windows PC.
- Locate the serial number on the unit for web access.
- Ensure the network switch supports PoE+ if using PoE power.
Specs in practice
- PoE+ (802.11at)
- Power over Ethernet; allows data and power over a single cable.
Images and diagrams
- The rear panel diagram identifies ports for RS422, RS232, DC 12V, NDI/PoE, HDMI, Audio IN/OUT, and 6G/3G SDI.
Model compatibility
- Web dashboard is optimized for Chrome or Firefox browsers.
- Requires NDI-compatible receiving software or hardware.
- Windows devices require Bonjour services for friendly name discovery.

Manual page author
David Miller
Documentation analyst
Organizes user manual content into clear summaries, with attention to model details, product context, and everyday usability.