Computers / Crypto Miners
Installation Guide for Bitmain Antminer T9 Server
Quick installation and configuration guide for the Bitmain Antminer T9 server. Learn how to connect the power supply, set up network settings, configure mining pools, and manage firmware updates.
Table of contents
Manual images
Click an image to enlargeQuick Start and Important Information
The T9 server is a high-performance mining device. Before beginning, ensure you have your own ATX power supply, as it is not included. The server is tested and configured prior to shipping. Note that the IPReporter tool is supported by Microsoft Windows only. If the server's chip temperature reaches 125-135°C, the system will stop running and display a fatal error.
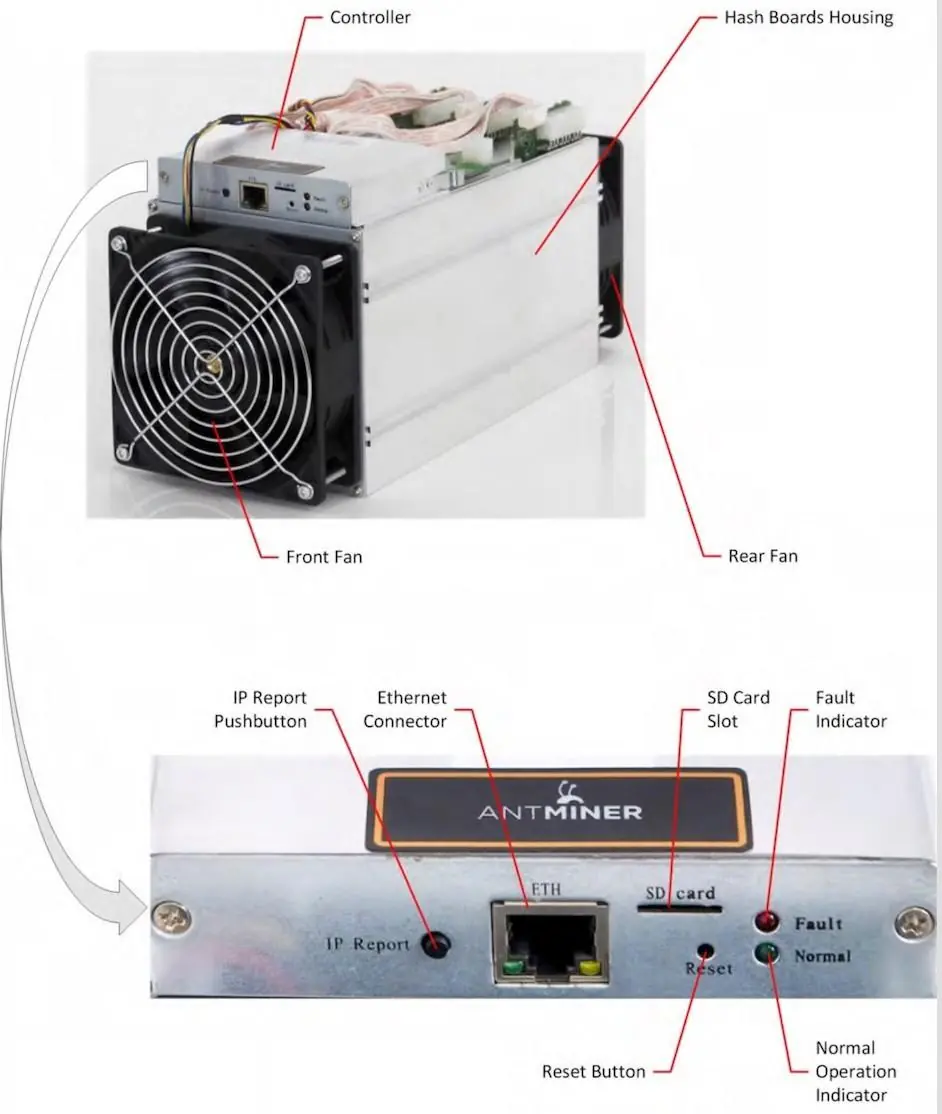
T9 Server Components
The main components include the hash boards housing, front and rear fans, and the controller front panel. The controller panel features an IP Report button, Ethernet connector, SD card slot, and status indicators (Fault and Normal).
Connecting the Power Supply
The T9 server requires specific power connections to operate safely:
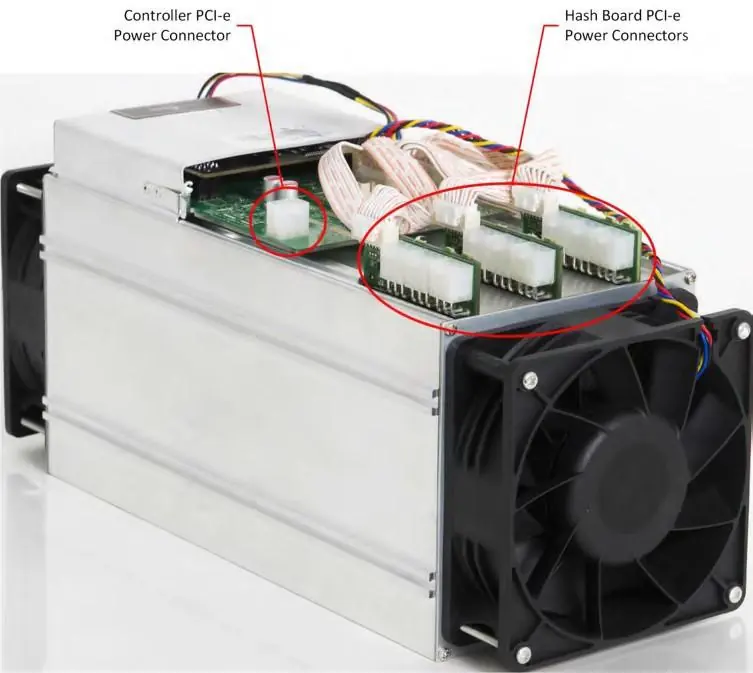
- There are ten PCI-e connectors on top of the server: nine for the hash boards and one for the controller.
- Each hash board has a set of three PCI-e connectors.
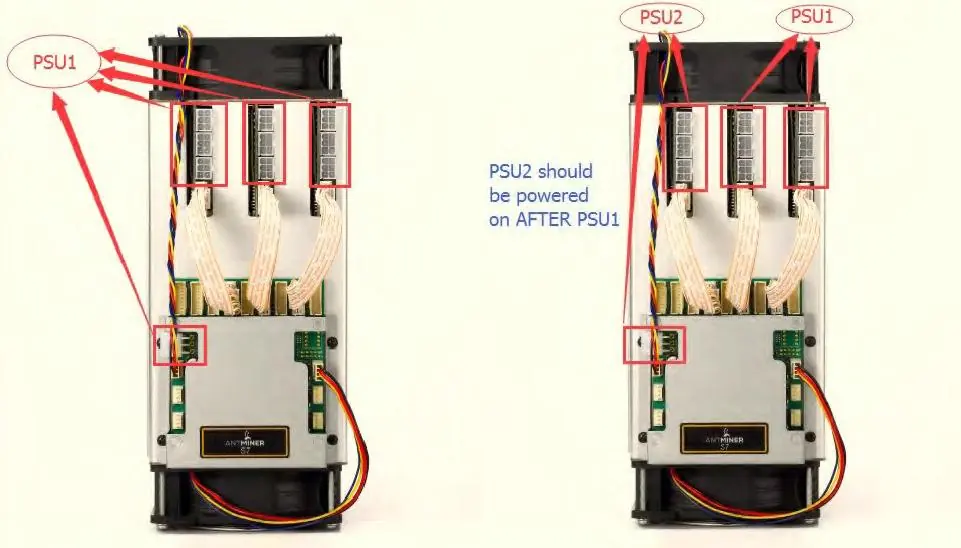
- Important: Each hash board must be powered by the same PSU to prevent damage and instability.
- If using multiple PSUs, power up the PSU connected to the controller after you have powered up the other PSUs.
- Connect the network cable to the ETH port before powering on.
Setting Up the Server
To configure the network settings:
- Download the IPReporter.zip file from the official Bitmain support website.
- Extract the file and run IPReporter.exe as Administrator.
- Select your preferred option (Default for home servers, or Shelf/Step/Position for farm servers) and click Start.
- On the controller board, press and hold the IP Report button for about 5 seconds until it beeps.
- The IP address will appear on your computer screen. Enter this address in your web browser.
- Log in using root for both the username and password.
- In the Network section, you can assign a static IP address if desired, then click Save & Apply.
Configuring the Pool
To start mining, you must configure your mining pool settings:
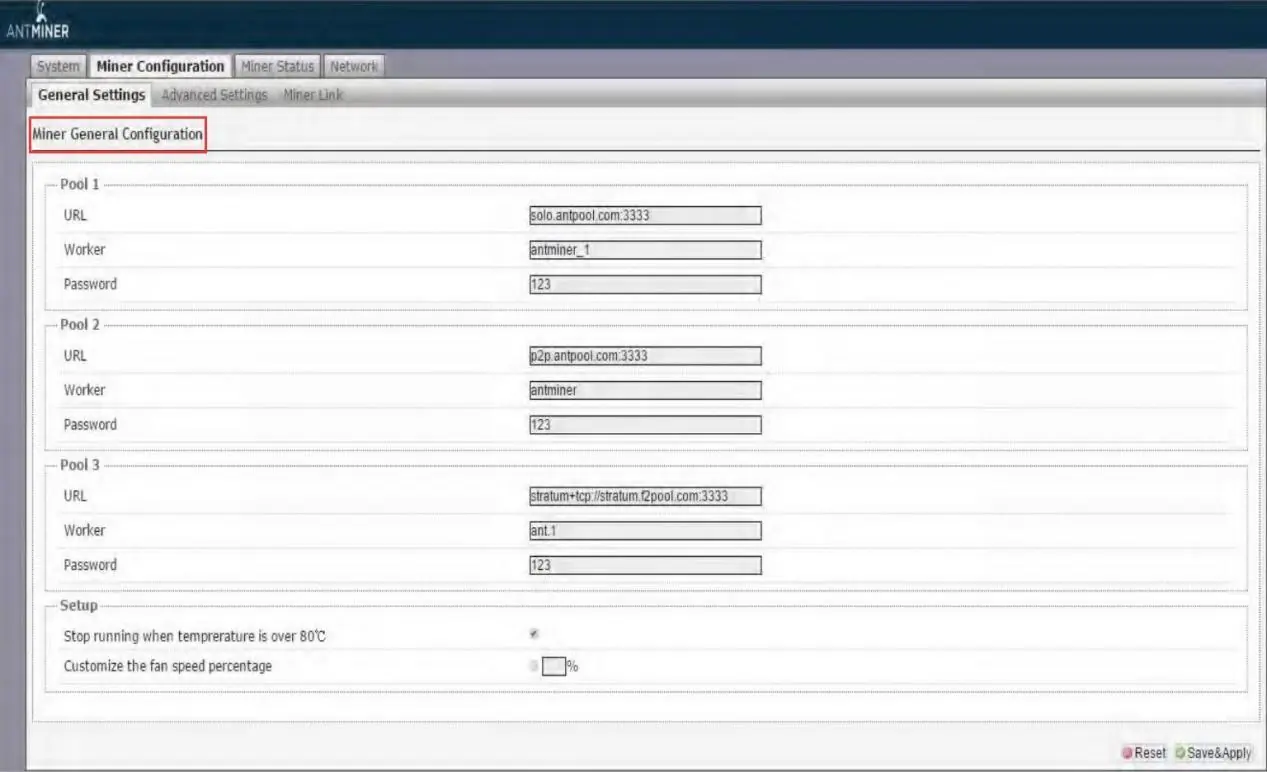
- Navigate to General Settings.
- Enter the URL, Worker ID, and Password for your desired mining pool.
- The server supports up to three mining pools with decreasing priority (Pool 1 to Pool 3). Lower priority pools are only used if higher priority ones are offline.
- Click Save & Apply to restart the server with the new settings.
Monitoring Your Server
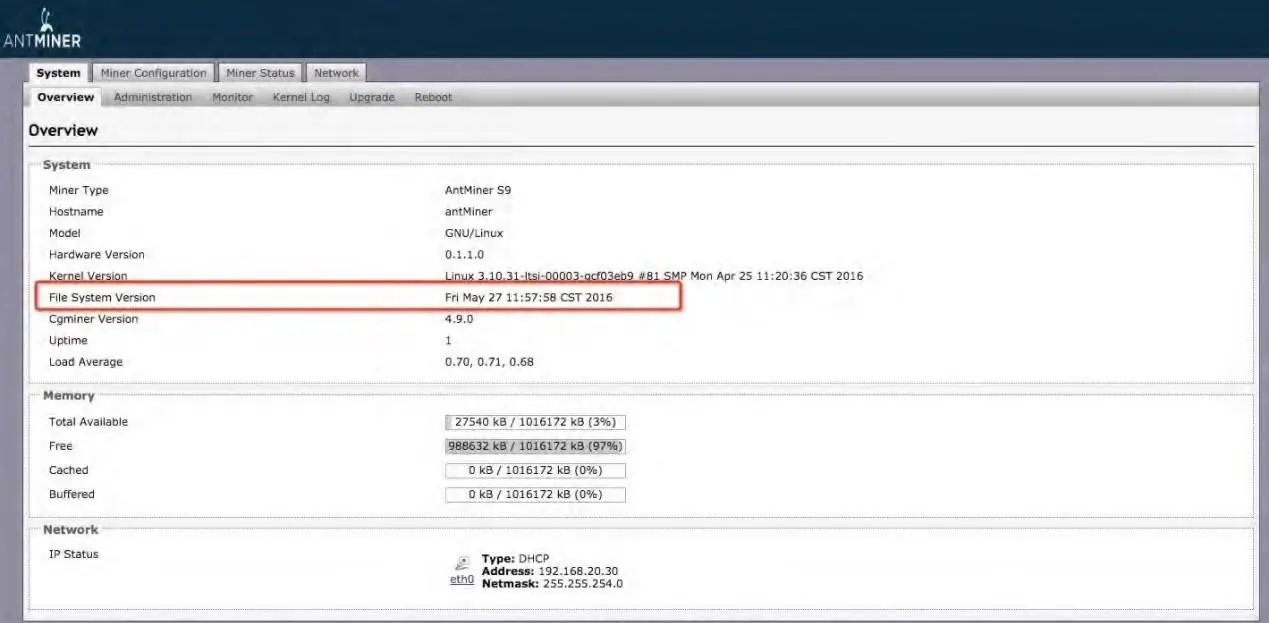
You can monitor the operating status via the web interface. Key metrics include:
- ASIC#: Number of chips detected.
- Frequency: ASIC frequency setting.
- GH/S(RT): Hash rate of each hash board.
- Temp(PCB) / Temp(Chip): Temperature readings.
- ASIC status: O indicates OK, X indicates error, and - indicates dead.
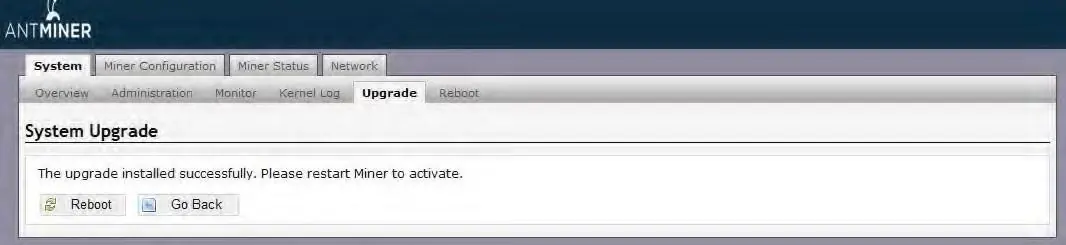
Administering Your Server
Firmware Upgrades: In the System tab, click Upgrade. Ensure the server remains powered during the process; power failure may require the unit to be returned for repair. You can choose to keep current settings or reset to defaults.
Password Management: Change your login password in the Administration tab.
Restoring Initial Settings: To reset, turn on the server, let it run for 5 minutes, then press and hold the Reset button on the controller front panel for 10 seconds.
Official resources from the manual
Practical help
Common problems
Fatal Error: Temperature is too high!
The server will stop running if chip temperature reaches 125-135°C. Ensure adequate cooling and ventilation.
Power failure during firmware upgrade
Do not power off the server during the upgrade process. Failure to complete the upgrade may require the unit to be returned to Bitmain for repair.
Incorrect PCI-e connection
Ensure all hash boards are powered by the same PSU to prevent damage and instability.
Before use
- Provide your own ATX power supply.
- Ensure all 10 PCI-e connectors are connected to the power supply.
- Download IPReporter.zip from the Bitmain support site.
- Ensure the server is connected to a network with DHCP enabled.
- Use a Windows PC to run the IPReporter tool.
Specs in practice
- Rated voltage
- 11.60~13.00V.
- Operating ambient temperature
- 0 - 40°C.
- Power consumption
- 1349W +7% (with APW3, 93% efficiency, 25°C ambient).
Images and diagrams
- PCI-e Connectors: Shows correct vs incorrect connection of power cables to hash boards.
- Controller Panel: Identifies IP Report button, Ethernet port, SD card slot, and status indicators.
Model compatibility
- IPReporter.zip is supported by Microsoft Windows only.

Manual page author
David Miller
Documentation analyst
Organizes user manual content into clear summaries, with attention to model details, product context, and everyday usability.