Lighting / Fixtures
User Manual for Element 27" 1080P Frameless PC Monitor EM2FPAB27B
Quick guide for the Element 27" 1080P Frameless PC Monitor (EM2FPAB27B). Includes setup, stand assembly, OSD menu settings, connection instructions, and troubleshooting.
Table of contents
Manual images
Click an image to enlargeQuick Guide
This manual provides instructions for the Element 27" 1080P Frameless PC Monitor (Model EM2FPAB27B). Ensure the monitor is placed on a flat surface and handled with care, as the glass can be easily scratched or broken. It is recommended to have two people handle the display if necessary.
Package Contents
- Element Monitor
- Monitor Base
- Monitor Neck
- Monitor Base Screw (M4 x 10mm)
- Monitor Neck Screws (2x M4 x 10mm)
- Monitor Hinge Screws (4x M4 x 4.5mm)
- Hinge Cover
- Rubber
- HDMI Cable
- AC Adapter
- User Manual
Installation
Stand Assembly:
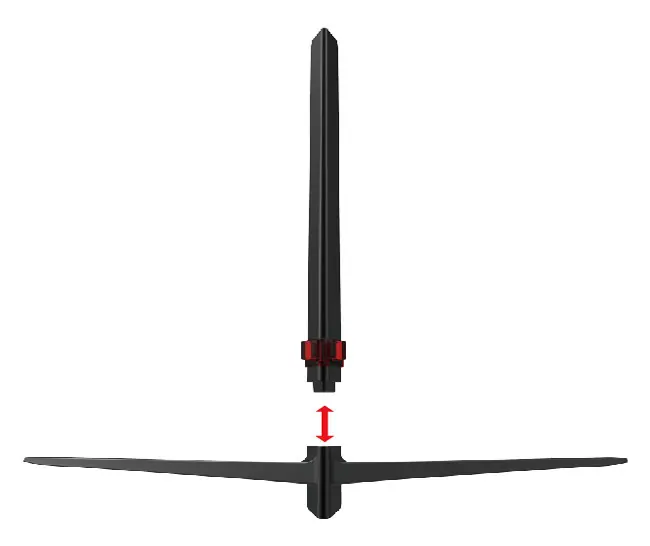

- Lay the monitor screen facing down on a table with the packing foam still on.
- Attach the neck to the base and secure it with the base screw from the bottom.
- Insert the rubber to the bottom of the base.
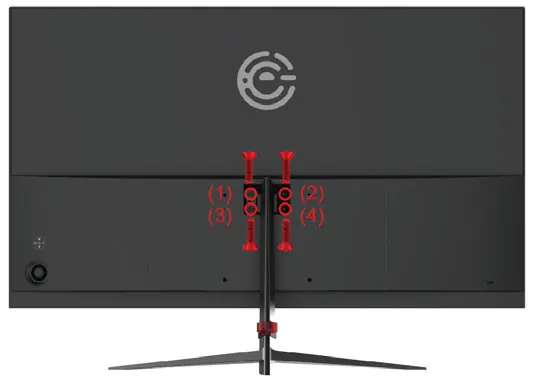
- Attach the assembled stand to the back of the monitor and secure it with the 4 M4x4.5mm neck screws.
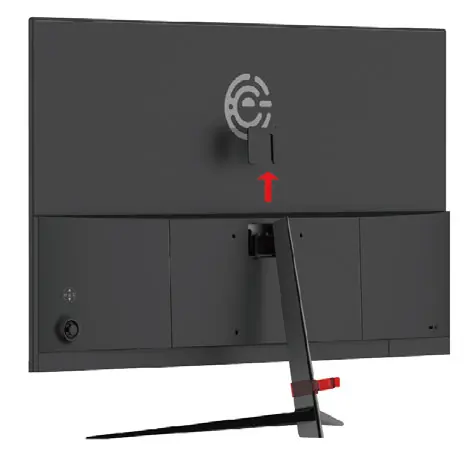
- Install the hinge cover to the back of the neck.
Wall Mounting:
To wall mount, remove the hinge cover and unscrew the four screws to remove the stand. The mounting pattern is 100mm x 100mm using M4 x 10mm screws.
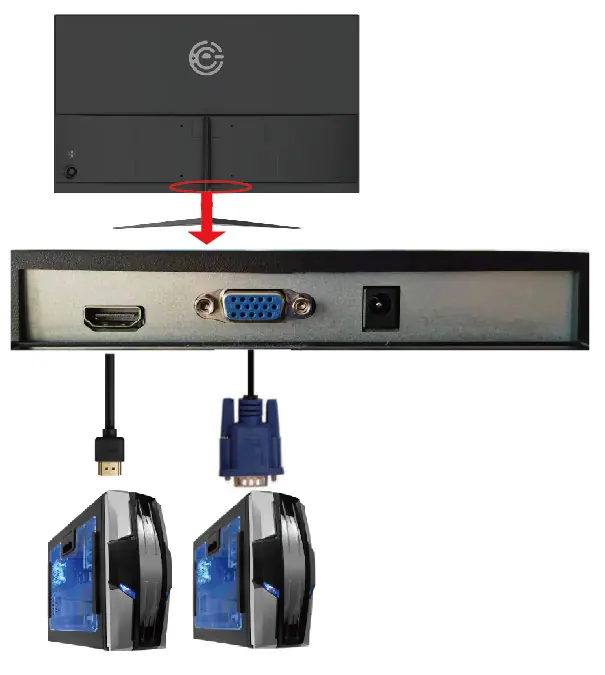
Connections
Ensure the monitor and computer are turned off before connecting cables. Connect the HDMI or VGA cable to the back of the monitor and the other end to your computer. Connect the power adapter to the DC IN port.
OSD Menu
The monitor features an On Screen Display (OSD) menu controlled by buttons on the rear panel:
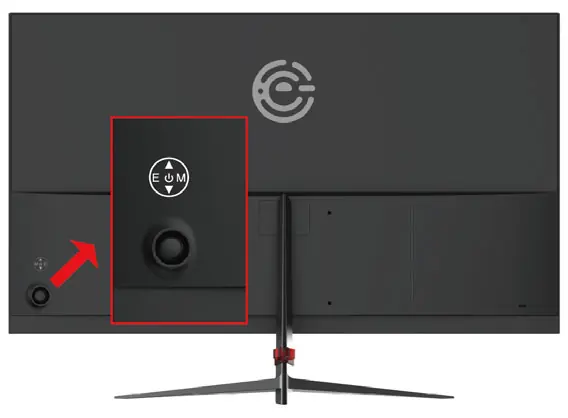
- M: Activates OSD and acts as the select button.
- Up/Down Arrows: Adjust volume (no OSD) or navigate selections (with OSD).
- E: Exit button or switches input sources.
- Power: Turns the monitor on or off.
Menu Options:
- Luminance: Adjust Brightness, Contrast, ECO Mode, DCR, and Overdrive.
- Image Setup: Adjust H. Position, V. Position, Clock, Phase, and Image Ratio (VGA mode only).
- Color Temp: Adjust color temperature (Warm/Cool/User) and Low Blue Mode.
- OSD Setting: Adjust language, OSD position, timer, and transparency.
- Reset: Reset to factory settings.
- Extra: Select input source (VGA/HDMI).
Troubleshooting
- No LED Display/No Signal: Check that the correct source is selected, verify video cables, and ensure the power plug is fully connected.
- Signal Out of Range: If using a CRT monitor, change the refresh rate to 60Hz in display settings. If not, boot into Safe Mode and uninstall video drivers, then reinstall.
- Blurry Text: Ensure the resolution is set to the native 1920 x 1080 at 60Hz.
- Colors Incorrect: Check if the HDMI/VGA cable is loose or corrupt.
Specifications
- Panel Size: 27" (diagonal)
- Resolution: 1920 x 1080
- Refresh Rate: 75Hz Max
- Wall Mount: 100mm x 100mm (M4 screws)
- Inputs: HDMI x 1, VGA x 1
Practical help
Common problems
No signal or black screen
Check that the correct input source is selected, ensure video cables are securely connected, and verify the power adapter is plugged in.
Signal Out of Range error
Set your computer's display resolution to 1920x1080 and refresh rate to 60Hz.
Text appears blurry
Ensure the monitor is set to its native resolution of 1920x1080.
Cannot open OSD menu
A valid video signal must be going through the monitor to access the OSD menu.
Before use
- Check package contents for all screws and cables
- Place monitor on a flat surface
- Use two people to handle the display if heavy
- Connect video cables before turning on the monitor
- Ensure proper ventilation space around the monitor
Specs in practice
- Refresh Rate
- Supports up to 75Hz maximum.
Images and diagrams
- The stand assembly requires attaching the neck to the base and then securing the assembly to the monitor back.
- The rear panel contains the OSD control buttons and input ports (HDMI, VGA, DC IN).
Model compatibility
- Supports 1920x1080 resolution.
- Compatible with standard 100x100mm VESA wall mounts.

Manual page author
Emily Carter
User documentation editor
Prepares concise manual descriptions and highlights the most useful setup, operation, and maintenance information for readers.