Elgato Shock Mount User Guide
Quick installation guide for the Elgato Shock Mount. Learn how to attach the mount to a boom arm and secure your Wave microphone properly.
Quick answers from the manual
Quick answer
- The Elgato Shock Mount is installed by attaching it to a boom arm using the provided adapters, removing the Wave microphone from its original stand, and securing it to the shock mount using the alignment screws. p. 2, 3, 4
Key actions
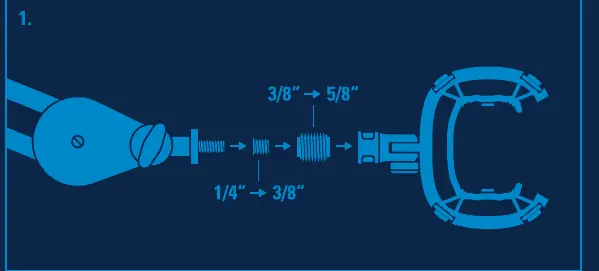
- Attach Shock Mount to boom arm using adapters if necessary. p. 2
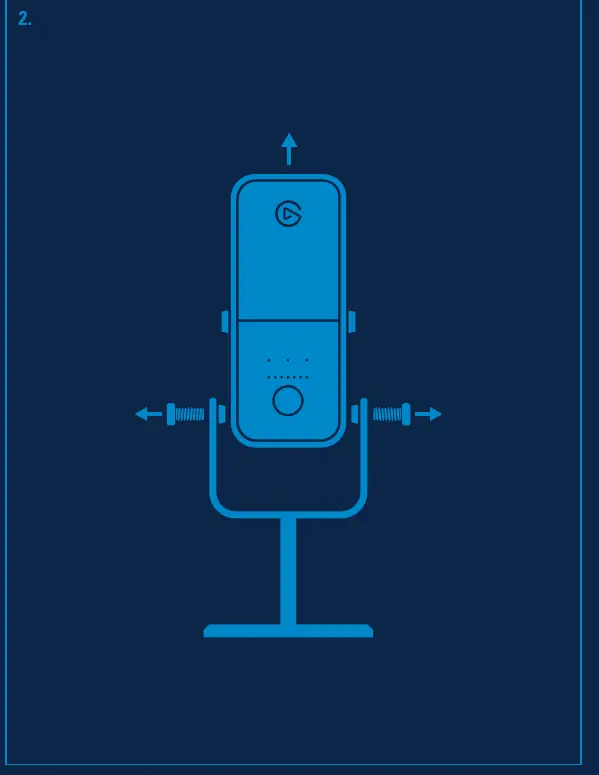
- Unscrew Wave microphone from its original stand. p. 3
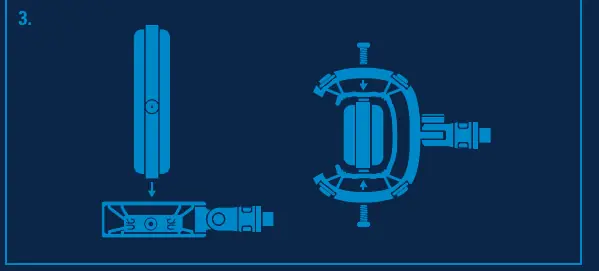
- Align microphone holes with shock mount eyelets and secure. p. 4
Where to find it in the PDF
- Installation Step 1 p. 2
- Installation Step 2 p. 3
- Installation Step 3 p. 4
Table of contents
Manual images
Click an image to enlargeQuick guide from the manual
The Elgato Shock Mount is designed to isolate your Wave microphone from vibrations. Installation involves three main steps: attaching the mount to your boom arm, removing the microphone from its original stand, and securing the microphone into the shock mount.
Installation
Step 1: Attaching to a boom arm
Secure the Wave Shock Mount to your boom arm. If required, use one or both of the included adapters (3/8" or 5/8") to ensure a proper fit with your specific boom arm thread.
Step 2: Removing the microphone
Unscrew your Wave microphone from its original stand. Ensure you have a firm grip on the microphone while unscrewing it to prevent it from falling.
Step 3: Mounting the microphone
Align the screw holes on the Wave microphone with the eyelets on the Wave Shock Mount. Re-insert and tighten the screws. Important: Do not overtighten the screws.
Manufacturer information
Elgato
Practical help
Common problems
Use the included 3/8" or 5/8" adapters to match the thread size of your boom arm.
Ensure the microphone screw holes are perfectly aligned with the shock mount eyelets before tightening. Do not overtighten.
Before use
- Verify you have the Shock Mount and the included adapters.
- Ensure your boom arm is stable and ready for mounting.
- Have your Wave microphone ready for transfer from its original stand.

Manual page author
David Miller
Documentation analyst