Electronics / Interactive Displays
User Manual for Elo 04L Touch Monitor
Quick guide for the Elo 04L touch monitor series. Learn about installation, VESA mounting, OSD settings, connectivity, and troubleshooting common issues.
Table of contents
Manual images
Click an image to enlargeQuick guide from the manual
The Elo 04L series touch monitors are designed for high-traffic environments. This manual covers the 10.1-inch (1004L), 13.3-inch (1304L), and 15.6-inch (1504L) models. The monitors feature PCAP touch technology, LED backlighting, and multiple connectivity options including HDMI, DisplayPort, and USB-C.
Installation
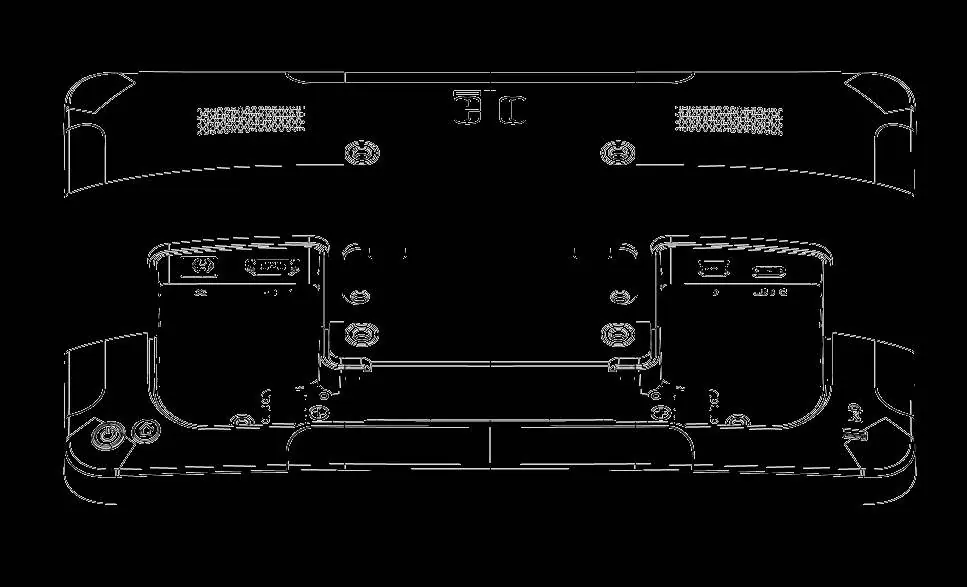
Unpack the monitor and verify the following items are included: monitor, quick installation guide, 1.8m USB-A to C cable, 1.8m HDMI cable, 12V/5A power brick, power cables (NA and EU), EEI label, and mounting hardware (tie wraps and M4 screws).
Connecting the monitor:
- Source without USB-C: Connect the power adapter, connect HDMI or DP cable to the source, and connect the USB 2.0 Type-A to Type-C cable for touch functionality.
- Source with USB-C: Connect the power adapter and use a USB-C to Type-C cable for video and touch.
- Single-Source USB-C: Use a single USB-C cable for power, video, and touch (requires compatible host).
Hardware Installation
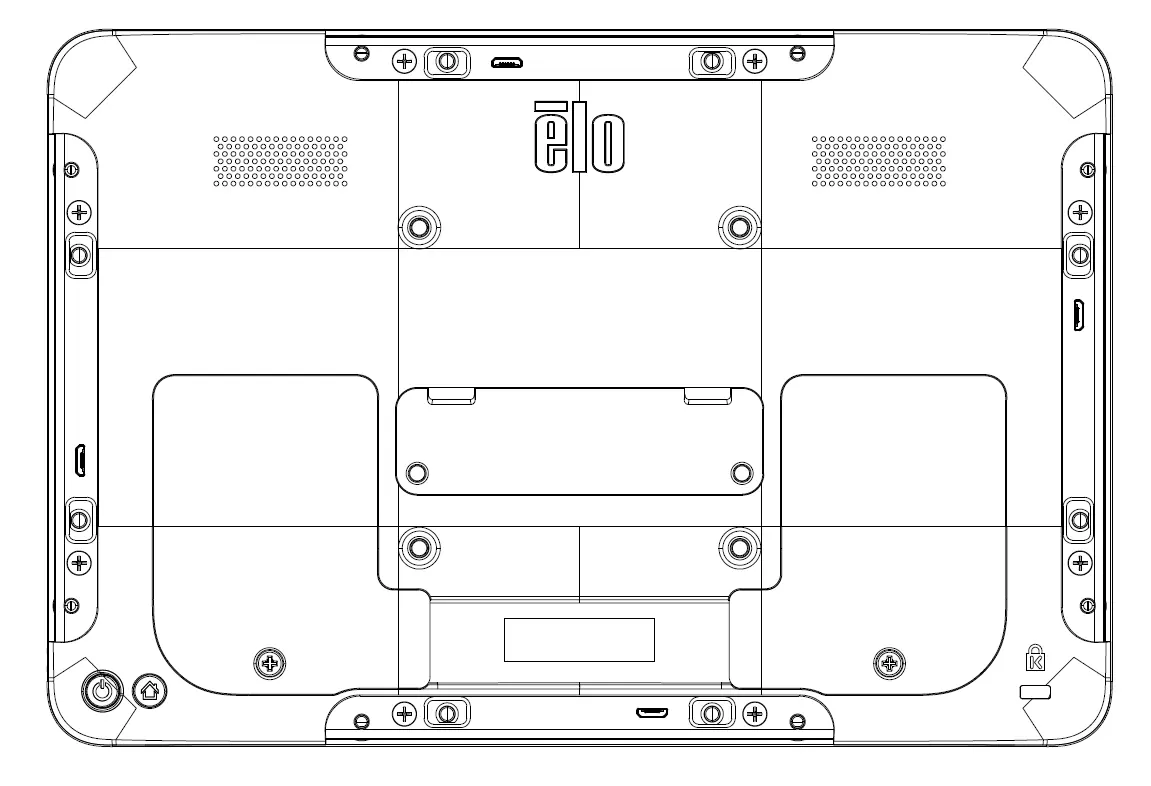
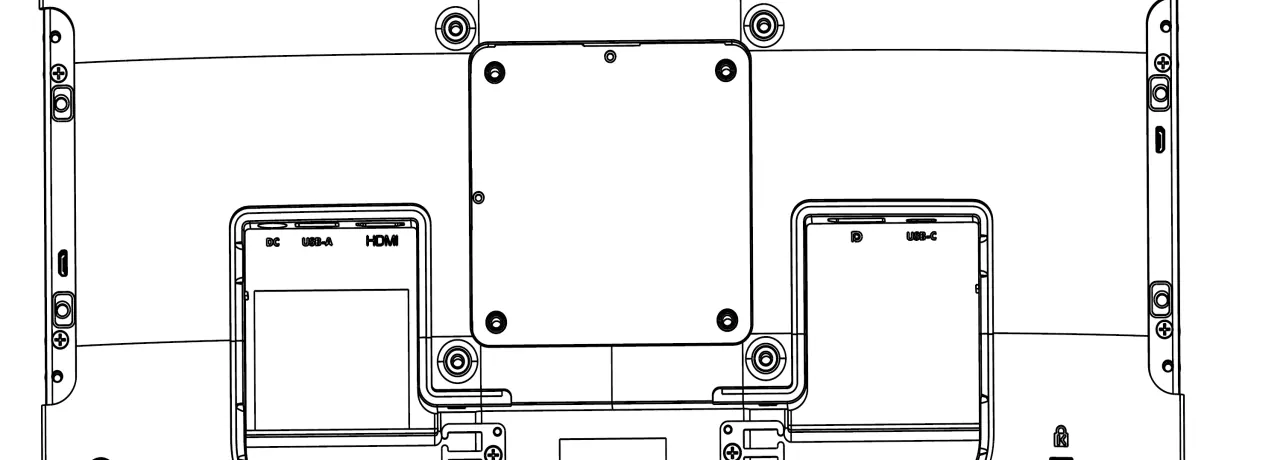
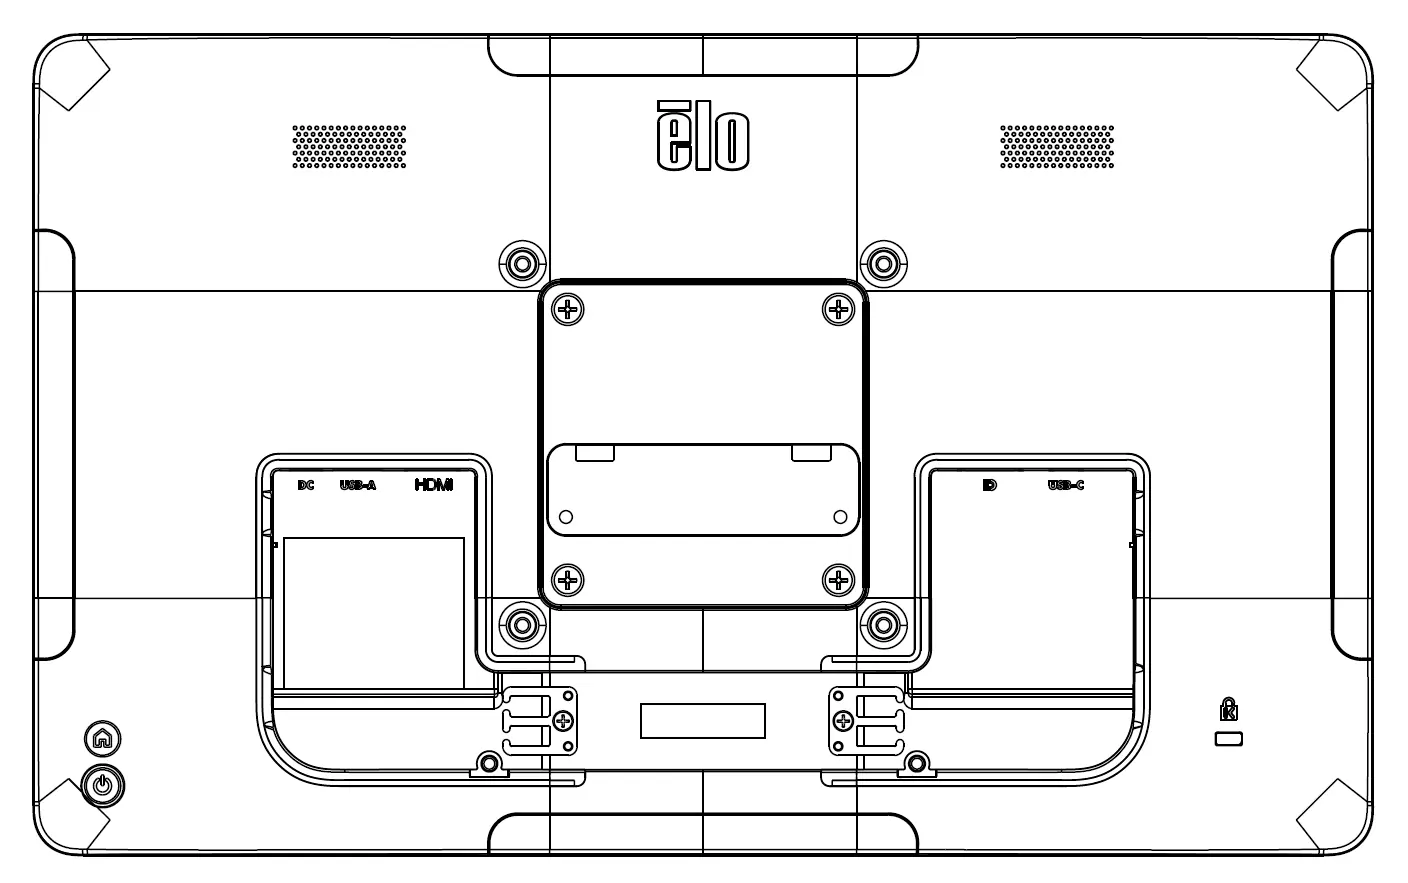
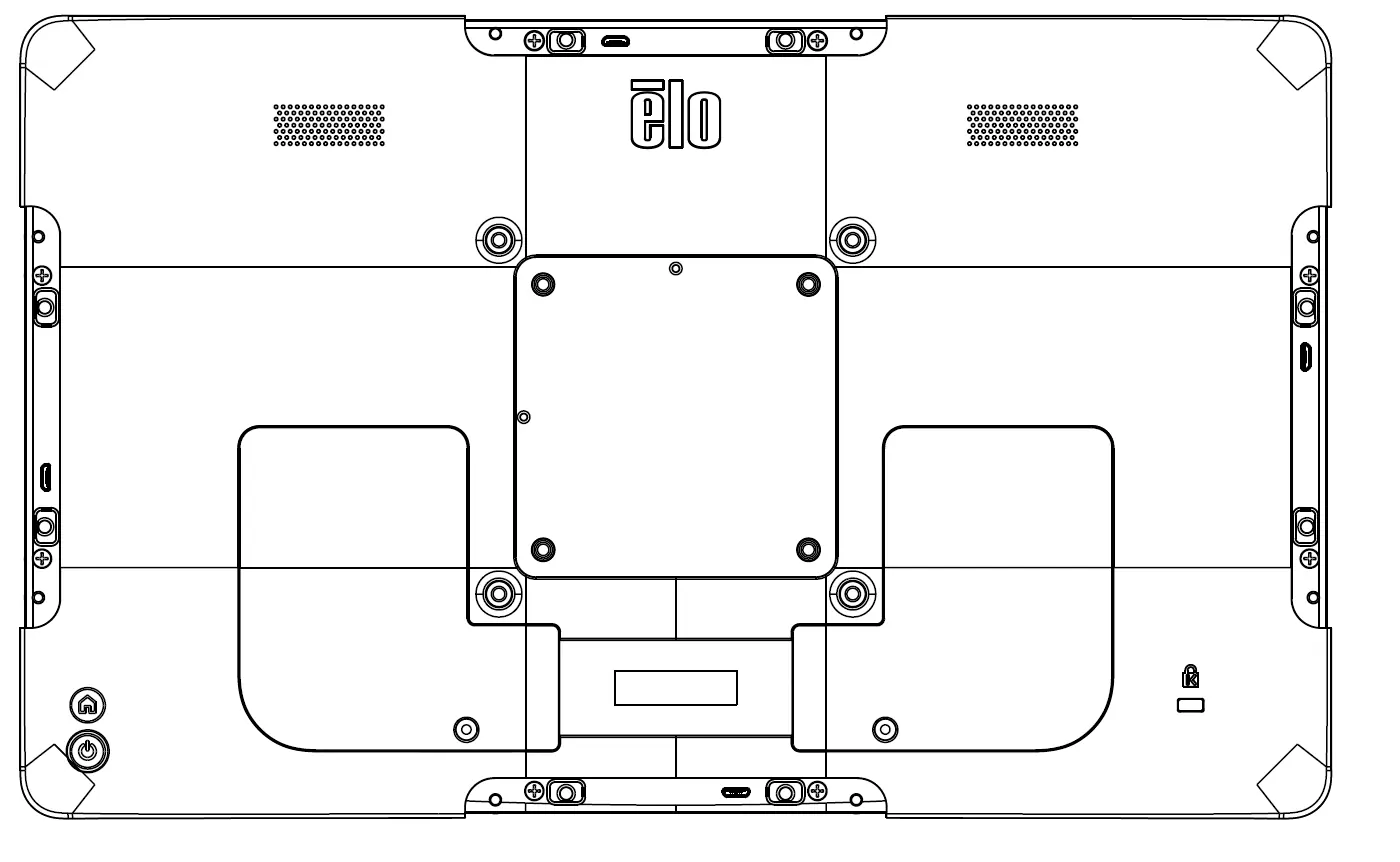
The monitor includes a 75x75mm VESA mounting interface on the rear. Use M4 screws with a maximum length of 8mm from the mounting surface for the 1004L model. For 1304L and 1504L models, ensure screw length is between 9-14mm for specific mounts.
Operation
The monitor ships in an OFF state. Press the power button to turn it on. The OSD menu is navigated via the touchscreen. To access the OSD, press the Menu button on the rear of the monitor. You can adjust brightness, contrast, aspect ratio, color settings, and sound settings through this menu.
OSD and Power Lockouts:
- OSD Lock: Press and hold the Menu button for 5 seconds.
- Power Lock: Press and hold the Menu and Power buttons simultaneously for 3 seconds.
Technical Support
If you experience issues, check all cable connections first. If the monitor is dim, adjust brightness/contrast in the OSD. If the monitor shuts down or restarts, it may be receiving insufficient power via USB-C; connect the provided AC adapter. For touch issues, ensure the latest drivers are installed (Windows 7/10 use HID drivers; Windows XP requires specific drivers).
Safety & Maintenance
- Disconnect the AC power cable before cleaning.
- Clean the cabinet with a clean cloth and mild detergent.
- Clean the touchscreen with a window or glass cleaner applied to a cloth; never apply cleaner directly to the screen.
- Do not use alcohol, thinner, benzene, or abrasive cleaners.
- The monitor is not designed for outdoor use.
Practical help
Common problems
Monitor does not respond when turning on
Check that the power adapter and/or USB-C cable is properly connected.
Monitor display is dim
Use the OSD menu to increase brightness and/or contrast.
Monitor shuts down and restarts automatically
The host cannot supply enough power via USB-C. Decrease volume/brightness or connect the AC-DC adapter.
Touch functionality does not work
Verify the PC has the latest Elo drivers installed or restart the monitor.
OSD or power buttons do not respond
Check if OSD lock or power lock functions are enabled.
Before use
- Verify all items are present in the carton
- Ensure the power source matches the 12V/5A requirement or compatible USB-C PD
- Remove cable covers to access IO ports
- Check VESA mount compatibility (75x75mm)
- Ensure the monitor is placed in an environment with proper ventilation
Specs in practice
- Power Delivery
- Supports 5V/3A, 9V/3A, 15V/1.8A, 20V/1.35A via USB-C.
Images and diagrams
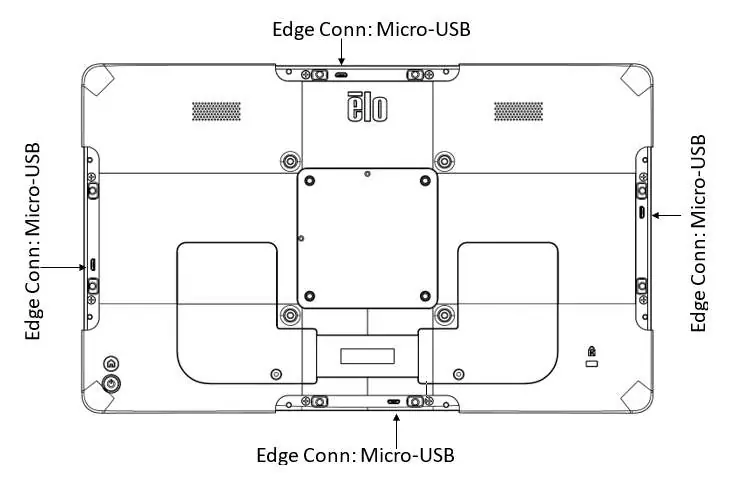
- Connector panel layout showing DC IN, HDMI, DP, and USB-C ports
- VESA mounting points on the rear of the monitor
- OSD menu icons for navigation
Model compatibility
- Compatible with Windows 7 and 10 using Windows HID drivers
- Windows XP requires specific touch drivers
- 1304L/1504L support Energy Star 8.0

Manual page author
David Miller
Documentation analyst
Organizes user manual content into clear summaries, with attention to model details, product context, and everyday usability.