Installation Guide for Fagerhult Notor 36 InTrack Opal Lighting System
A comprehensive installation guide for the Fagerhult Notor 36 InTrack Opal system, featuring configuration examples for straight, corner, T-coupler, X-coupler, and ceiling-to-wall layouts.
Table of contents
Manual images
Jump to the sectionQuick guide from the manual
This document provides visual installation configurations for the Fagerhult Notor 36 InTrack Opal lighting system. It serves as a reference for planning the layout of the track system, including straight runs, corner connections, T-junctions, X-junctions, and wall-mounted transitions.
Straight installation configurations
The system supports various lengths using combinations of large and small ceiling cups:
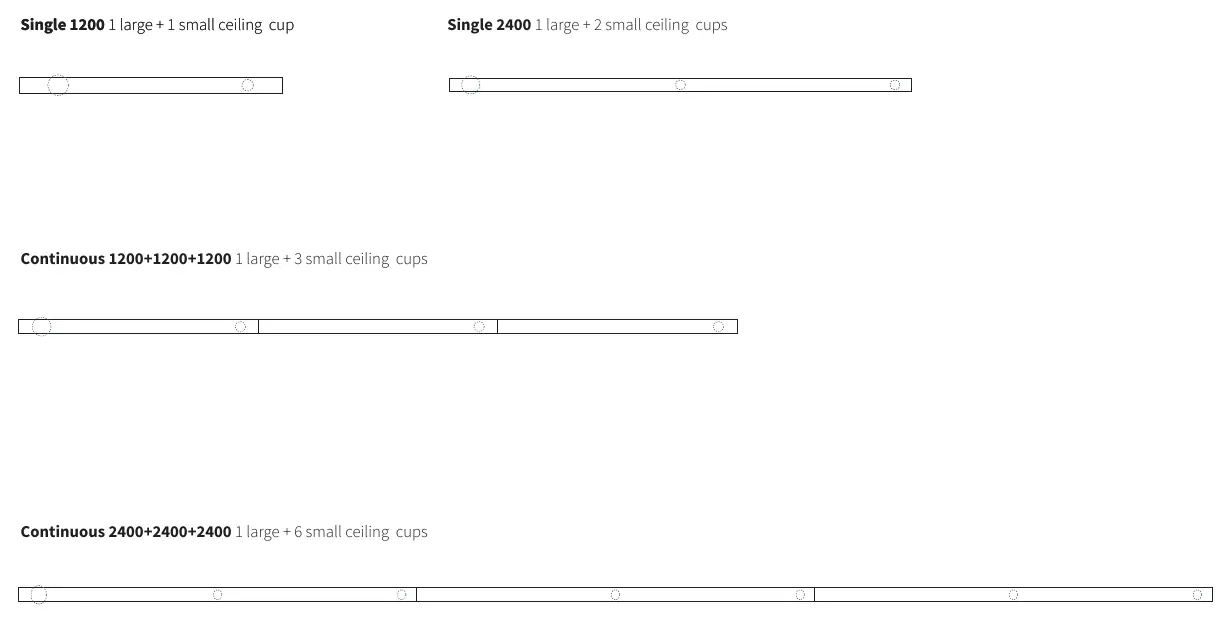
- Single 1200: 1 large + 1 small ceiling cup.
- Single 2400: 1 large + 2 small ceiling cups.
- Continuous 1200+1200+1200: 1 large + 3 small ceiling cups.
- Continuous 2400+2400+2400: 1 large + 6 small ceiling cups.
Corner and T-coupler configurations
The system allows for flexible routing using specialized couplers:
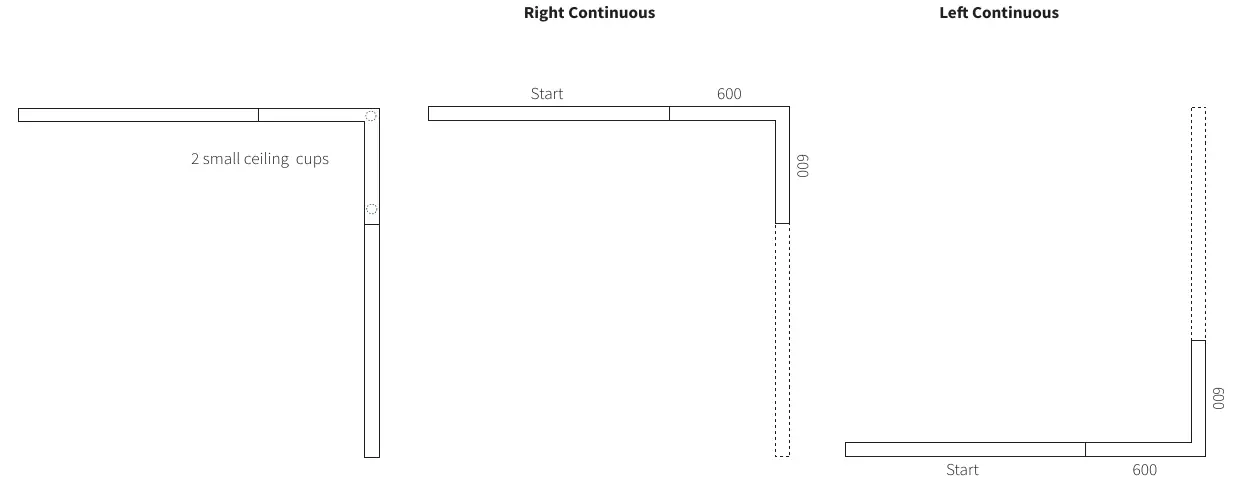
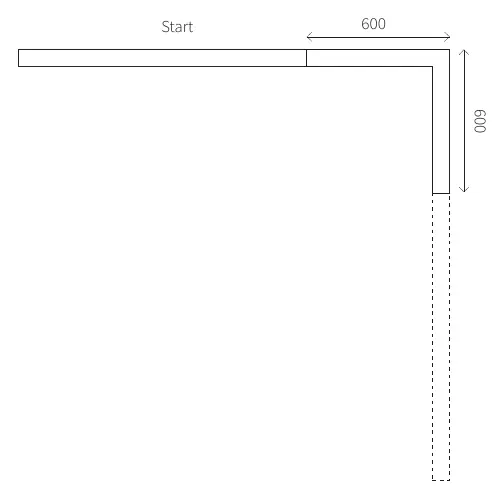
- Corner: Supports right and left continuous configurations with 600mm spacing segments.
- T-Coupler: Available in various orientations including Left-Right continuous and Straight-Left/Right continuous, typically utilizing 600mm and 1200mm spacing modules.
X-coupler and wall mounting
For complex layouts, the X-coupler allows for four-way intersections. The system also supports ceiling-to-wall transitions, where the track continues from the ceiling down a wall surface, maintaining a 600mm segment length for the transition.
Manufacturer information
Fagerhult
Practical help
Before use
- Verify the total length of the track run required.
- Identify the necessary coupler type (Straight, Corner, T, or X).
- Ensure the correct number of large and small ceiling cups are available for the chosen configuration.
- Check the spacing requirements (e.g., 600mm or 1200mm modules) for your specific layout.
Images and diagrams
- Top view diagrams show the arrangement of track segments and the placement of ceiling cups.
- Side view diagrams illustrate the transition from ceiling to wall mounting.
- Dashed lines in diagrams indicate continuation or secondary segments of the track system.

Manual page author
Michael Turner
Technical manual editor
Reviews PDF manuals for structure, safety notes, and practical product details so readers can find the right information quickly.