Home Appliances / Cleaning Robots
User Manual for Finlux J2Fenster Window Cleaning Robot
Quick guide and user manual for the Finlux J2Fenster window cleaning robot. Learn how to set up, operate, maintain, and troubleshoot your device.
Table of contents
Manual images
Click an image to enlargeQuick Guide
The Finlux J2Fenster is an automated window cleaning robot. Before use, ensure the safety rope is securely tied to a stable indoor object. The device requires a power connection and should be fully charged (backup battery) before operation. Do not use on frameless windows or in rainy/wet weather.
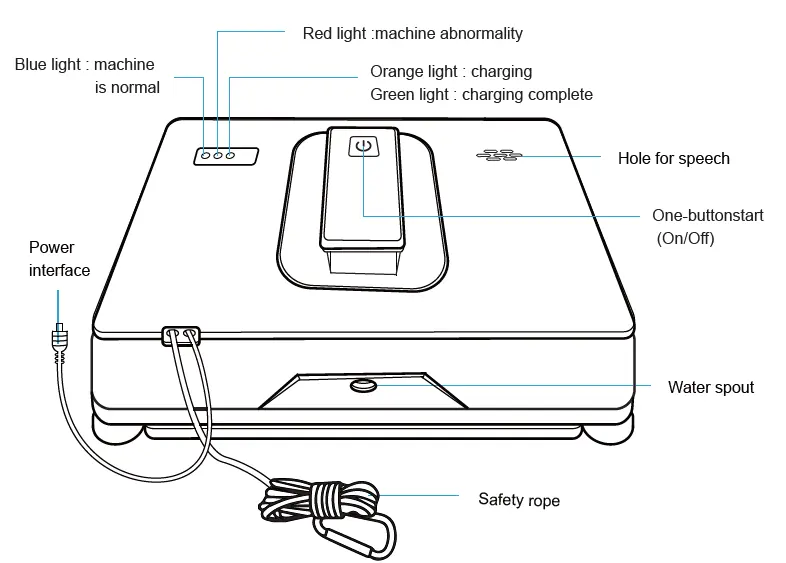
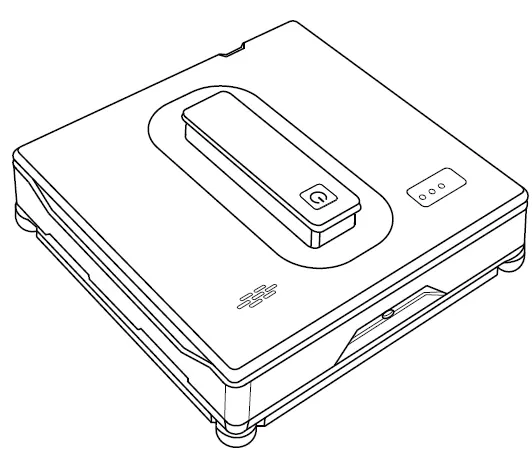
Product Overview
The robot features a one-button start, water spray nozzles, and status indicators. It includes a remote control and supports smartphone app connectivity via Tuya Smart. The device is equipped with anti-drop sensors and a backup battery system for power failure protection.
Installation and Setup
Cleaning Cloth Installation: Attach the cleaning cloth to the bottom of the robot, ensuring it does not cover the anti-drop sensors located at the four corners.

Water Injection: Open the silicone cover on the water tank and fill it with clean water (do not add cleaning agents). Fill to approximately 80% capacity to maintain stable air pressure.
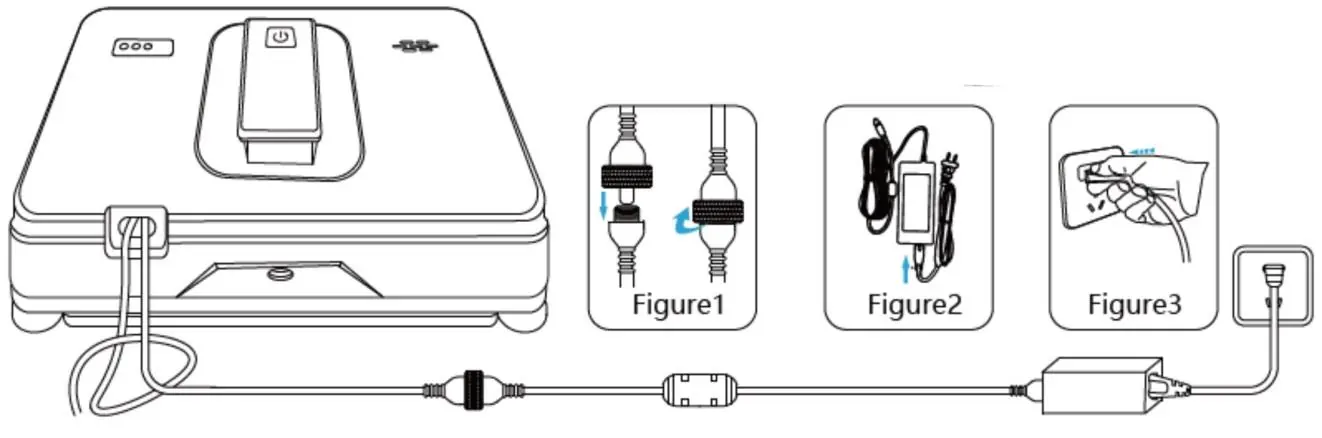
Power Connection: Connect the DC power cable to the robot and tighten the nut. Connect the adapter to the power supply.
Safety Rope: Always attach the safety rope to a secure, stable indoor object before placing the robot on the glass.
Operation
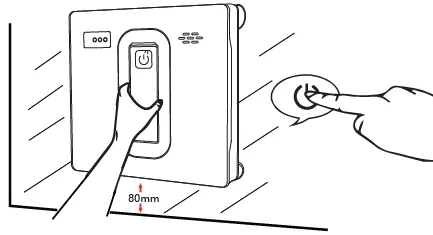
Starting the Robot: Press and hold the power button for 2 seconds to turn on the machine. Place it on the glass surface and press the power button again to start the cleaning program. Ensure the robot is at least 80mm away from window frames or corners.

Cleaning Modes: Use the remote control or app to select between Deep mode, Z mode, or N mode. The robot features automatic and manual water spray options.
App Connectivity: Download the Tuya Smart app, enable Bluetooth on your smartphone, and follow the on-screen instructions to add the device in pairing mode.
Maintenance
Cleaning Cloth: Remove the cloth, wash in cold water with a small amount of detergent, and dry.
Sensors and Fan: Regularly wipe dust and dirt from the frameless anti-drop sensors and the fan using a clean, dry cloth.
Tracks: Wipe the drive tracks with a clean, dry cloth. You can use the remote control to rotate the tracks for easier cleaning.
Troubleshooting
If the machine slips, replace the wiping cloth or dry the tracks. If the robot stops or flashes red, check for insufficient vacuum or incorrect cloth installation. For connectivity issues, restore factory settings by pressing the power button 3 times.
Practical help
Common problems
Machine slippage
Replace the wiping cloth, dry the water on the track with a dry cloth, or clean the track wheel.
Not running smoothly
Use the remote control to manually wipe the glass once, then clean the track wheel.
Squeaking noise
Spray water on the glass surface, clean the anti-drop sensor, or clean the crawler wheel.
Tuya App cannot search for the robot
Restore factory settings by pressing the power button on the machine 3 times.
Before use
- Check that the safety rope is not broken and is securely tied to a stable indoor object.
- Ensure the cleaning cloth is clean and properly attached without covering the anti-drop sensors.
- Fill the water tank with clean water (max 80% capacity).
- Fully charge the built-in backup battery (green light on).
- Ensure the machine is placed at least 80mm away from window frames or corners.
Specs in practice
- Suction force
- 2500Pa, ensures the robot adheres securely to vertical glass surfaces.
- Power outage protection
- 30 minutes of backup battery time to prevent falling during power failure.
Images and diagrams
- Safety rope: Must be tied to a stable indoor object to prevent falling.
- Power connection: Ensure the DC connector nut is tightened securely.
- Cloth installation: Do not cover the four corner sensors.
Model compatibility
- Do not use on frameless windows or glass.
- Do not use in rainy or wet weather.
- Do not use on damaged glass or uneven surfaces.

Manual page author
David Miller
Documentation analyst
Organizes user manual content into clear summaries, with attention to model details, product context, and everyday usability.